Even if you're a big-city resident or live in the desert, setting up a Christmas village display brings a quaint winter wonderland aesthetic to your living room. It's also a fun way to add some creativity to your Christmas decorations. You might use the same village buildings and figures in your setup each year, but you can arrange them in a unique way every year.
But where to begin? And how can you make your miniature holiday village as magical as possible this holiday season?
Video of the Day
Video of the Day
Most importantly, remember that there's no "wrong" way to set up a Christmas village. As long as you love the way it looks, it's perfect. With that in mind, here are some tips to make your setup as easy and fun as possible.
Start with a roadmap
Plan out a layout for this year's village before doing anything else. If your set is sturdy and unbreakable, you can experiment with laying out the actual pieces on the tabletop or mantel where you plan to display the village.
If you have more delicate, heirloom village pieces, like from a Dickens village set, they should be handled as little as possible. Cut out pieces of paper to approximate the size of the base of each building and use them to plot out where everything's going to go in your completed village. You could also draw the entire thing to scale on a piece of paper.
Create hills and height
Slightly elevating parts of your Christmas village set makes sense for a few reasons. It mimics the appearance of a real village with sloping hills and buildings of different heights, and if your village is set up on a mantelpiece or bookshelf at eye level, raising up pieces in the back of the display allows every part of the village scene to be visible.
Use pieces of Styrofoam or wood to build platforms for your village set. Just make sure any small platform you create for a building is large enough to hold the entire thing. Balancing a building on a small pedestal makes it more prone to being knocked over and breaking.
Lay a piece of cotton batting across the entire display area as the base for the village. Create the appearance of sloping snow-covered hills by layering more pieces of cotton batting together around the back and edges of your village scene.
Tip
What if you don't already own a Christmas village set or you have a few buildings but want to expand your village collection? Here's a fun DIY project: Make your own Christmas village buildings using Styrofoam and paint!
Add a cobblestone street
If your holiday village set doesn't include any kind of street pieces, make your own cobblestone street using a sheet of thin Styrofoam. Use a sharp knife to carefully carve out long, winding sections to act as roads. Scrape lines into the foam, mimicking the design of old stones.
Brush the piece with brown or gray paint or leave it white and pretend the road is just covered by snow. You can also find tutorials for this kind of project online.
Create eye-catching scenes
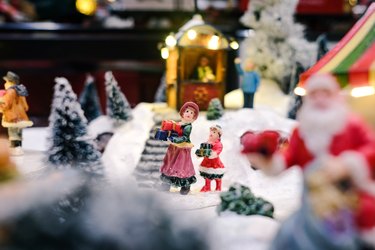
Once you've laid down a cotton batting base and plotted a layout, you can add your street pieces and carefully put all the village buildings in place. Next is the really fun part: adding some whimsical characters to your village. You're going to need at least a few small figurines plus village accessories, like small trees, snowmen, benches, sleds, gazebos or even small train sets. (These kinds of figurines are readily available from craft stores and other retailers around Christmas.)
Think about ways to arrange the figurines in festive Christmas scenes. You might cluster them around the biggest tree in your village, as if they're all attending a Christmas tree lighting ceremony, or pose a few of the figurines facing each other in the snow and put tiny snowballs in their hands as if they're having a snowball fight.
Tip
Sadly, it'll be time to pack up your holiday decorations before you know it. Make sure to hold on to all boxes and other packaging so you can store your Christmas village properly when the time comes. Hold on to any sketches you make to plan out the design and take lots of photos of the village setup too. If you love how it turns out, you can easily replicate it next year.
Add festive finishing touches
Once you're happy with how the buildings and figurines are set up, finish your holiday village with a few final flourishes. Tuck a few pine-scented sticks or cinnamon sticks under the cotton batting snow to give your village a Christmasy scent. Wrap tiny strings of battery-operated Christmas lights around the village trees and around the eaves of village houses. Finally, dust the entire village with fake snow—the sparklier, the better.
And that's it! Turn on some Christmas music, pour some cocoa and start plotting out the most magical holiday village your living room has ever seen!