There are many tool options for marking your fabric, and everyone seems to have their favorite. Test them out on a small scrap of fabric first to see which one you prefer and to make sure that the mark can be removed later. Let's take a look at some of the options and which pattern marks you will need to transfer.
Video of the Day
Marking Tool Options
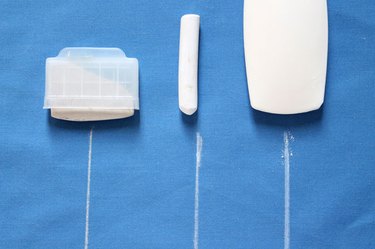
1. Chalk in a chalk holder -- This is just a regular piece of chalk put into a pen-type holder so you don't get the chalk on your fingers while you're working. You can choose which color chalk will show up on your fabric best. Chalk works best when marking small areas on the fabric such as dots, gathers, button placement or center points.
Video of the Day
2. Washable marking pen -- There are many colors available and they are fairly inexpensive, which makes them a good option for marking your fabrics. Washable markers are actually a good option for all pattern markings.
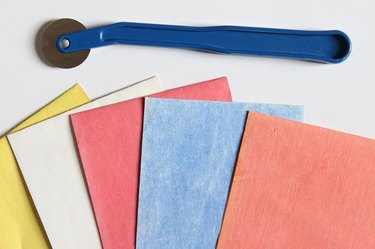
3. Tracing wheel and dressmaker's carbon -- Tracing wheels are available in smooth or spiked versions and are great for transferring paper patterns onto fabric. The dressmaker's carbon paper is available in many colors so you can choose the color that will show up on your fabric best. Tracing wheels are great when marking pattern outlines and darts.
4. Tailor's chalk -- Tailor's chalk is more compressed than regular chalk so it doesn't crumble as easily and makes a sharper line on the fabric. It also rubs out easily when you're finished.
5. Chalk -- You can also use regular chalkboard chalk to mark your fabric. The advantage of chalk is that it's quite inexpensive and comes in many colors. The disadvantage of chalk is that it needs to be sharpened often and it crumbles easily.
6. Soap -- One marking tool that you're most likely to have in your house already is soap. You can save small slivers of soap or hotel soap, and it's the perfect size to mark your fabrics.

How to Mark Fabric With a Tracing Wheel
Should you opt to use a tracing wheel and dressmaker's carbon over chalk or marking pens, you may need a little guidance to get started.
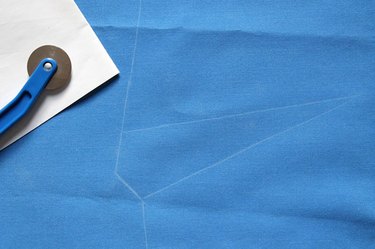
To use a tracing wheel, place the carbon paper between the fabric and the pattern, directly under the marks you want to transfer onto the fabric. Then press and roll the tracing wheel directly over the pattern lines. Move the carbon paper until you've traced over all the lines you wish to trace.
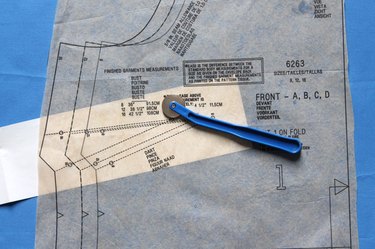
Before you remove the entire pattern, check to make sure the lines have transferred completely and visibly onto the fabric.
Pattern Markings to Transfer Onto Fabric
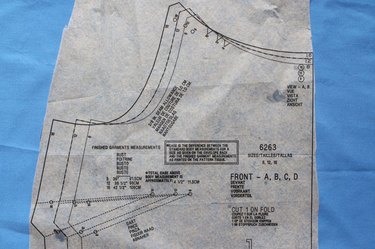
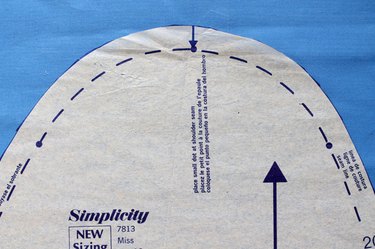
When you open your pattern, you will notice many marks on the pattern pieces. Only some of these marks will need to be transferred onto the fabric.
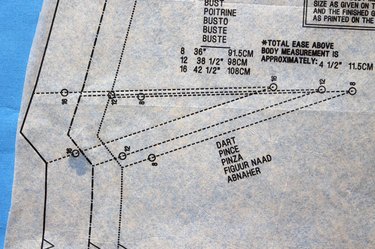
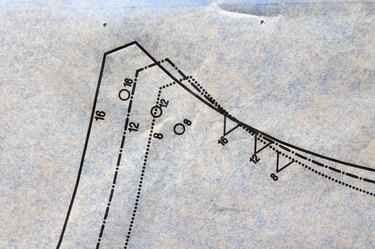
Size Cutting Lines -- Patterns come with the option to create a garment in various sizes -- for example, size 8, size 12, etc. If you want to use the pattern again and keep the different size markings on your pattern, then using a tracing wheel to mark the pattern lines is a good option.
Darts -- Darts are the triangular shaped lines on the fabric and are there to help give your garment shape. Use a tracing wheel with dressmaker's carbon paper or a washable marker to transfer the darts onto your fabric.
Dots and Notches -- These marks are used for matching the different pattern pieces when you sew them together and can be marked with chalk, washable markers or soap.
Gathering Points and Centers -- Gathering points show you where to start and stop your gather stitching. Center points are there to help accurately match the pattern pieces when you sew them together. These points can be marked with chalk, washable markers, or soap.
Buttonhole Placement -- Use chalk, washable markers or soap to mark the buttonhole placement. However, it's a good idea to mark these again after sewing the garment to make sure they are placed correctly.
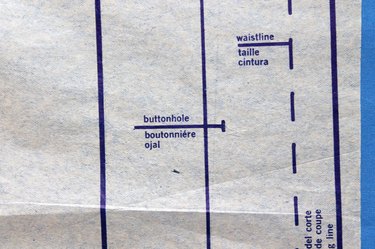
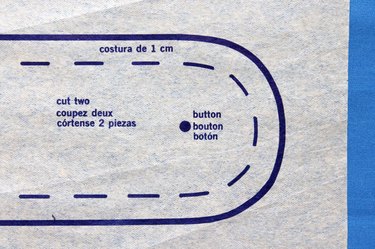
Button Placement -- Use chalk, washable marker or soap to mark the button placement. Just as the buttonhole markings, these should be double-checked right before sewing to make sure they are placed correctly.
Once you have the marks transferred onto the fabric, you'll be ready to open up the directions and start following the step-by-step instructions. Pattern directions can be somewhat intimidating at first, so next we'll look at the different parts of the instructions, where to start, how to read them and learn the sewing vocabulary you'll need to complete your project.
Don't miss the rest of the series!
- Read Part 1: Essential Sewing Tools
- Read Part 2: Basic Sewing Machine Stitches
- Read Part 3: Choosing Patterns & Fabrics