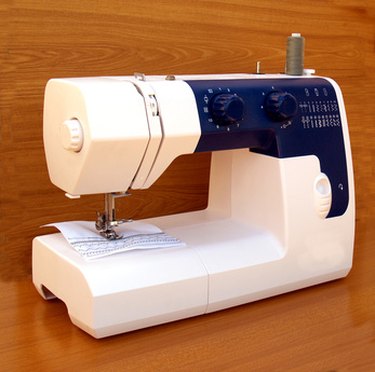
The White brand sewing machine model 1866 threads from right to left in a pattern that utilizes the key points of the machine. When threaded correctly, the White sewing machine can perform 13 different stitches. Threading the sewing machine may seem challenging in the beginning but, with practice, you will be able to thread the machine in seconds.
Step 1
Place the spool of thread over the spool pin located at the top right corner of the White sewing machine. Spools of thread need to align through the center hole with the spool pin entering the bottom of the spool and coming out the top.
Video of the Day
Step 2
Place the spool cap on top of the spool of thread. Spool caps are round discs that hold the spool of thread in place during sewing and prevent dropped stitches.
Step 3
Take the loose end of thread in your hand and carry it toward the left hand side of your machine. Pass the thread under the thread take-up and down toward the thread guide. Pass the thread to the left of the tension plate and back toward the top of the thread take-up.
Step 4
Roll the handwheel toward you until the needle is in the highest position. Pass the thread through the hook inside the thread take up. Guide the thread back toward the needle and thread the needle from front to back.
Step 5
Pull the needle thread toward the back of the machine to establish a 5-inch tail. Hold on to the thread and turn the handwheel toward you, lowering the needle. The needle will pass through the throat plate and grab the bobbin thread below. Keep turning the handlewheel until the needle has come to its highest position while carrying the second bobbin thread.
Step 6
Pull the bobbin thread toward the back of the machine creating a 5-inch tail. Adjust the stitch width regulator and the stitch length regulator. These dials control the type of stitch as well as the length they sit apart from one another.
Tip
Change the bobbin color to match the thread being used. Lift the presser foot so the thread slides through the threading points easily. Adjust the tensioner according to thread weight.
Warning
Never press the foot pedal when threading the needle.
Video of the Day