You've finally decided to take the plunge and learn to sew. Now what? Where do you start? What do you need to buy? How do you get that sewing machine up and running?
This sewing series is designed for beginners and for those who would like a refresher so you, too, can be on your way to creating your own fabric treasures. Once you get a taste of how much fun sewing can be, you'll never look back.
Video of the Day
"Sew"...let's get started!
The Essential Tools
First of all, you'll need to make a shopping list and head to your local store to pick up a few essential tools to get you started. You will only need a few basic things to plunge head first into this wonderful world of sewing.
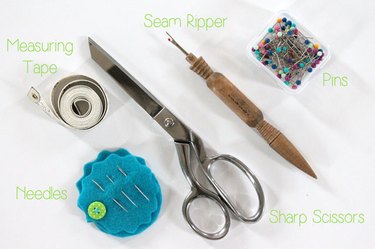
Things You'll Need
Sharp pair of sewing scissors to use only on fabric
Seam ripper
Straight pins
Measuring tape
Variety pack of hand sewing needles
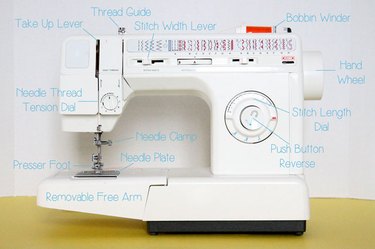
Sewing Machine Basics
Next up, your most exciting purchase -- the sewing machine!
This can seem like such a big decision. After all, you and this machine are going to make beautiful things together for years to come. How do you choose from all of those options on the shelves? Which machine is right for you?
You'll be happy to know, there is no need to buy a fancy schmancy machine. A basic machine is really all you need. If the machine you choose has a straight stitch, a zig zag stitch and a reverse stitch, you and your machine will be able to spend hours and hours happily creating beautiful projects together.
Once you get home with your new friend, pull that beauty out of the box and spend some quality time getting to know each other.
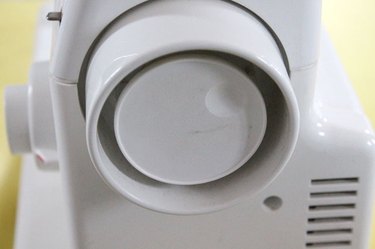
Winding the Bobbin
Now, let's get your machine up and running so you can sew your first project.
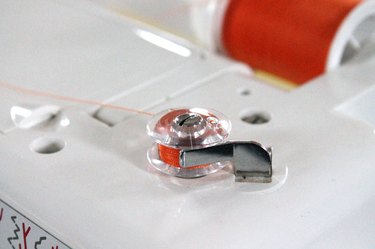
The first thing you'll need to do is wind a bobbin with thread. A bobbin is a small clear plastic cylinder that should be included with your machine. Place a spool of thread on the spool pin, secure it in place and bring the end of the thread through the thread guide and back toward the bobbin winder.
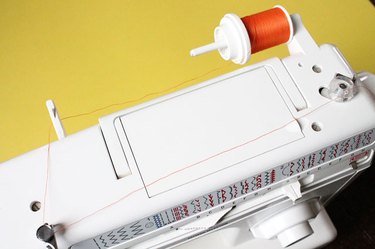
Next, bring the end of the thread through the hole in the top of the bobbin and place the bobbin onto the bobbin winder. Snap it in place by pressing it to the right, against the little metal bar.

Now, you'll need to release the hand wheel. This will disengage the rest of the machine while you wind the bobbin. All machines are different and this particular machine releases the hand wheel when you push in on the indentation on the wheel. You'll need to check the manual for your machine to see how to release the hand wheel.
Then comes the fun part -- winding the bobbin. Hold onto the end of the thread and press the foot control pedal so the thread will wind around the bobbin. When the bobbin is full, cut the thread, unlock the bobbin winder by pressing it to the left, and remove the bobbin from the bobbin winder.
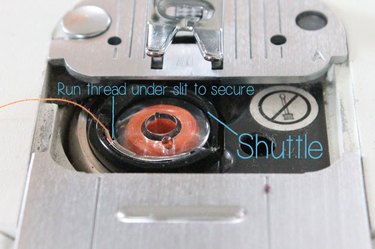
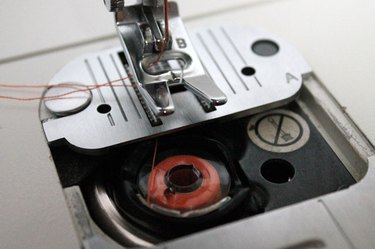
Next, let's install the bobbin under the needle plate. Slide the needle plate open and drop the bobbin down into the bobbin shuttle. Make sure the thread is moving in a clockwise direction. Secure the thread by running it under the slit in the bobbin shuttle.
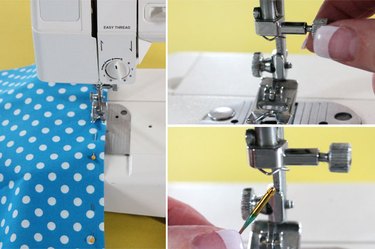
Installing the Needle
You're almost there!
Next, you'll need to install the needle. All machine needles have a flat side and a curved side. When you install the needle, the flat side will face the back of your machine and the curved side will face toward you.
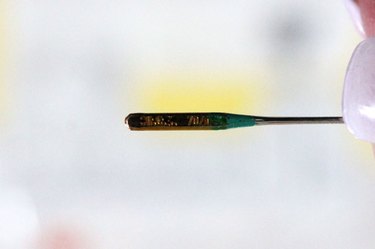
Loosen the needle clamp by turning it in a counterclockwise direction. Place the needle up into the needle slot as far as it will go and tighten the needle clamp by turning it in a clockwise direction.
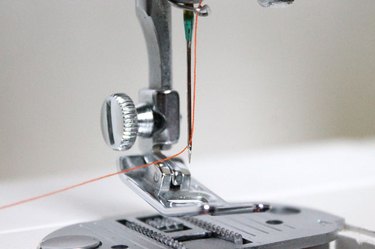
Threading the Needle
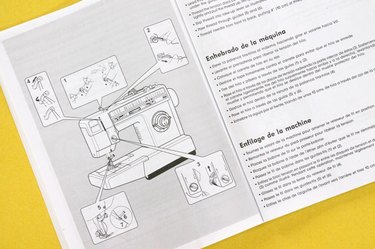
You're now ready to thread your sewing machine. This can seem a little intimidating at first, but after time, threading your machine will become second nature. All machines thread a little bit differently, but if you're lucky, your new machine will have the threading diagram printed right on your machine.
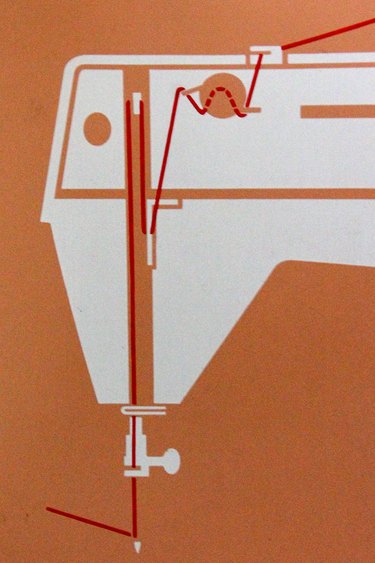
If your machine doesn't have the diagram directly on the machine, you'll need to keep your machine manual handy until you know how to thread your machine by heart.
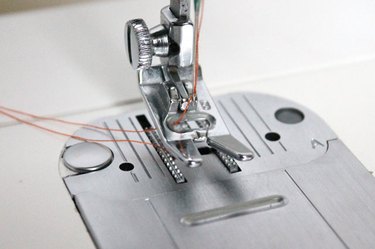
To thread a machine, start by placing the spool of thread on the spool pin and secure it in place. Then (1) run some thread out and through the thread guide, (2) down through the slit on the right, (3) around the bottom and up through the slit on the left, and (4) bring the thread through the hole in the take up lever and down through the slit to the hooks above the needle.

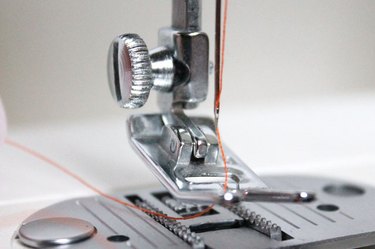
Run the thread through the hooks above the needle.
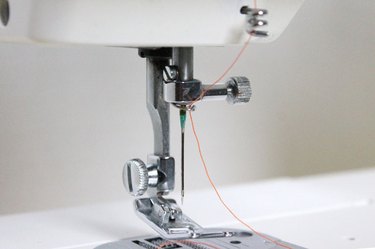
Then thread the end through the needle from the front to the back.
Place the thread under the presser foot and hold onto the end with your left hand. With your right hand turn the hand wheel one complete rotation so the needle goes down into the bobbin case and back out again.
When the needle comes back out of the bobbin case, it will have the bobbin thread looped over the needle thread. Use a pin or your finger to pull the end of the bobbin thread out of the bobbin case.
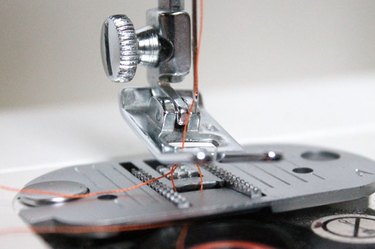
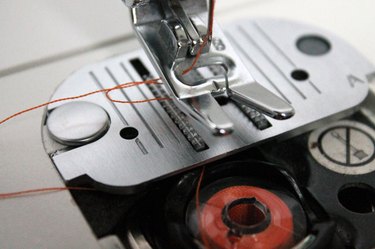
Keep pulling on the bobbin thread until the end is completely out of the bobbin case and both threads are under the presser foot.
Slide the needle plate closed.
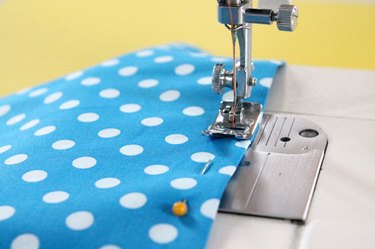
Yay! You did it! You and your machine are now ready to create some beautiful projects together. Next up, you'll learn how to sew the basic stitches on your machine. Then you'll practice your new skills by making a fun and colorful first project with your new sewing machine.
Don't miss the rest of the series!
- Read Part 2: Basic Sewing Machine Stitches
- Read Part 3: Choosing Patterns & Fabrics