Frame weaving looms are terrific starter looms for beginners, but the cost of purchasing one can put off a lot of would-be weavers. If you're just starting out and don't want to make that initial investment, you can easily whip up your own frame loom for a fraction of the cost of buying one readymade. There are a lot of different ways to make one, but this is one of the easiest and most affordable types of looms to both create and use.
Video of the Day
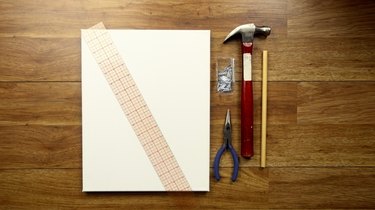
Things You'll Need
Pre-stretched canvas of desired size, new or used -- (we recommend 11 x 14 if you're unsure of what size to use)
Stapler with 1/4-inch staples (optional)
Sharp bladed tool (like craft/utility knife)
Gripping pliers (optional -- duckbill pliers recommended)
Ruler
Pencil
3/4-inch wire nails
Hammer
1/4-inch round dowel
Fork or small hair pick
Weaving materials (yarn, twine, roving, lace, etc.)
Making the Loom
Basically, all you need to make a wooden frame loom is, well, a wooden frame. Instead of building a frame yourself, you can skip a few steps by using a wooden canvas stretcher frame. Inexpensive ones from the craft store will do just fine, or you can buy used ones for next to nothing at a thrift shop. A regular picture frame would do as well, but make sure that it is wooden and at least 3/4" of an inch thick to withstand being hammered into by a good number of nails (at close proximity) without splitting. Even the cheapest canvas stretchers we tried out worked great, so that's what we recommend.
Tip
The dimensions of this particular type of frame loom will dictate how large a woven piece you can create. You'll be able to create a piece of any size smaller than the loom, but not larger.
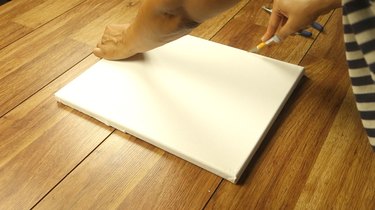
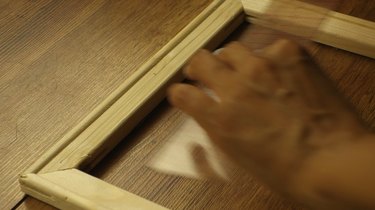
Step 1: Remove Canvas From Stretcher Frame
The cleanest way to do this is to use a craft knife to cut around the edges. This will allow you to lift the face of the canvas off intact, allowing you to save it for an artwork project later on (if you'd like).

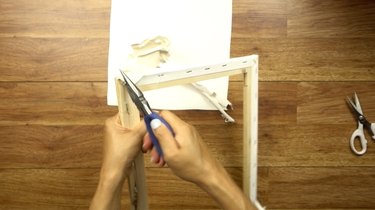
Once the front panel of the canvas is removed, use a pair of pliers (or your fingers) to pull away the canvas edges that are stapled to the wood. The remaining canvas should easily tear away from the staples (and/or cleanly remove the staples along with them). However, be careful to not quickly rip the staples out of the frame, as this may take some of the wood along as well. You don't need to remove all of the staples, but you can if you'd prefer not to have them in your loom for aesthetic reasons.
Tip
Jiggle your frame to test for durability of the corner joints. Less expensive brands may not be as securely fastened as higher end ones. However, this is easily fixed. If there is any wiggling at the joints, reinforce them with 1/4-inch staples.
Step 2: Measure & Mark
The particular frame loom we're making will have two rows of 3/4-inch wire nails on both the top and bottom bars (i.e., the short bars) of the frame. These short, thin nails will hold your "warp" threads in place at the proper tension. If you're brand new to weaving and don't know what warp means, don't worry -- we'll cover that in the "Preparing to Weave" section below. For now, we'll show you how to measure out and mark the placement of the nails.
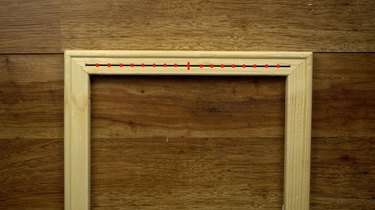
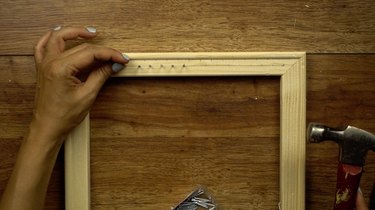
Use a ruler and pencil to draw a line about 3/8" from the bottom edge of one of the short bars of the frame. The length of the line should approximately match the length of the frame opening, as shown below.

Then, mark the center of the frame (NOT the center of the line you just drew).
Now, measure and mark every 1/2-inch point on both sides from the center along the line, stopping about 1 inch from the edge. Keep the number of marks balanced on both sides. For our 11 x 14 frame, we marked 8 points (each a half an inch apart) on both sides of center for a total of 17 marks along the line (indicated in red in the image below). Each mark shows where you will place a nail.
Now, you'll mark the second row of nails. Take your ruler and measure the midpoints between the marks you made on the first line, marking them 1/4 of an inch ABOVE the line.
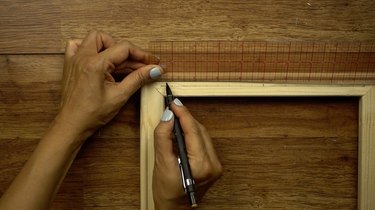
This will create another row of equidistant marks 1/4 inch above your first row (see red marks in the illustration below). The marks on this row will also be a half an inch apart, but they will be staggered from (rather than aligned with) the marks in the row below.
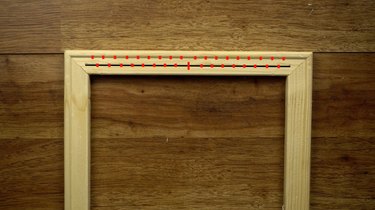
Remember to keep the number of marks balanced from the center, so that you have a symmetrical loom. The longer the rows of nails you create, the wider your woven pieces can be.
Repeat the measuring and marking process on the opposite edge (the bottom) of the frame.
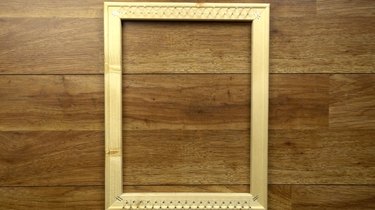
Step 3: Hammer Nails at Marked Points
Hammer the 3/4" wire nails (about halfway) into each mark you made in the previous step. Try to make the nails roughly the same height, but you don't have to be precise.
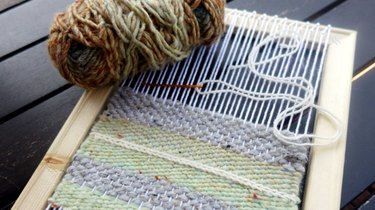
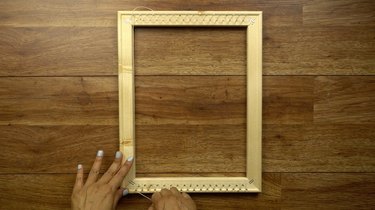
Does your loom now look like the image below? If so, your DIY frame loom is ready for action! How easy was that?
Preparing To Weave
This section will cover the basics on how to prep your loom for weaving, including what tools and materials you'll need (listed below). Keep in mind that you have plenty of options when it comes to both materials and tools, so the following supplies are simply our recommendations for someone who is brand new to the craft who may not already own tools specifically made for weaving. You might be surprised to discover that some very common household items work just as well!
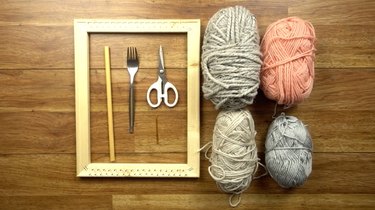
Things You'll Need
Very strong yarn (we recommend a fine to worsted-weight cotton or acrylic) for the "warp" (see Weaving Terminology below)
Any additional yarns of your choice (we recommend worsted weight wool or acrylic)
Tapestry needle
A 1/4-inch - 3/4 inch dowel or chopstick (to be used as a "shed stick" -- see Weaving Terminology below)
Fork
Scissors
Weaving Terminology
Before we begin, it's best to run through some basic weaving terms that we'll be using:
Warp: The thread that is tensely strung lengthwise -- typically vertically (i.e. up and down) -- on the loom. The warp will be kept at a constant tension on the loom, which will hold the woven fabric together.
Weft: The thread that is woven in and out through (that is, perpendicular to) the warp threads.
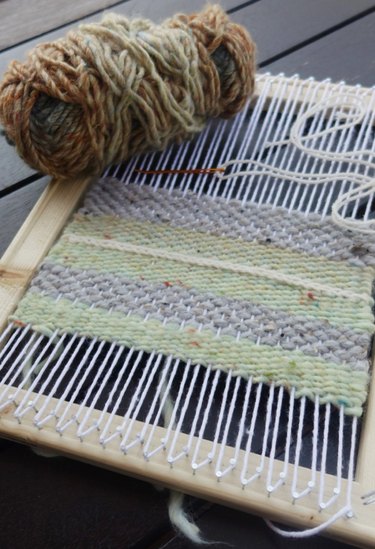
Shed: A gap created between warp threads by some sort of "shed" tool -- allowing you to quickly and easily pass your weft thread over and under through the warp threads without having to manually separate them one by one. There are a number of different tools that will allow you to create a shed. For this beginner project, we'll be using a dowel as a "shed stick."
Shed Stick: A stick that is woven through the warp allowing you to quickly pass your weft over and under the warp threads into two sets in a desired pattern without having to manually separate the threads one by one. Using a shed tool isn't necessary, but it will definitely save you a lot of time! Typically, a shed stick is used for weaving in only one direction on a frame loom -- either left to right, or right to left -- throughout the entirety of your project. The weft in the opposite direction will be woven through the warp manually.
Step 1: "Warping" Your DIY Loom
The first step in the weaving process is to add warp thread to your loom. Your warp will provide the foundation for your woven material. That's because the warp is tensely (but not TOO tensely) strung upon the loom in order to hold the fabric together. It's important to note that though the warp will be kept at a constant tension, if it's too tight, you won't be able to easily pass your weft yarns (or your shed tool, if you're using one) over and under in order to create the fabric.
Tip
Note that how you warp your loom depends upon the final dimensions that you'd like your finished project to be as well as the density of the woven fabric you'd like to create. That said, you don't have to string your warp on every single nail/peg on your loom. The type of loom we've created here limits both the width and length of your project to a little under the size of the loom itself. However, you'll be able to create woven items in any dimensions smaller than the dimensions of the loom. Having said this, you can make a number of fun projects on an 11 x 14 loom such as wall hangings, placemats, coasters, etc.
NOTE: For instructional purposes, we'll assume that you want to create a project of the longest and widest dimensions that can be created on the loom.
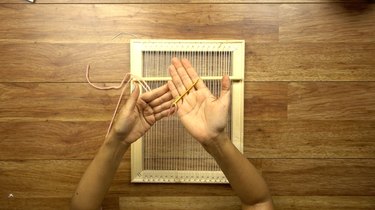
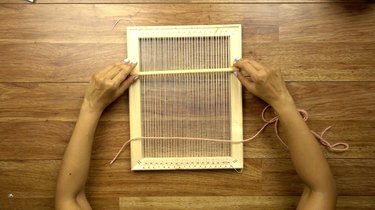
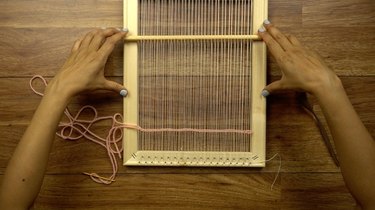
Using a very strong yarn, string, or twine for your warp, tie a double knot to the leftmost peg at the top of the loom.
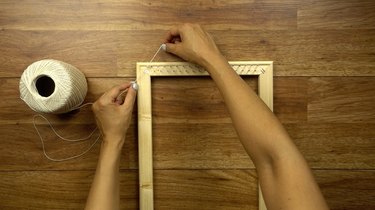
Keeping a steady tension, string it down and around the opposite peg below, as shown.
Continue winding your warp in this fashion, up and down, around every nail from left to right as shown.
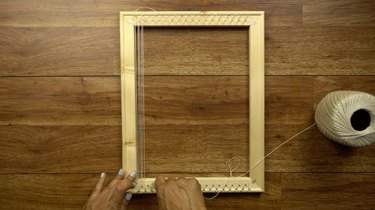
Every once in a while, test your tension by pressing down on the warp. It should bounce back up when pressed and there should be no visible slack.
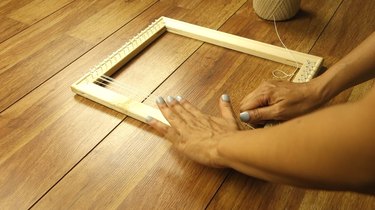
When you've reached the rightmost peg at the bottom right corner, tie off your warp thread and cut it, leaving a 4 - 6-inch tail. You'll hide this tail later.
Now, you're ready to weave!
Using Your DIY Frame Loom
Since this tutorial focuses primarily how to build a simple DIY loom, we won't get into details regarding the weaving process itself. For weaving basics and detailed instructions on how to weave on a frame loom similar to the one shown, we recommend you visit The Weaving Loom, a terrific resource for beginners. Instead, we'll provide a brief overview on how to achieve a basic "tabby" weave using this particular DIY loom with worsted weight yarn, a tapestry needle, and a dowel (or chopstick, knitting needle, or other similarly-shaped object) as a shed stick.
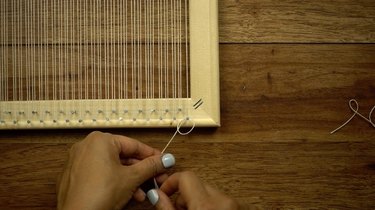
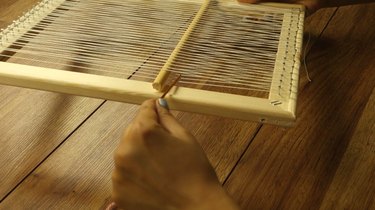
Using a Dowel as a Shed Stick
As mentioned above, a shed stick is a great tool to have because it will make your work a bit easier and faster. To use it for a plain weave, simply weave the stick over one, under one (or vice versa -- it doesn't matter as long as you follow that 1:1 pattern) across all warp threads. The tension caused by separating the warp threads will hold the shed stick in place.
By weaving the stick through all of the warp threads, you've separating them into into two sets of alternating threads --one set lying on top of the stick, and one set underneath the stick -- with the stick creating a space in between the sets. As stated earlier, that space in between (pictured below) is called the "shed."
Essentially, the shed stick has pre-picked the set of warp threads that you'll need to pass your weft threads under in one direction, so that you don't have to manually pick them up every single time you weave in that direction. The return row, however, must be woven through manually -- unless you want to remove the stick and reinsert it to create a shed for the return row. BUT, you'll have to do this for every row -- a time consuming process which sort of defeats the time-saving purpose of the shed stick.
Start Weaving!
These instructions will show you how to create a basic "tabby" weave on your loom.
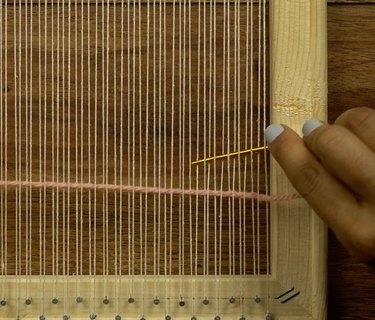
Though there are many different ways (and tools) that will allow you to carry your weft yarn through the warp threads, we'll be using a common tapestry needle. To do so, thread a length of yarn (no more than 2 yards or so at a time to keep it manageable), on the needle.
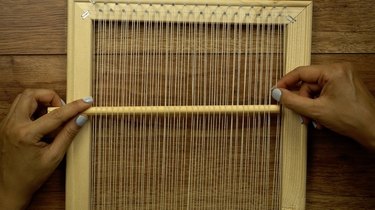
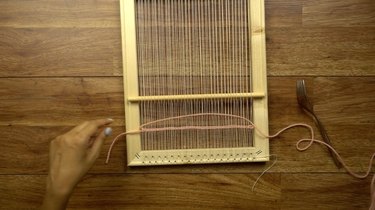
Pull your shed stick down to open up the shed closer to your first row of weaving.

Now, simply draw your tapestry needle through the shed all the way across.

Make sure to leave a tail (about 4 - 6 inches long) hanging from the loom. This tail will be woven into the back of the project at the end. To prepare to weave in the opposite direction, push the shed stick back up toward the top of the loom to lessen the gap (the shed) between the warp threads.
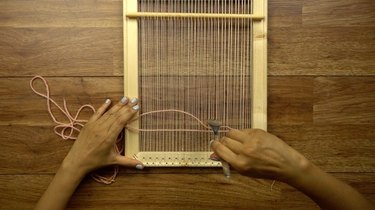
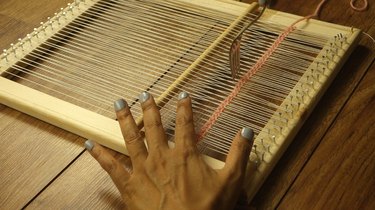
When the warp threads come back together, they will clamp the weft thread in place. Now, heading in the opposite direction, use your tapestry needle to pick up and pass underneath every warp thread that was previously NOT lifted by the shed stick in the preceding row. You'll know which ones to pick up, as they're the set that is lying slightly lower than the others, as the shed stick will still separating the threads above.
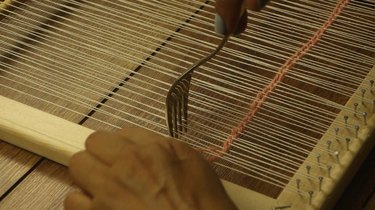
After you pull the weft all the way through, grasp the yarn to the right and left of the loom and pull down to create an arc as shown below. This will ensure that you don't create too tight of a weave.

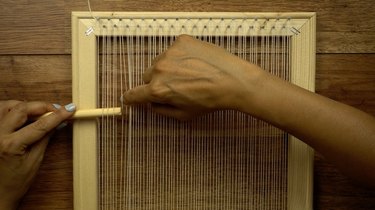
Use your fork to push down your arc to meet the row beneath. In weaving parlance, this is called "beating down" the weft. Attempt to beat down evenly across the row.
Now, pull your shed stick back down to open the shed and repeat the process (i.e. pulling your weft through the warp, creating an arc, and beating down). Of course, one half of your weft rows will be drawn through much faster than the other half thanks to your handy dandy shed stick!
And there you have it -- you're now officially weaving on your own DIY loom!
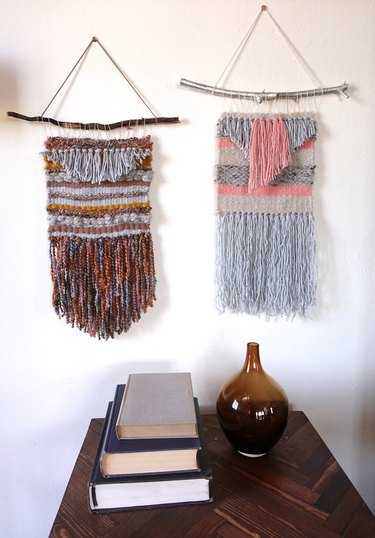
If you're looking for the perfect beginner project to create on your brand new loom, check out our tutorial on how to make these simple but gorgeous wall hangings.
Happy weaving!
This project is based on a weaving loom created as part of the course "Weaving For Beginners" taught by Annabel Wrigley on Creativebug.com.