Halloween may be best known as the time to dress up in a scary costume, but whether or not you're partaking in the masquerade on the big day, you can easily get in the spirit of the season by dressing up your nails! Halloween nail art makes for a festive accessory all month long, especially when the design features frightful blood drips and splatters.
Our three bloody good patterns work on short nails, long nails, press-on nails, and acrylic nails, making it easy to add these spooky patterns to your regular routine. You can create these patterns on your own even if you're a beginner, and it's even more fun to recruit a friend and exchange morbid manicures together.
Video of the Day
Things You'll Need
Wax paper
White nail polish
Red nail polish
Clear tape
Bottle cap
Eye dropper
Nail polish remover
Cocktail straw
Cotton pads
Straight pin with round tip
Tip
Before you begin your manicure, cover your work surface with wax paper.
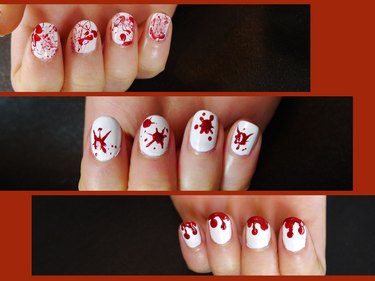
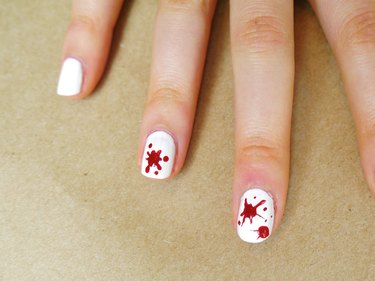
Blood Splatter Halloween Nails Design #1
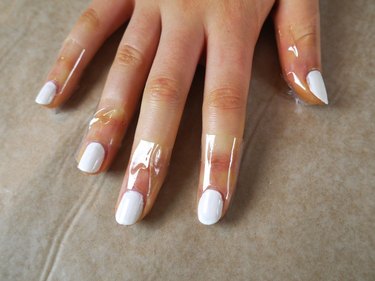
1. Prepare the nails
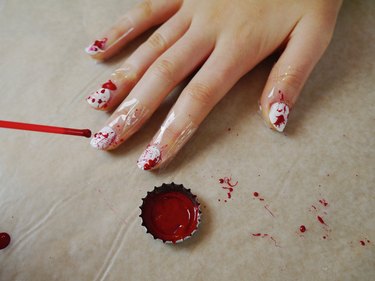
Start with dry white nails. Tape the skin around each nail with clear tape to protect your fingers from excess splatter. Begin with a small strip of tape right under the cuticle, across the front of the finger. Use a second strip and arch it over the top of the finger along the outer edge of each nail. Fold the excess tape to the back of the finger.
2. Prepare the blood
Place five drops of red nail polish into a bottle cap. Use an eyedropper to put two or three drops of nail polish remover into the red polish. Mix it with a cocktail straw. This will thin the polish so it splatters easily.
Dip the tip of the cocktail straw into the diluted red polish, completely covering the tip. Then place it 1 inch from the surface of a nail and blow nail polish out through the straw. The paint will splatter over the white surface of the nail. Continue on all of the nails.
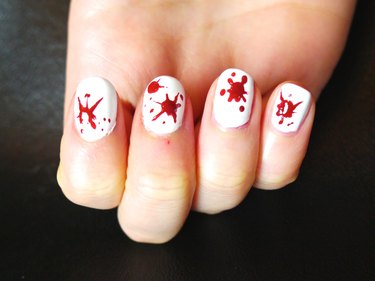
3. Clean up the nails
Once the nails are covered in red splatter, remove the tape and touch up any unwanted splatters with a cotton pad dipped in nail polish remover. Allow the nails to dry.

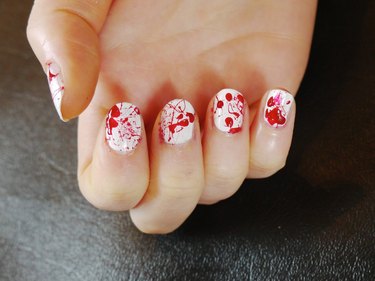
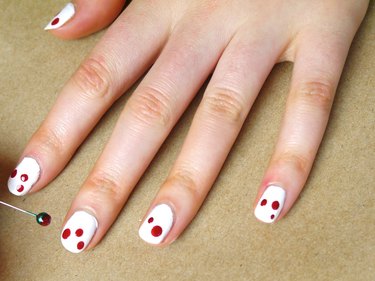
Blood Splatter Halloween Nails Design #2
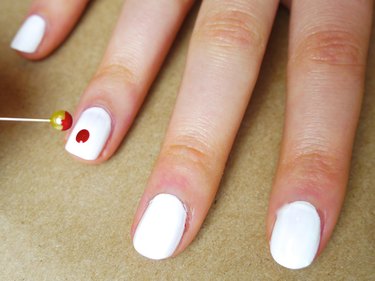
1. Create the blood
Start with dry white nails. Add a couple drops of red nail polish to a bottle cap or another shallow dish. Dip the rounded end of a straight pin into the polish and dot it onto the nail where you would like a splat.
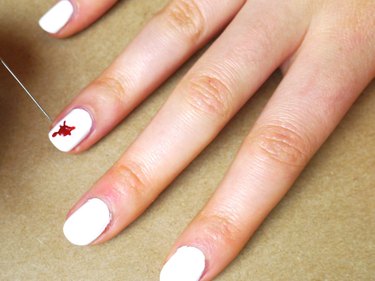
2. Spread the blood
Turn the straight pin around (or use a new pin) and pull the red polish from the center of the splat out into the nail, forming several splat lines. Continue using the same technique on all your nails, dotting polish and then pulling it from the center of the splat mark to the outer nail, forming various streaks and dribbles.
Add smaller dots or flecks of red nail polish around the main splat marks using the tip or round side of the pin. Allow the nails to dry.
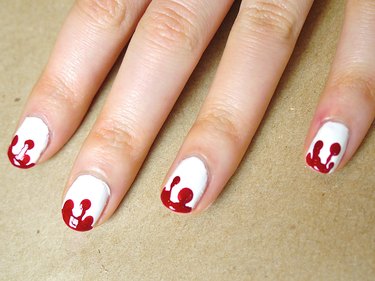
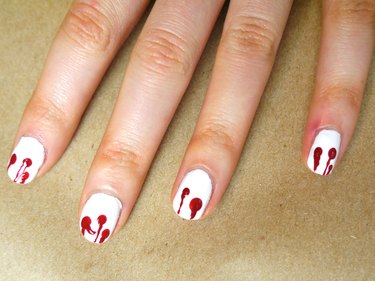
Blood Splatter Halloween Nails Design #3
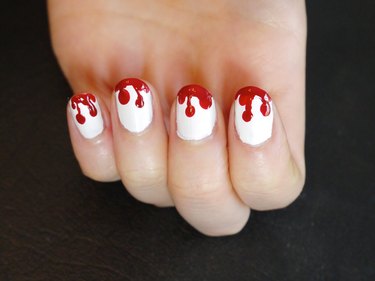
1. Create blood drops
Start with dry white nails. Add a couple drops of red polish to a bottle cap or another shallow dish. Use the rounded end of a straight pin to add two or three dots to each nail in a staggered pattern.
2. Create the drip pattern
Dip the end of a straight pin in the red polish and draw lines from the tip of the nail to the center of the dots. Some lines can be thicker than others.
3. Paint the nail tips
Finish this technique by using the nail polish brush to paint the tips of each nail red. Allow the nails to dry.