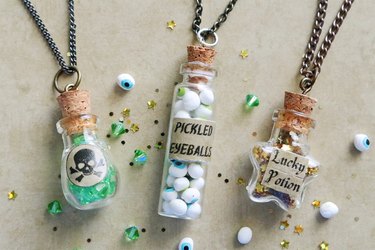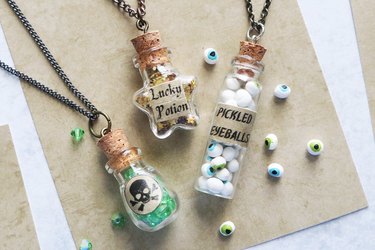
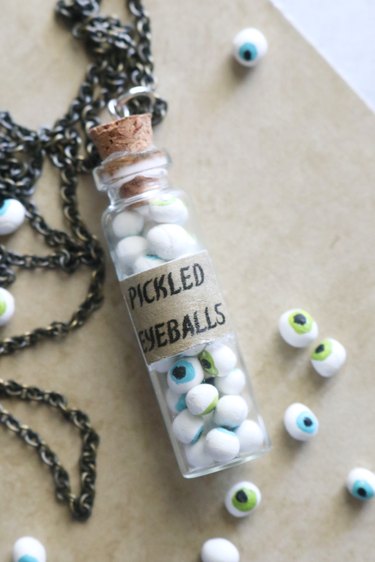
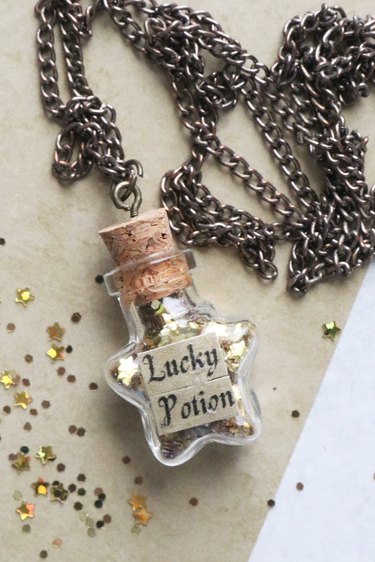
This fun and creepy DIY project includes Halloween pendant necklaces containing three different potions: "pickled eyeballs" made of polymer clay and paint, "poison" made of sparkly green crystal beads, and a "lucky potion" made of chunky star glitter (complete with a star-shaped bottle!). And the perfectly macabre little labels are a cinch to make with our free printable labels.
Video: Potion Bottle Pendant Necklaces
Video of the Day
Pickled Eyeball Potion Bottle Necklace
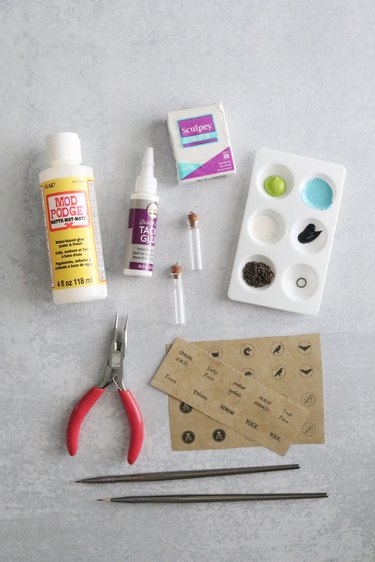
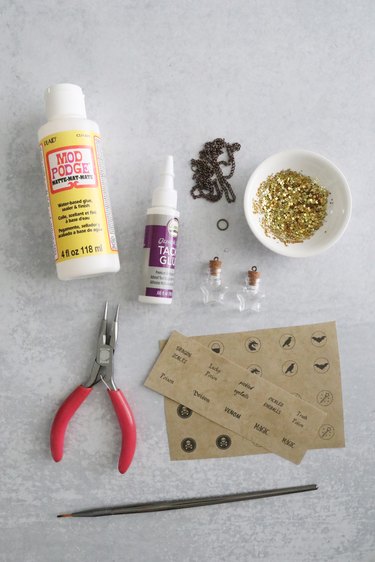
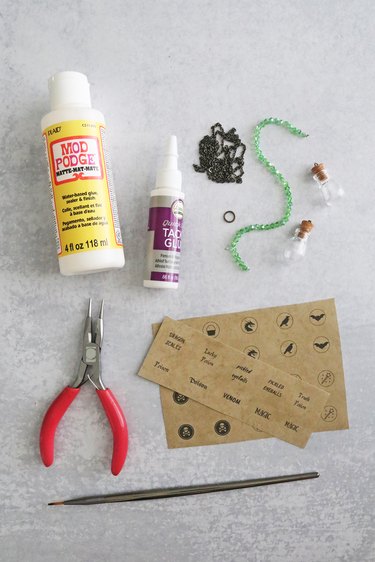
Things You'll Need
Parchment-colored paper (8.5 x 11 in.)
Printer
Scissors
Glass bottle pendant
Chain
Jump ring
Jewelry clasp set (optional)
White polymer clay
Acrylic paint (black and eye colors of choice)
Craft tweezers (optional)
Thin paintbrush
Decoupage glue, like Mod Podge
Super glue or tacky glue
Jewelry pliers
Tip
Bottle pendants can be found in many sections of the craft supply store. In most cases, they’ll be sold in the jewelry section, though they might also be available in the scrapbooking section. During the holidays, you might find them among fall and Halloween items.
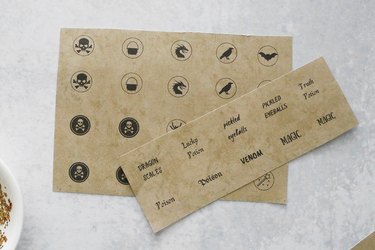
1. Prepare the labels
Print the bottle labels on parchment-colored paper (regular letter size), using the free printable labels PDF and adjusting the scale based on the size of your pendants. For reference, we printed our labels at 32% scale.
Tip
To determine the best label size for your bottle pendants, do a test print on scrap paper. From there, you can adjust scale as needed. You could even print labels at a larger scale for other Halloween decoration ideas, like regular-size potion bottles, trick-or-treat bags or paper crafts.
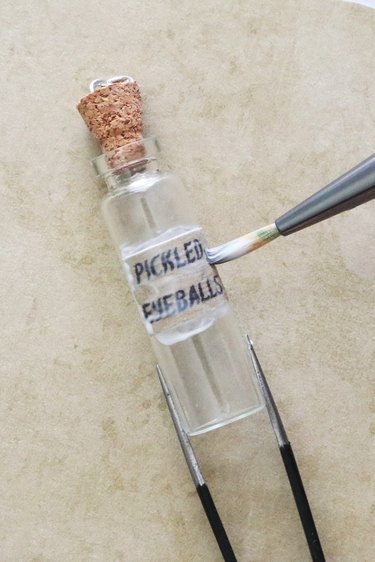
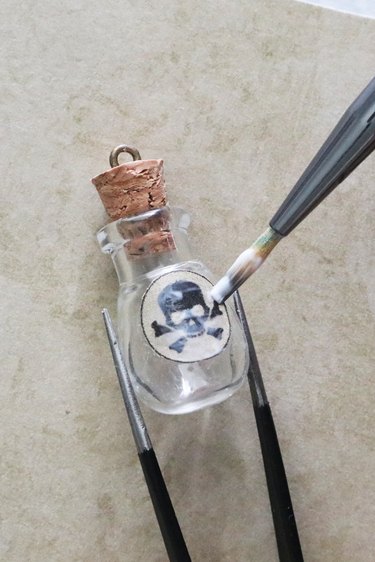
2. Apply label to bottle
Cut out your desired label. For this necklace, we used "pickled eyeballs." (The printable features a range of classic Halloween icons, like spiderwebs and cauldrons, so you can easily customize your craft project!)
Using a thin paintbrush and decoupage glue, apply the label to the bottle. You might need to gently press down corners to help them stick to bottle. Set aside the pendant to dry.
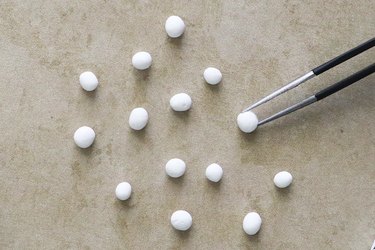
3. Make clay eyeballs
Roll white polymer clay into tiny spheres to make the eyeballs. Bake the clay balls according to the package directions. Most products need to be baked at 275°F for 15 minutes per 1/4 inch of thickness. Since the eyeballs are very small, consider baking them for less time (about 10 to 12 minutes) to prevent burning. Remove the balls from the oven and let them cool completely.
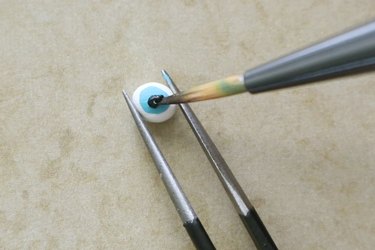
4. Paint the eyes
Using a thin paintbrush, paint a circle on each ball to represent an iris, and let it dry. Next, paint a black circle inside the iris circle to represent a pupil, and let it dry.
Tip
Use a pair of craft tweezers to hold each ball steady as you paint.
5. Fill the bottle
Fill the bottle with the mini eyeballs, leaving room for the cork. Apply super glue or tacky glue to the cork and place the cork firmly into the bottle. Let the glue dry as directed.
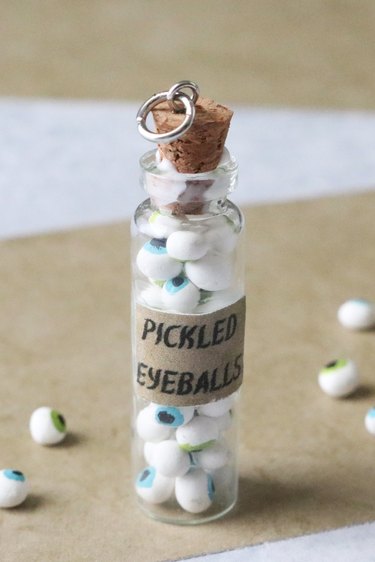
6. Add a chain
Thread a chain through the loop in the cork. If you're using an extra-long strand of chain, simply connect the ends with a jump ring. Alternatively, attach a clasp set to the ends.
Make an eyeball centerpiece
This potion bottle project can be easily adapted into a last-minute DIY Halloween decoration! Instead of clay, paint eyeball details onto white foam balls or ping-pong balls. You’ll be able to add more detail this way, as the eyeballs are bigger. Next, add painted eyeballs to a Mason jar or vase from the dollar store and display as a Halloween centerpiece. It also works great as table decor for Halloween parties.
Lucky Potion Bottle Necklace
Things You'll Need
Parchment-colored paper (8.5 x 11 in.)
Printer
Scissors
Glass bottle pendant
Chain
Jump ring
Jewelry clasp set (optional)
Gold chunky glitter
Gold star glitter
Thin paintbrush
Decoupage glue, like Mod Podge
Super glue or tacky glue
Jewelry pliers
Tip
To emphasize the “lucky potion” vibes, we used star-shaped potion bottles. They’re available on Amazon.
1. Prepare the labels
Print the bottle labels on parchment-colored paper (regular letter size), using the free printable labels PDF and adjusting the scale based on the size of your pendants. For reference, we printed our labels at 32% scale.
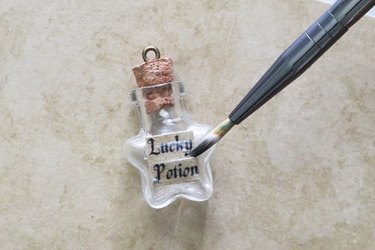
2. Apply label to bottle
Cut out the "Lucky Potion" or wand label. Apply the label to the bottle using a paintbrush and decoupage glue. Set aside to dry.
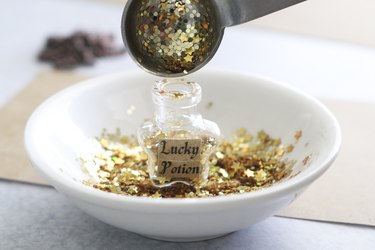
3. Fill with glitter
Fill the bottle with gold glitter. We recommend placing the bottle in a small container to catch excess glitter. Apply super glue or tacky glue to the cork and place the cork firmly into the bottle. Let the glue dry as directed.
Glitter potion decorations
You’ll likely have leftover glitter after making this piece. For a fun Halloween craft, add extra glitter to a large cork bottle and seal the top with hot glue. (You can find these types of bottles at the dollar store or craft store.) Print labels at a larger scale and then decoupage one to the bottle. Another option is to create a design using glass paint and a stencil. When it’s time to display the bottle, place tea lights around it. Flickering light will make the “potion” look extra sparkly!
4. Add a chain
Thread a chain through the loop in the cork. If you're using an extra-long strand of chain, simply connect the ends with a jump ring. Alternatively, attach a clasp set to the ends.
Tip
Turn this easy DIY into a Christmas necklace by skipping the “lucky potion” label.
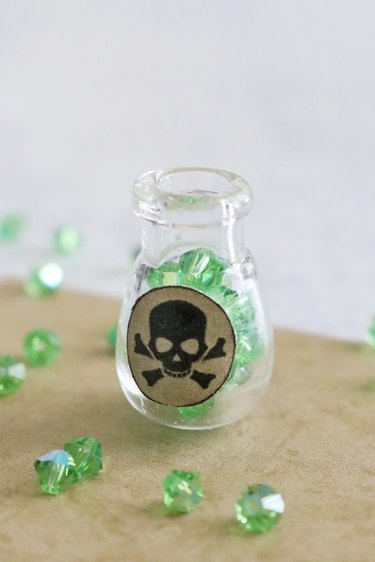
Poison Potion Bottle Necklace
Things You'll Need
Printer
Parchment-colored paper (8.5 x 11 in.)
Scissors
Glass bottle pendant
Chain
Jump ring
Jewelry clasp set (optional)
4 mm green crystal beads
Thin paintbrush
Decoupage glue, like Mod Podge
Super glue or tacky glue
Jewelry pliers
1. Prepare the labels
Print the bottle labels on parchment-colored paper (regular letter size), using the free printable labels PDF and adjusting the scale based on the size of your pendants. For reference, we printed our labels at 32% scale.
2. Apply label to bottle
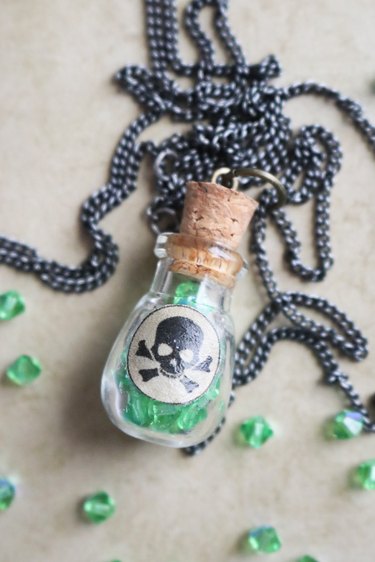
For a "poison" potion bottle, cut out the skull and crossbones label. Apply the label to the bottle with a paintbrush and decoupage glue. Leave it to dry.
3. Fill the bottle
Fill the bottle with green (or use a different color, if desired) beads.
Apply super glue or tacky glue to the cork and place the cork firmly into the bottle. Let the glue dry as directed.

4. Add a chain
Thread a chain through the loop in the cork. If you're using an extra-long strand of chain, simply connect the ends with a jump ring. Alternatively, attach a clasp set to the ends.