The coziness of fall goes hand in hand with warm tones of burnt orange, soft yellow and vibrant red. Autumn flowers are also decidedly special, bringing brilliant blooms to an otherwise chilly season. Marigolds, in particular, are an example of flowers that retain their beauty during the fall months—and they're a traditional decoration element used during Día de los Muertos (Day of the Dead) celebrations each fall. In fact, many families use marigolds to dress up altars, or ofrendas, in honor of lost loved ones.
This sense of tradition, natural beauty and seasonal celebration inspired us to create a stunning yet simple tote bag dotted with felt marigold flowers. With our beginner-friendly sewing tutorial, you'll DIY a functional and eye-catching piece that works perfectly as a farmers market bag, a tote for library books, a handy reusable shopping bag or even an accessory for Halloween and Día de los Muertos gatherings.
Video of the Day
What's more, this sewing project is so straightforward that you won't even need a sewing machine to complete it. You'll simply create vibrant felt flowers, adhere them from top to bottom of a plain bag and enjoy. Ready to let your creativity bloom? Check out our step-by-step floral tote bag tutorial for all the beautiful details.
Video: A Marvelous Marigold Tote Bag to Celebrate Fall
Things You'll Need
Felt sheets
Pencil
Circle template or compass
Fabric scissors
Hot glue sticks
Hot glue gun or fabric glue
Embroidery floss
Big embroidery needle
Ruler or measuring tape
Simple tote bag (canvas or upcycled fabric)

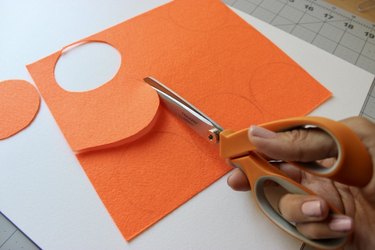
1. Cut three circles out of felt
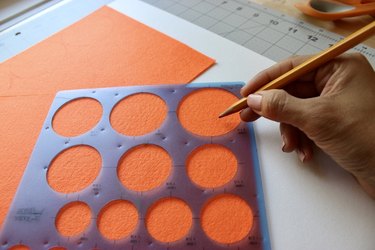
Draw three circles, each with a diameter of about 2.5 in., and cut them out. You'll be able to create three complete marigolds using a felt sheet measuring 8.5 x 11 in.
2. Create flower petals
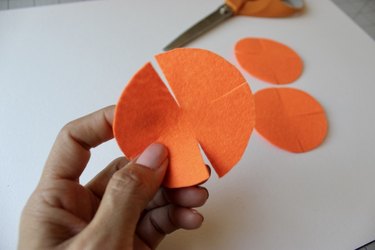
Start with one circle. Fold circle in half and make some small cuts, leaving center of circle intact. Fold circle in half again and make more small cuts, until you have 4 symmetrical petals. Fold 4 petals in half again and cut to create a fraying effect, leaving center of the circle intact. You'll end up with 8 smaller petals.
Give petals a heart shape by folding them in half and cutting down corners in a curve. Do the same with other 2 felt circles. You'll need three of these pieces to create one marigold flower.

Tip
Want to turn this into an upcycled project? Consider using a basic thrifted bag or even repurposed T-shirt fabric as a base for your flowers—in fact, we’ve got a tutorial for making an easy tote using recycled fabric and simple side seams that even beginners can tackle.
3. Create center of flower
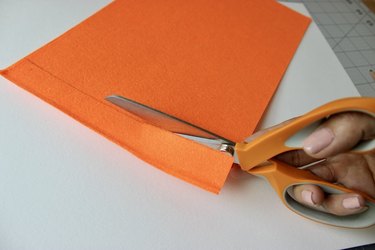
Measure a strip that is about 1 in. wide and 7.5 in. long. Make small cuts, approximately 1/4-in. wide, along strip of felt.
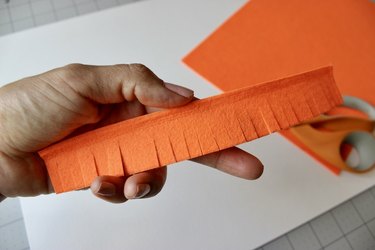
Create center of flower by adding hot glue to the end of felt strip and rolling it up slowly. Add more hot glue and roll entire strip until it resembles a cylinder.
Tip
Use fabric glue for this project if you're planning to wash your tote bag from time to time. Some fabric glues create a strong bond that can withstand washing, so ask for the best option in your craft store. Fabric glue is also a more kid-friendly option, though you might need to wait longer between each step for fabric glue to dry. The benefit of using hot glue is that it dries quickly.
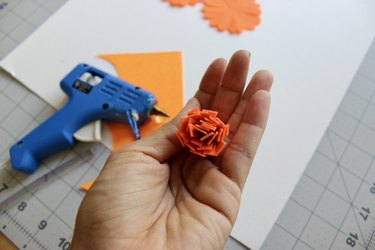
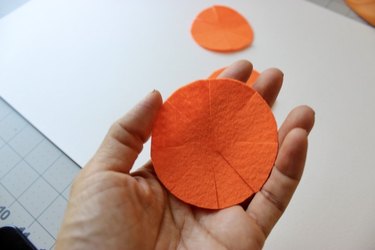
4. Glue flower pieces together
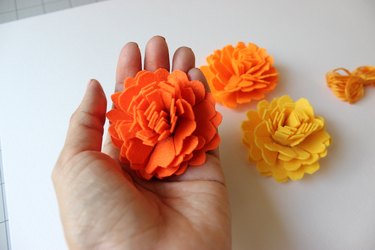
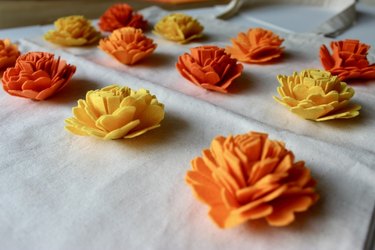
First, glue center of marigold flower to center of one felt circle. Add a bit of hot glue on the sides, then fold it carefully toward the center. Continue gluing circles until you have a complete marigold.
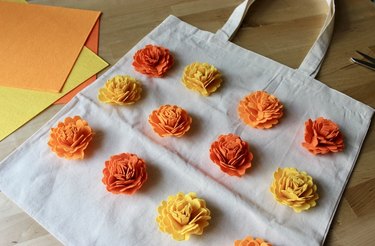
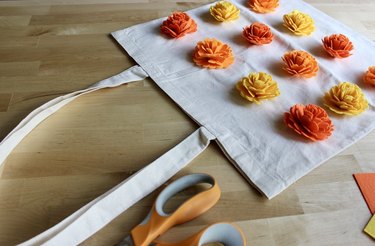
For a regular size tote bag measuring about 15 in. wide x 16 in. high, we added 12 marigold flowers to the side of the bag. We also used two tones of orange and one shade of yellow to create a warm autumn vibe.
Tip
For extra floral beauty, make additional felt flowers and sew them to bag handles. Alternatively, create an eye-catching border along top of the bag or embellish bottom corners with mini marigolds. You might even create a unique background by adhering a square piece of fabric to outer fabric of tote bag, then sewing flowers onto the fabric. Get creative!
5. Sew flowers to tote bag
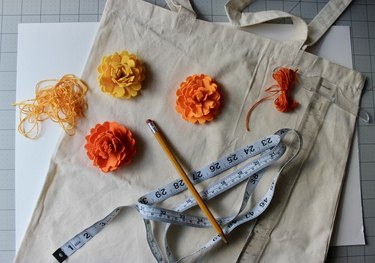
To lay out your tote bag pattern, measure and mark flower placement with a ruler or measuring tape and pencil.
Use embroidery floss to sew felt flowers to your tote bag. You'll need to push and pull a bit more than usual because felt with hot glue is not easy to sew, but this will make your tote bag more durable. A thick embroidery needle works best for this project.
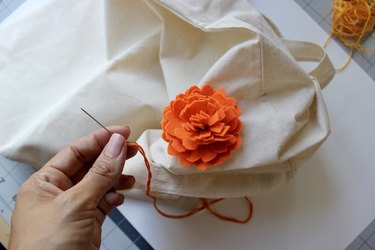
Introduce thread from the inside of the tote bag. Pull entire thread through a large section of each flower, including the center. This will keep marigolds in place on the tote fabric. Be sure not to adhere flowers too close to right and left folded edges, top edge or bottom seam of bag.
With that, you've created a functional and downright easy DIY tote bag inspired by the beauty and celebratory spirit of fall—no complex sewing patterns, quilting or advanced zigzag stitches necessary!
Whether you're a total newcomer to fabric projects or an expert who could sew bags in your sleep, we hope you feel inspired by this seasonal craft!