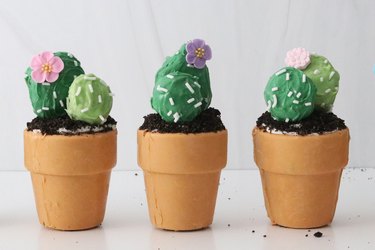
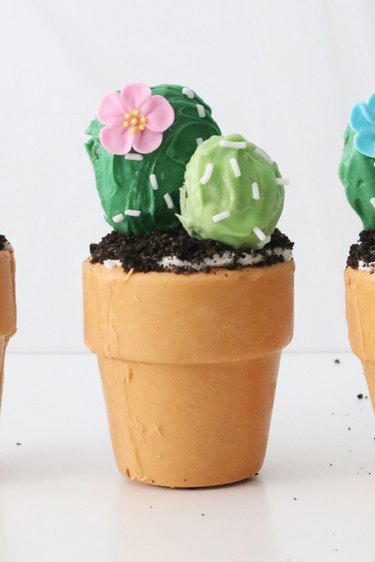
There's something deliciously charming about dirt dessert recipes. And these cactus dirt cups, which add a fun botanical twist to a beloved treat, are no exception. For starters, the "flower pots" themselves are edible! They're made of candy wafers, filled with chocolate cake and topped with crushed Oreos, resulting in a mini simplified version of an Oreo dirt cake.
On top are adorable cactus cake balls made of whipped cream cheese frosting and (you guessed it) more chocolate cake. When styled together, the cacti and pots turn into the sweetest dessert.
Video of the Day
What's more, since these cactus-themed treats are served in individual cups, they're perfect for potlucks as an alternative to typical dirt cake recipes. Read on for the full tutorial plus tips for making a dessert that's sure to prickle your fancy.
Video: A Desert of Desserts! Cactus Dirt Cups Are in Bloom
Candy Pots
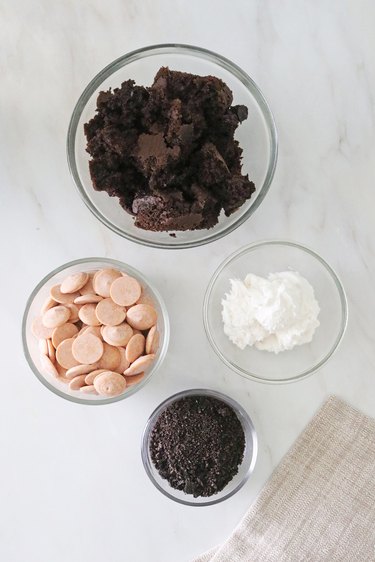
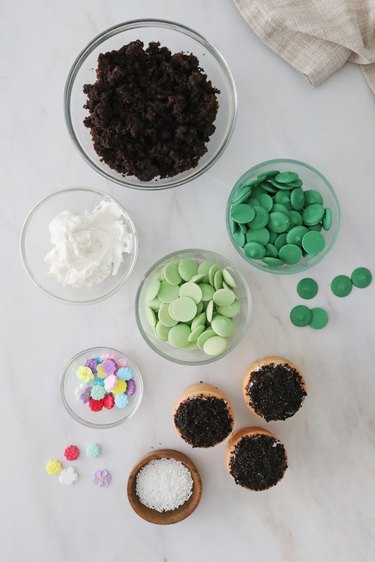
Things You'll Need
Cake chunks
Light brown candy wafers
Oreo cookie crumbs
Frosting
Tip
To make this a no-bake dessert and reduce prep time, use cake (or even cupcakes) from the grocery store.
1. Melt candy wafers
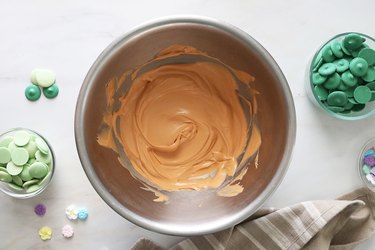
Melt light brown candy wafers in a DIY double boiler. We used pumpkin spice-flavored candy wafers, but caramel and peanut butter wafers also work well.
Tip
To make a DIY double boiler, fill a pot with about 2 in. of water. Place a heat-safe bowl on top, making sure the bottom doesn’t touch the water. Bring water to a boil and then add candy wafers to the bowl. Stir the wafers until they are melted and smooth.
Another option is to melt candy wafers in a microwave-safe bowl at 30-second increments, mixing with a spatula in between.
2. Add melted candy to mold
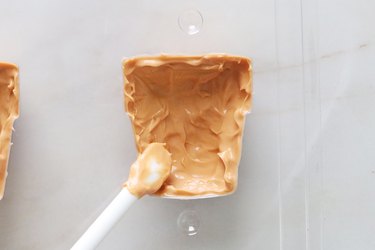
Add a generous scoop of melted candy to a mold. Using a thin spatula or the back of a spoon, spread candy to fill the entire mold, making sure to reach the edges. Don't forget to check the reverse side for air bubbles too.
Tip
If you want to make hollow plant pots (i.e., true cups that you can scoop something out of), avoid spreading candy along the top of the mold. However, this can be difficult to do neatly; it will also make the pots less sturdy.
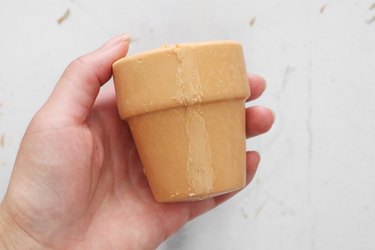
Let harden for about 30 minutes and then add another layer to make sure the candy is thick and sturdy. Let sit for another 30 minutes. To remove the pots from the mold, place them in the freezer for 5-10 minutes and then turn them upside down and pop out.
3. Fill plant pots
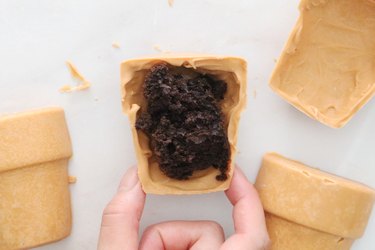
Add chunks of cake to one plant pot half, gently packing in.
Tip
If you want to enjoy the edible plant pot as a hot cocoa bomb, add chocolate chips, hot cocoa powder and sprinkles instead of cake.
4. Connect two halves
Melt a small amount of candy wafers. Let it cool slightly and then apply along the edge of the cake-filled half using a butter knife or thin spatula. Gently press on a second half to create a full pot. To conceal the seam, apply melted candy where the halves meet and smooth it out with your finger.
Tip
Be sure to let the candy cool before this step. If the candy is too warm, it will melt the plant pot.
5. Top with dirt
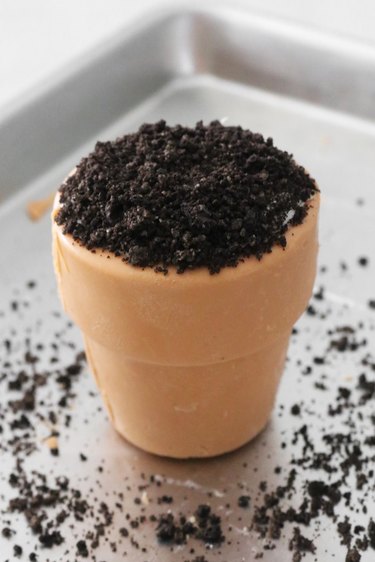
Spread a bit of frosting on top of the plant pot. Add a layer of Oreo crumbs for the "dirt."
Tip
You can crush chocolate sandwich cookies in a food processor or blender. If you don’t have either appliance, place cookies in a resealable plastic bag and run a rolling pin over them. Extra Oreo crumbs can be used as an ice cream topping or in milkshakes.
Now your edible plant pots are ready to be topped with cactus cake balls!
How to Make Cactus Dirt Cake Pudding Cups
You can easily turn this recipe into a pudding dessert by filling each pot with instant pudding instead of cake. Or, better yet, make a tasty cake and pudding mixture by combining the two ingredients! Chocolate pudding is best for the dirt pudding look, but remember that the pot will be topped with crushed cookies. This means you can use vanilla pudding, banana pudding and other flavors of your go-to instant pudding mix.
Cactus Cake Balls
Things You'll Need
9x9-in. cake (crumbled)
1 cup whipped cream cheese frosting
Dark green candy wafers
Light green candy wafers
White sprinkles
Icing flower decorations
Filled candy pots
Vegetable oil
1. Prepare cake ball mixture
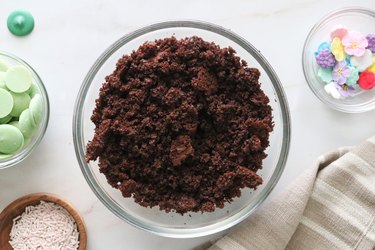
If you haven't already, crumble cake in a large bowl.
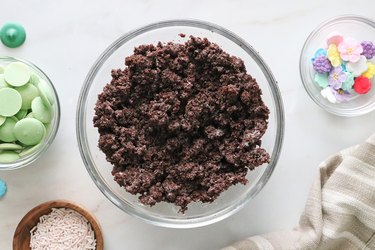
Add frosting and mix well using a large fork to properly spread the frosting. The mixture is ready when it resembles a tacky dough and the cake easily clumps together.
Tip
For a cheesecake-inspired take, mix cream cheese frosting with crushed graham crackers and a bit of powdered sugar.
2. Form into cactus shapes
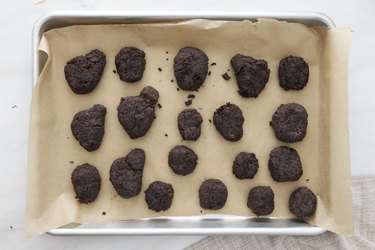
Line a baking sheet with parchment paper. Mold the cream cheese mixture into circular or oval balls. On some, add a smaller ball to create that classic cactus shape. Place on a baking sheet and refrigerate for at least 1 hour. The cake balls will be easier to coat in candy when they're chilled.
3. Coat cake balls
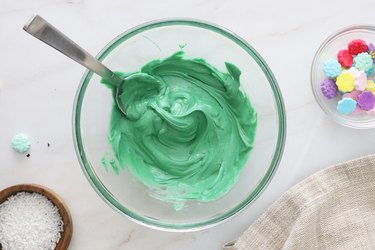
Melt green candy wafers using a double boiler or microwave. Add 1/4 to 1/2 tsp. vegetable oil to thin the candy. This will make it easier to coat the cake balls. Line a baking sheet with parchment paper and set aside.
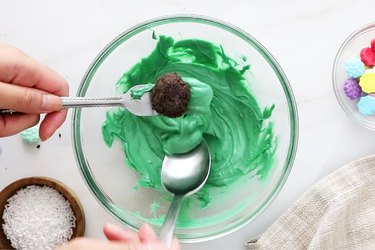
Place a cake ball on a fork and then dip it into the melted candy. Use a spoon to scoop melted candy onto the cake ball.
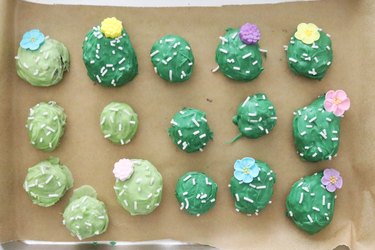
Set on a baking sheet and add white sprinkles. Repeat with the remaining cake balls, adding an icing flower to some. Leave them to harden for at least 1 hour. The total time it takes to dry will depend on the temperature of your space.
4. Add to candy pots
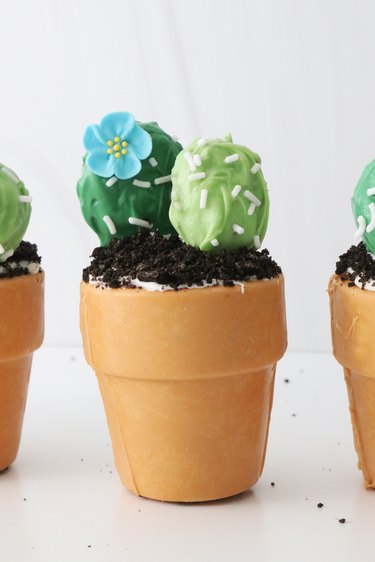
Place cactus cake balls on top of the candy pots. For a nostalgic touch, add gummy worms! You could even give each pot a holiday spin by adding icing decorations, like bunnies for Easter or mini skulls for Halloween.
Tip
If you used pudding mix or dairy-based frosting in your dirt dessert, be sure to refrigerate the cups. Otherwise, place them on a baking dish or sheet, loosely cover them with plastic wrap and store at room temperature.
For the ultimate dessert spread, serve your charming cactus pots with a side of vanilla ice cream and whipped topping. The combination of cake, crushed Oreos and ice cream will be so delicious.