
If you're a fan of seasonal treats and sweet eats, you've probably had your fair share of Halloween sugar cookies. After all, thanks to shaped cookie cutters and colorful royal icing, you can easily give any sugar cookie recipe a deliciously spooky spin. But why stop there? With the following tutorial, you can create these super cool crystal ball cookies with edible "glass" just in time for your next Halloween party.
The trick is to use the right combination of Halloween cookie cutters. You'll need one shaped like a crystal ball (or snow globe!) and a circular one that's slightly smaller. Once you've cut out a circle from the crystal ball, simply add crushed Jolly Ranchers to the open space. In the oven, the candies will melt and spread, creating a mesmerizing clear "glass" that's beautiful and tasty to boot.
Video of the Day
Video of the Day
From there, you can enjoy the cookies as is or add star-shaped sprinkles for extra twinkle. And while this recipe does require more prep time than other Halloween treats, we think it's totally worth it. Read on to learn how to make them, along with tips and tricks for working with sugar cookie dough.
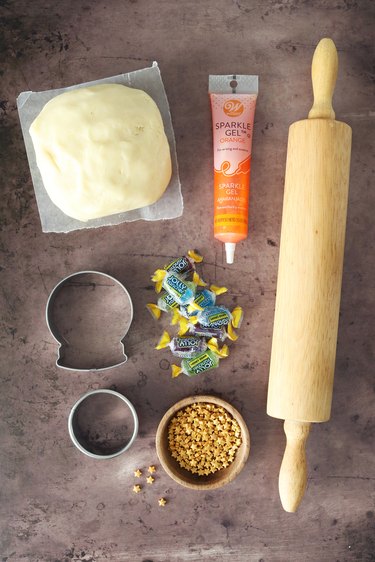
Things You'll Need
Chilled sugar cookie dough (regular or gluten-free)
Crystal ball or snow globe cookie cutter
Circle cookie cutter
All-purpose flour
Jolly Ranchers
Icing or decorating gel
Toothpick
Star sprinkles
Rolling pin
Cookie sheet
Parchment paper
Plastic wrap or clean cloth towel
Mortar and pestle or meat mallet
Spatula
Tip
Whether you’re using a store-bought or homemade cookie dough, be sure to use unsalted butter. This will work best with this type of cookie. Also, when making the cookies, it’s essential to use chilled dough. If the dough is at room temperature or too warm, it won’t hold its shape during baking. You’ll also need to repeatedly return the dough to the refrigerator to ensure it stays cool and firm, especially if it’s a hot day.
1. Cut out the crystal balls
Roll out the chilled sugar cookie dough on a floured surface. Using the cookie cutter, cut out as many crystal balls as you can. Be sure to re-roll and reuse the scraps.
Place them on a parchment-lined cookie sheet and then chill in the refrigerator for at least 15 to 20 minutes.
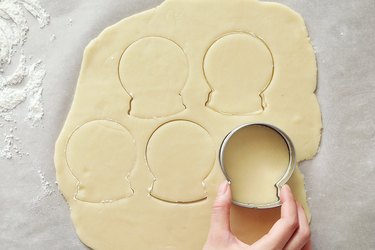
Next, cut out a circle from each crystal ball. This will be easier to do if the dough is chilled. Again, you can re-roll the scraps.
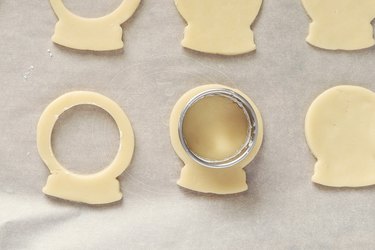
Return the cookie sheet to the refrigerator for at least one to two hours. You can loosely cover the cookies with plastic wrap or for a more eco-friendly option, a clean cloth towel.
Tip
Dip the cookie cutter into all-purpose flour before cutting the dough. This will help prevent the dough from sticking to your cutter.
2. Crush hard candies to make "glass"
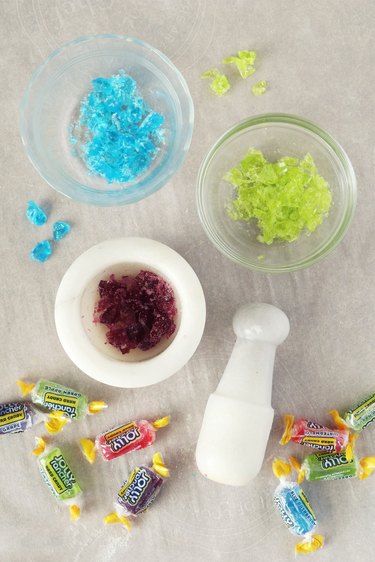
Just before you take out the dough, crush the Jolly Ranchers using a mortar and pestle. You can also place the candies in a resealable bag and crush them with a meat mallet. Just be sure to do this on a nonbreakable surface (i.e., not tile).
Line another baking sheet with parchment paper and preheat the oven to 325°F. (This is lower than what most recipes list, but low and slow is best for keeping the shape of these cookies. You can adjust it according to your oven and judgement but be sure to keep a close eye on your cut-out sugar cookies.)
Transfer the chilled crystal balls to the second nonchilled sheet. It's not recommended to place cold cookie sheets in the oven, as it might cause them to warp.
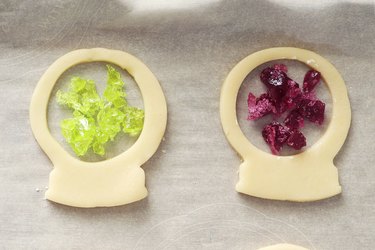
Fill 3/4 of each crystal ball with crushed candies and then immediately place the sheet in the preheated oven.
Tip
If you’re not quite ready to put the cookies in the oven, return them to the refrigerator until you are ready. The less time they spend at room temperature, the better.
Bake for 11 to 14 minutes or until the candy has melted and spread and the dough is slightly golden brown. The total time will depend on many factors, including your specific cookie recipe and oven.
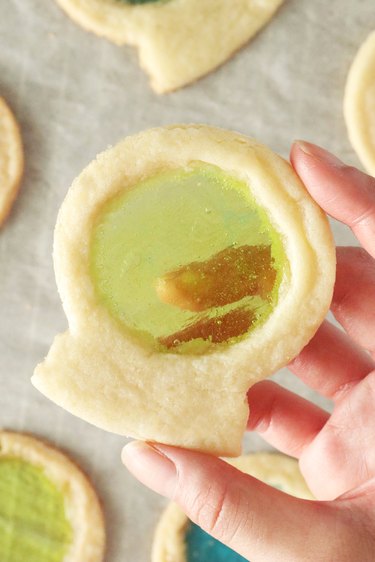
Consider baking one or two test cookies to start. This will help you determine the best cook time for your cookies and whether you need to add more or less candy filling.
Tip
It’s natural for sugar cookies to spread slightly in the oven. That said, about halfway through, you may want to remove the cookies from the oven and quickly reshape them. For example, you can use the back of a spoon to carefully tidy up the inner circle if needed. You can also place the crystal ball cookie cutter around the dough to help form its shape.
5. Let them sit until the candy “glass” completely hardens
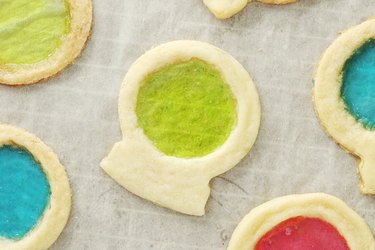
After the cookies are done baking, let them cool for at least 10 to 15 minutes before handling them. You can also carefully pick up the parchment paper and place it on a wire rack to cool.
The candy will slightly stick to the parchment paper, so be sure to remove the cookies slowly. A spatula is handy for this step.
6. It’s time to decorate!
Using a toothpick, add dots of decorative gel or icing to your cookies. Feel free to use your favorite icing recipe or a store-bought version.
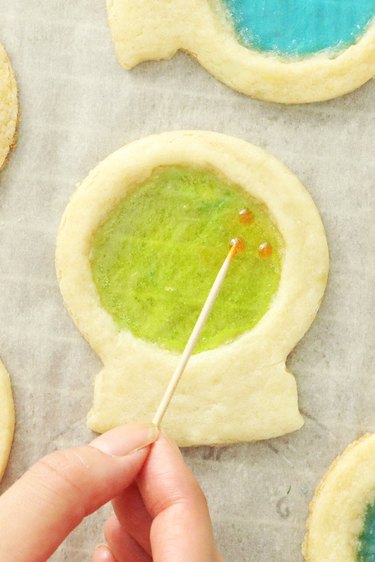
Next, add star-shaped sprinkles. And just like that, your decorative cookies are ready.

For an egg-free version of this recipe, replace each large egg with 1/4 cup mashed bananas or unsweetened applesauce. You can also use 1/4 cup pumpkin puree for a fun twist on pumpkin cookies.
Add a teaspoon of vanilla extract or almond extract to the dough for even more flavor. Simply add the extract to the mixing bowl when combining the wet ingredients.
To make colorful crystal balls, add gel food coloring to the cookie dough. You can also use a piping bag and black icing to create fun details on the finished cookies. For added flair, pipe a fun fortune message across the edge of the crystal ball.
If you love candy corn, consider sticking a few pieces to the bottom as tasty edible embellishments. You also can't go wrong with a sprinkling of powdered sugar.
No matter how you personalize these Halloween treats, be sure to store leftovers in an airtight container at room temperature.
Happy Halloween baking!