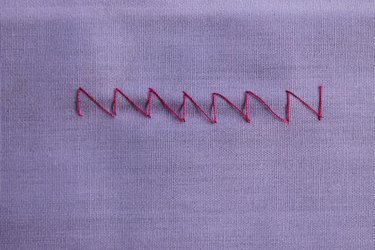
A zig zag stitch can be stitched on a sewing machine, but it can also be stitched by hand. A zig zag stitch is perfect when you want a seam that allows plenty of stretch, like seams on a knit fabric. Zig zag stitch can also be used as a decorative stitch when you use contrasting thread. You don't need any previous sewing skills to learn how to sew the zig zag stitch.
Things You'll Need
Sewing needle
Thread
Scissors
Video of the Day
Tip
A contrasting thread color is being used for demonstration purposes. You can use a contrasting thread if the zig zag stitch is decorative or you can use a thread to match the fabric for a more invisible stitch.
Step 1
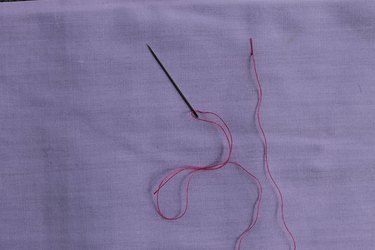
Cut a length of thread that's about four times as long as the length of the seam.
Video of the Day
Step 2
Thread the needle with thread, then tie a knot at the end of thread opposite the needle.
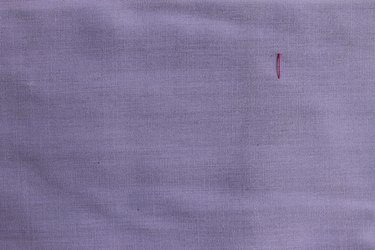
Step 3
Bring the needle through the fabric from back to front.

Tip
If you want to ensure that your zig zag stitch is the same size all the way across the fabric, use a ruler and washable fabric marker or tailor's chalk to draw two parallel lines on the fabric before you begin stitching. Work the zig zag stitch within these two lines.
Step 4
Insert the needle vertically above the needle's first entry from front to back, creating a straight stitch.
Step 5
Insert the needle from back to front, coming back up through the original entry point. The needle should now be at the bottom of the stitch you just created.
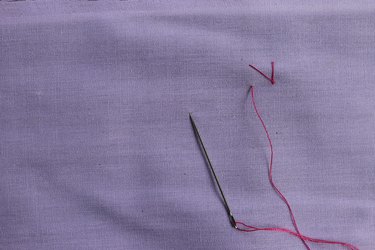
Step 6
Insert the needle front to back, placing it diagonally at a 45-degree angle from the original entry point. You should now have a diagonal stitch from the entry point. The stitch will look like a V that's leaning to the left.
Step 7
Insert the needle from back to front at the point just below the diagonal line, creating a straight stitch on the back of the fabric.
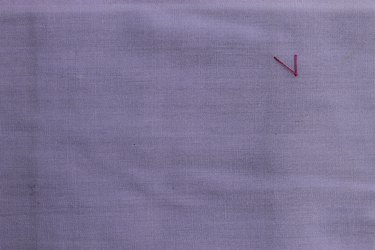
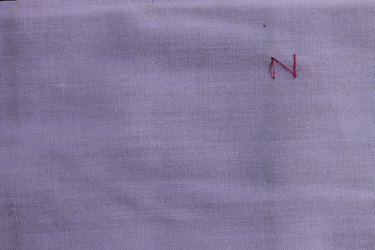
Step 8
Insert the needle into the point of the diagonal stitch, making a straight stitch to connect the threads. The stitches should now look like the letter N.
Step 9
Insert the needle from back to front, through the point at the bottom of the vertical stitch you just made.
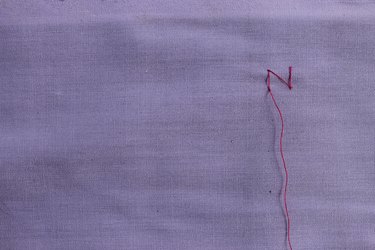
Step 10
Repeat steps 6-9 across the fabric until you have completed the length of the zig zag stitch you desire.