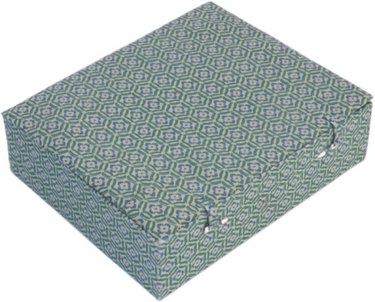
A paper cigar box is the perfect size for makeup, fashion accessories, office supplies, small tools, craft supplies or anything else you want to store attractively and have handy. Covered with fabric, a paper cigar box makes a personalized statement of your own unique style. It also makes a great gift box. You can make your own paper cigar box covered with fabric in no time at all.
Video of the Day
Things You'll Need
Ruler
Craft Box Latch (Optional)
Cotton Fabric Of Your Choice (Approximately 1 Yard)
Trims (Optional)
Scissors
Fabric Glue
Fabric Marker Or Pen
Step 1
Lay the fabric out on a flat surface with the underside facing up.
Video of the Day
Step 2
Place the cigar box in the upper left corner of the fabric and far enough from the edges that you have enough to pull up the sides of the box and at least 1 more inch.
Step 3
Trace around the bottom of the cigar box on the backside of the fabric with the pen or marker. Remove the box from the fabric.
Step 4
Measure the height of the sides of the cigar box from the bottom to the top lip and add ½ inch to this number.
Step 5
Measure that same distance from each of the four sides of the square shape now drawn on the underside of your fabric and place a marker point on the fabric outside your box lines.
Step 6
Draw straight lines parallel to the box lines outside each of the lines traced around the box.
Step 7
Cut the fabric along the lines of the larger-sized box you have drawn.
Step 8
Cover the bottom of the cigar box with fabric glue and place it in the center of the fabric square you cut. Be sure to line the edges of the box up with the lines drawn on the fabric. Press the box firmly onto the fabric to set the bond of the glue.
Step 9
Glue the outside walls of the box.
Step 10
Lift one corner of the fabric up along the outside of the box and fold it down over the top edge of the box corner. Pinch the two flaps created by this action into two tight folds, tucking the extra fabric inside the tuck, at the corner and press them into place. You may need to add a dab of glue at each side of the corner to hold the fabric in place, but you may already have enough glue seeping through the fabric from gluing it to the box, so test this out before you add more glue. Hold the folds in place until the bonding is set.
Step 11
Repeat step 10 for all four outside corners of the box.
Step 12
Line the top inside of the box with glue and press the raw edge of the fabric over the top along the front two side edges of the box.
Step 13
Press the raw edge of the fabric at the back of the box up over the back part of the lid and glue it in place.
Step 14
Trace the lid on the underside of the remaining fabric.
Step 15
Cut two pieces of the fabric ½ inch outside your tracing lines.
Step 16
Snip diagonally ½ inch into the center of each corner.
Step 17
Spread glue over the top of the cigar box.
Step 18
Tuck under ½ inch along the raw edge of one of the lid fabric pieces that will be lined up along the back of the lid where it hinges. Press it into place with the tips of your fingers.
Step 19
Lay the rest of the lid fabric in place and smooth it down with the palm of your hand.
Step 20
Spread glue over the inside of the lid.
Step 21
Take the second piece of lid fabric and lay it down on the inside of the lid.
Step 22
Smooth it down with the palm of your hand beginning in the center and press out toward the edges. Tuck under the raw edges of the fabric so they line up along the edge of the box lid and press them into place.
Step 23
Cut the trims to the desired length and glue them in place around the edges of the box and box lid.
Step 24
Place the craft hinges over the top of the lid and the outside of the box front and secure them with a dab of glue.