Things You'll Need
Paneling
Measuring tape
Level
Hammer
Nails (both framing and finishing types)
1-by-3-inch furring strips
Construction adhesive
Masking tape
Saber saw
Shims
Trim and mouldings
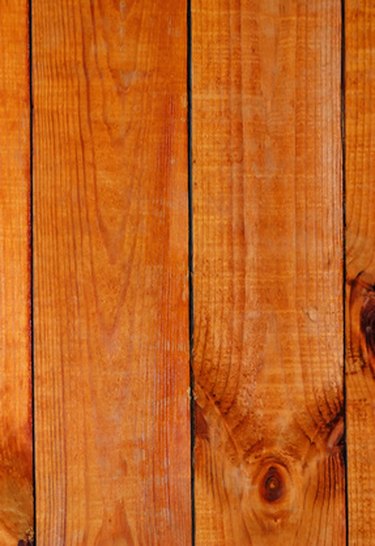
Paneling sometimes receives a bad rap due to older, cheaper installations where the paneling looked artificial. Today's paneling, however, provides you with a variety of styles and choices that can warm up your mobile home trailer and provide a "homey" look and feel. Simple to install, you can tear out your old wall covering and replace it with paneling, or attach the paneling over the old wall covering -- it's your choice.
Preparation
Step 1
Bring the paneling inside your mobile home two to five days before installation. Allow the paneling to acclimate to the temperature and humidity level; this helps eliminate expansion or shrinkage, which can cause problems with how the paneling fits once you install it.
Video of the Day
Step 2
Remove baseboard trim, door trim, electrical outlet covers and similar objects hanging on the walls. Clear the room of any obstacles that may hinder your paneling installation, such as couches and lamps.
Step 3
Remove the current wall covering, if desired. Nail 1-by-3-inch furring strips across the studs, starting 1/4-inch above the floor and repeating every 12 inches until 1/4-inch from the ceiling. Leave slight gaps between adjoining horizontal furring strips to prevent buckling.
Paneling Installation
Step 1

Apply construction adhesive to the furring strips where you will hang your first sheet of paneling and around the paneling edges. Create wavy stripes with the adhesive to help the glue bond.
Step 2
Place the first sheet of paneling against the edge of the adjoining wall, pushing it into the corner squarely to create a flush installation. Nail into place with finishing nails along the top and the bottom edges where the furring strips are, as well as in the corner where the paneling meets the wall (by definition this edge will have a stud under it, so nail placement is not critical.) Place nails down the opposite side of the paneling as well, driving nails into the furring strips. Repeat process for each sheet of paneling you install, letting paneling just barely touch at seams to prevent buckling and bowing.
Step 3
Cut away openings for electrical outlets or light switches by measuring from the closest sheet of paneling over to the electrical box. Measure up from the floor (or down from the ceiling) to determine the edges of the electrical box. Notate the height and width of the box, as well as the distance from the object and ceiling or floor.
Step 4
Transfer measurements to the back of a sheet of paneling, marking the exact outline of the electrical box according to the height and width, along with the spacing from floor or ceiling and edge of paneling. Put masking tape over the area you will cut before cutting with a saber saw or other saw to prevent rough, splintered edges. Cut around doors and windows similarly.
Step 5
Reinstall any trim you removed, adding shims as needed around door and window jambs to raise the trim level with the wall paneling. Nail trim to joints between paneling sheets, if desired, to cover edges.
Tip
Run a level across your walls before attaching furring strips, if applicable. Use shims to adjust the furring strips as needed to create a flat, plumb installation when you attach the paneling. The purpose of furring strips is to provide structural support so the paneling will not sag, along with providing a base to nail into. Place your first sheet of paneling against the wall before applying construction adhesive; hold a level against the side edge to determine it is level vertically, adjusting as needed to create a square panel. You can easily cover small gaps of less than 1/4-inch with trim.
Warning
Note that modern building codes sometimes require drywall behind certain wood paneling to create fire resistance. Check with local building authorities to determine if you can place the paneling directly over your stud wall, if desired.
Video of the Day