
Maybe you don't know how to knit or sew a handcrafted ornament, but everyone has the skills to make no-bake salt dough ornaments for the Christmas tree. The fact that they're basically foolproof and the easy salt dough recipe requires no special ingredients is the reason this is a classic Christmas craft project.
Making no-bake salt dough Christmas ornaments is a quick project with minimal prep time. Waiting for them to be finished, however, requires patience. Not having baking time for the DIY salt dough ornaments means you need to consider the drying process when calculating the total time needed to complete the salt dough creations. Air drying takes at least a few days before they are ready to hang.
Video of the Day
Video of the Day
Follow this step-by-step tutorial and simple salt dough recipe for a fun Christmas activity for the whole family. You can even get some gift tags and wrap up your salt dough crafts to give to friends and family.
Things You'll Need
2 cups all-purpose flour
1 cup table salt
1 cup warm water
Measuring cup
Mixing bowl
Rolling pin
Cookie cutters
Straw
Cookie sheet
Metal spatula
Parchment paper
Paint markers, stamps, glitter and/or acrylic paints for decorating
3mm suede lace
Make the salt dough ornaments
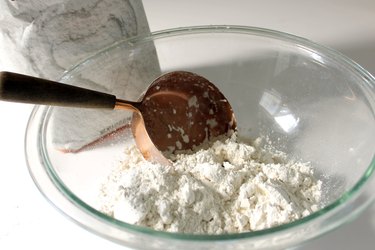
Measure out about 2 cups of flour and 1 cup of salt and pour it into a large mixing bowl. (Because you're not actually baking anything edible, it's OK if the measurements are approximate rather than exact.) Give the flour and salt a quick mix with clean hands or with a large spoon.
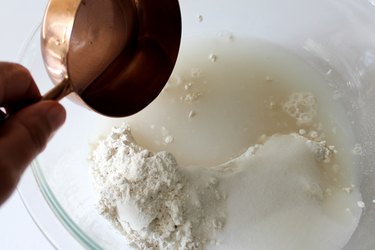
Add about 1 cup of water to the bowl.
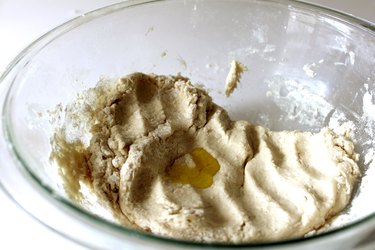
Mix the dough with your hands or a spoon until the ingredients are fully combined. Pinch a little between your fingers. The dough should feel stiff but still malleable like clay. If the dough feels sticky, mix in more flour a tablespoon at a time. If it's too dry, add a little more water. Knead the dough in the bowl or on a clean counter until you have a smooth ball.
Warning
If you have cats or dogs in your home, hang salt dough ornaments far out of their reach or skip them altogether. Because of the high salt content, eating even part of one of these ornaments could make a pet extremely sick.
Roll out the homemade salt dough
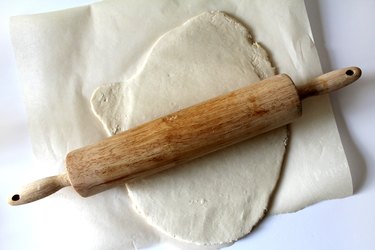
Transfer the ball of dough to a clean countertop dusted with flour. Using a rolling pin, roll the dough into a sheet about 1/4 inch thick.
Alternatively, lay down a sheet of parchment paper and roll out the dough directly on the parchment paper. You may need to have a second person hold the parchment paper still to keep it from moving while you roll the dough, but you won't have to clean the counter afterward.
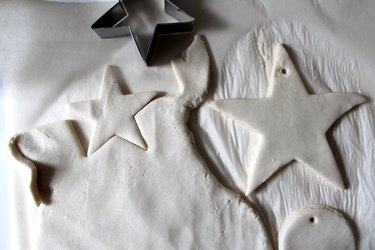
Cut out the ornaments
Use cookie cutters to create shapes in the dough. You may also use a sharp knife to cut out your own shapes.

Punch a hole near the edge of each ornament using a straw. Make sure the hole is large enough that you'll be able to string a piece of cord or twine through it to create a hanger.
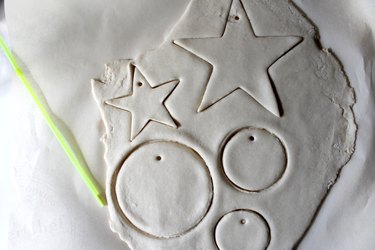
Carefully peel away all the dough from around your shapes and set these scraps aside. If the dough is already on parchment paper, move the paper and ornaments to a cookie sheet for drying. If the dough is directly on your counter, cover the cookie sheet with parchment paper and use a metal spatula to carefully lift and transfer the ornaments to the sheet. Form the dough scraps into a ball. Roll it out and cut more shapes.
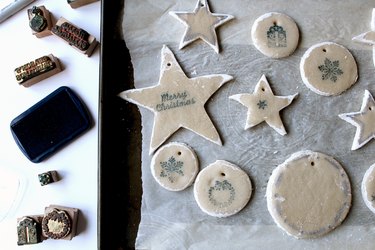
If you want to use stamps to create designs or texture in the ornaments, do it now while the dough is still soft. If you have children, you can have them make a handprint in the dough for a memorable keepsake
Dry the salt dough ornaments
Here's where the patience part comes into play. Not baking salt dough ornaments means they'll probably take at least a few days to dry enough to paint and hang from your tree. Set the cookie sheet someplace out of the way where no kids or pets can reach it. Flip the ornaments once a day until they feel completely dry and hard.

Tip
Can't wait a few days for them to dry? Baking ornaments is always an option. The most significant downside of baking ornaments is the risk that they'll crack in high heat. Set your oven to just 200°F and set a timer for around 30 minutes. How long baking ornaments takes depends on how thick you've made them, and it may ultimately take a few hours. Once the ornaments feel hard, turn off the oven and let them cool completely inside.
Decorate the no-bake salt dough ornaments
Now comes the fun part! Decorate your ornaments with paint markers or with paintbrushes and acrylic paint. Liquid glue and glitter will also work for decorating salt dough ornaments if you're willing to tolerate the mess. If you made a handprint ornament, be sure to mark the date and how many years old your child was when the ornament was made.
Cut pieces of suede lace or twine into pieces around 8 inches long. Thread one piece through the hole in each ornament and tie a double knot. It's time to decorate the tree!

Making salt dough ornaments is a fun way to add a personal touch to your holiday decorations. The recipe for salt dough is easy to follow; just be sure to plan ahead to allow plenty of time for the ornaments to dry before decorating. These ornaments are a fun holiday craft to get your whole family involved.