With gold leafing, adhesive, a sealer and a gilding brush from your local craft store or online craft retailer, you can add an elegant finish to any home furnishing and even turn a worn-out piece into one with an upscale and glamorous feel.
Things You'll Need
Gold leafing sheets
Leaf size (adhesive) in brush application or spray
Leaf sealer, in brush application or spray
Gilding brush
Foam brushes for brush-on size and sealer
Tip
- If your piece of furniture already has the finish you desire, you are ready to start gold leafing. If the finish is not what you want, update your piece with paint, or refinish it first. Gold leaf can be applied to any finish.
- A gold leafing kit may be available at some retailers and contains the first three items in smaller amounts.
- Gold leafing paint actually contains copper instead of gold and is not real gold leafing.
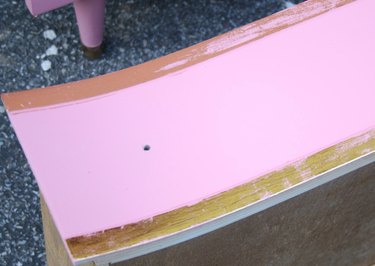
Step 1: Choose the Area to Gold Leaf
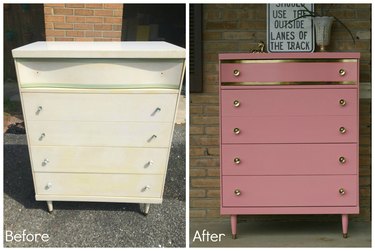
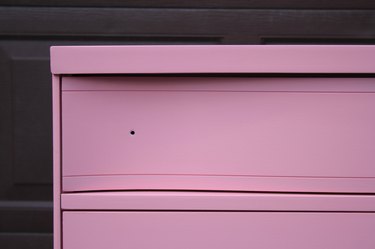
You will want to choose an area that makes sense, such as a raised detail or carving. In this case, this Mid-Century Modern dresser had a top drawer with two carved lines. The areas selected for leafing were those areas on the top and bottom of the drawer face highlighted by those lines.
Video of the Day
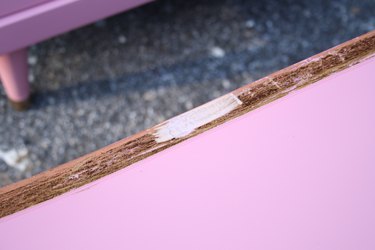
Step 2: Apply Adhesive
Apply your adhesive to the chosen area, and allow it to sit according to the manufacturer's directions (typically about 20 minutes) until the sizing is tacky to the touch. It will remain tacky, so don't worry about rushing through the next step. The adhesive will go on clear.
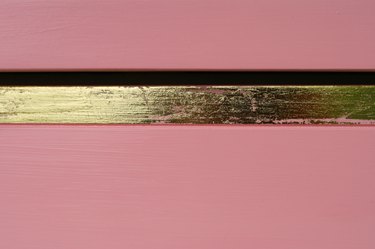
Step 3: Apply Your Gold Leaf
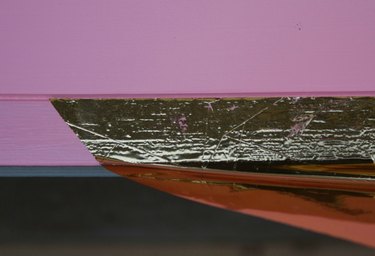
Gold leaf comes either with a plastic backing or tissue paper backing. Hold on to the backing and apply the leaf with the backing facing you. You may use your hands to apply and press, but if your piece if very detailed with intricate carvings and crevices, you will want to use a gilding brush, which has delicate bristles and can help press and guide the leaf into those hard-to-reach areas. Press or brush into the adhesive and peel the backing off. In this case, the gold leafing came on a transparent plastic backed roll, so it was easy to see exactly where the gold was being placed.
Step 4: Check for Adherence
Remove the backing and see where the gold leafing adhered.
If the leafing adhered perfectly, go on to the next step. If not, you can repeat the steps to this point, reapplying sizing. The sizing will appear white over the existing gold leaf at first, but it will quickly turn clear and again tacky.
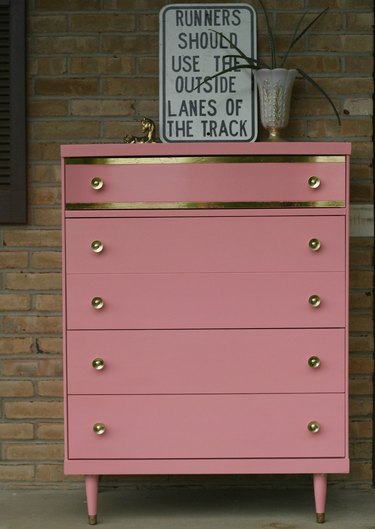
Step 5: Apply Your Sealer
In this case, a brush-on sealer was used. This is an important step, as it will protect your gold leaf and maintain its durability without altering the beauty and shine. It will also seal in any tackiness left over from the sizing.
That's it! In just five steps, you can gold leaf a piece of furniture and make it a showstopper.
Video of the Day