Things You'll Need
Janome Serger 644D
4 thread spools
Tweezers
Scissors
4 thread nets
Threading illustration

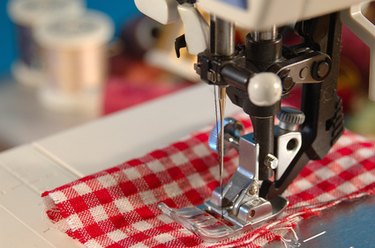
Sergers are challenging to thread, and the Janome Serger 644D is no exception. New sergers are prethreaded in the factory, from the tension discs to the needles. Simply add thread spools, connect them to the existing threads, and pull the thread through the machine. If your serger is not threaded, don't panic; the Janome 644D has a built-in illustration showing you step-by-step how to thread your machine.
Prethreaded
Step 1

Place thread spools on the spool pins located at the top rear of the serger. Place the thread nets over the spools. Pull the threads from the spools and tie each spool thread to its corresponding upper looper, lower looper, and left and right needle threads.
Video of the Day
Step 2
Raise the presser foot. Gently pull the threads through the serger until the knots are visible near the presser foot. Stop drawing the needle threads when you see the knots in front of the needle eyes. Cut the knots and thread the left needle, then the right needle.
Step 3
Gather all four threads. Pull the threads under the presser foot and toward the back of the serger, making sure to clear the needle plate.
Not Prethreaded: Replacing a Broken Thread
Step 1
Turn off the power switch and unplug the machine. Raise the presser foot and pull the thread chain out toward the back of the presser foot. Cut the chain and separate the threads.
Step 2
Review the illustration inside the looper door. Locate and replace the broken thread using the illustration as a reference.
Step 3

Turn the hand wheel toward you until the needle comes to its highest position. Pull approximately four inches of thread away from the presser foot and toward the back of the serger. You are now ready to sew.
Threading the Lower Looper
Step 1

Raise the presser foot, then place a spool of thread on the first spool pin on the right. Pull the thread from the spool, through the thread guide and holes, working from back to front.
Step 2
Hold the thread at both ends and tug gently to ensure the thread is correctly inserted between the tension discs. Guide the thread through the looper thread guide located above the looper compartment.
Step 3

Using the green illustration inside the looper cover, thread the lower looper. Draw approximately four inches of thread through the hole on the lower looper and toward the back of the serger.
Video of the Day
Threading the Upper Looper
Step 1
Raise the presser foot. Place the thread spool on the second spool pin from the right. Pull the thread through the holes and thread guide.
Step 2

Hold the thread at both ends and tug gently to ensure the thread is correctly inserted between the tension discs. Guide the thread through the looper thread guide located above the looper compartment.
Step 3

Using the red illustration inside the looper cover, thread the upper looper. Pull approximately four inches of thread through the looper hole and toward the back of the serger.
Threading the Right Needle
Step 1
Raise the presser foot. Place the thread spool on the second spool pin from the left. Draw the thread through the holes and thread guide.
Step 2
Hold the thread at both ends and tug gently to ensure the thread is correctly inserted between the tension discs. Using the blue illustration inside the looper cover, thread the right needle.
Step 3

Raise the needle to its highest point and pass the thread through the needle bar thread guide from right to left. Thread the left needle from front to back and pull the thread approximately four inches from the eye of the needle to the back of the machine.
Threading the Left Needle
Step 1

Place the spool of thread on the left spool pin. Draw the thread through the holes and thread guide.
Step 2

Hold the thread at both ends and tug gently to ensure the thread is correctly inserted between the tension discs. Using the orange illustration inside the looper cover, thread the left needle.
Step 3
Raise the needle to its highest point and pass the thread through the needle bar thread guide from left to right. Thread the left needle from front to back and pull the thread approximately four inches from the eye of the needle to the back of the machine under the foot.
Tip
Read the user’s manual completely before attempting to thread a serger, and familiarize yourself with the threading illustration found inside the looper cover.
Warning
Never thread the machine while it is plugged in and turned on as the cutting blade in the machine may cause injury.