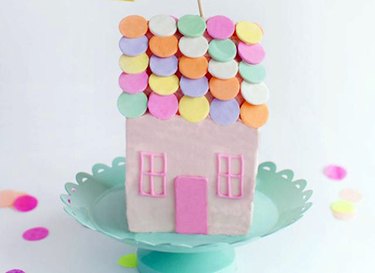
A house cake can be perfect for a fun themed party or to congratulate a friend on their new house. It's not too difficult and you only need the basic cake supplies.

Things You'll Need
3 6-inch cake pans
2 boxes of cake mix
1 container of frosting
Food coloring
Necco wafers
Icing bags
Fine point icing tip
Knife
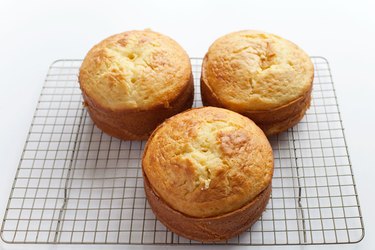
Step 1: Bake the Cakes
Mix the cake batter according to package directions and fill up all 3 cake tins. Bake each cake until a toothpick inserted into the center of the cake comes out clean. Then set them on a rack to cool.
Video of the Day
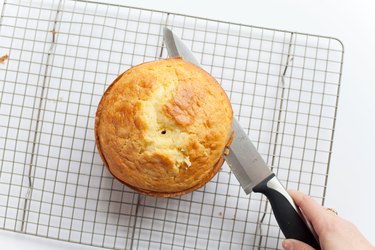
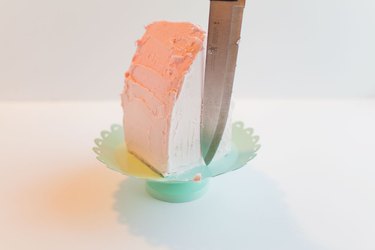
Step 2: Shape the Sides of the House
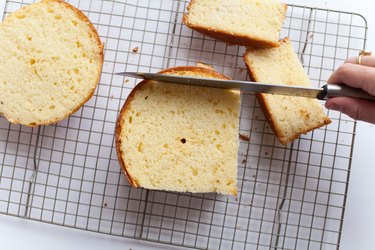
Take two of the cakes and slice off the top to form a flat, even layer. These two cakes will form the main part of the house.
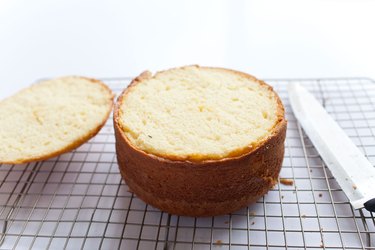
Next, cut off the rounded sides of both cakes to form two identical square shapes. Try to cut as close to the edge of the circle as possible to maximize the amount of cake remaining.
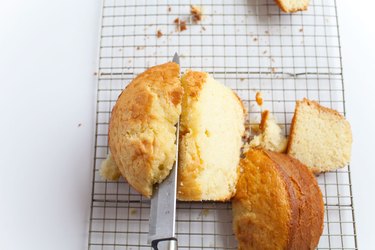
Step 3: Slice the Roof
Take the third cake and position your knife at the top center. Cut downward at a diagonal slope toward the bottom left edge. Then make a similar cut toward the bottom right edge. This will form your roof.
Step 4: Assemble the House
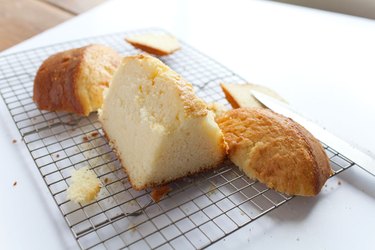
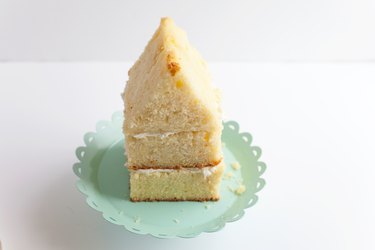
Layer the cake so the two squares are stacked with the roof on top. Assess if there are any sides or pieces that may need to be trimmed, and adjust your cakes accordingly.
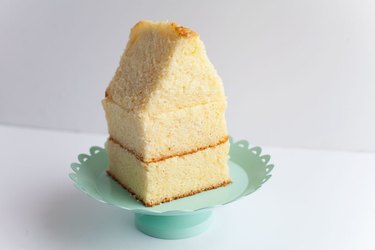
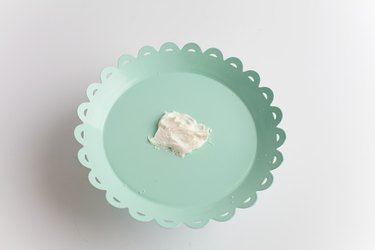
Once all the pieces match up you can start to put them together with the frosting. First put some frosting onto the cake plate, to keep the cake from sliding.
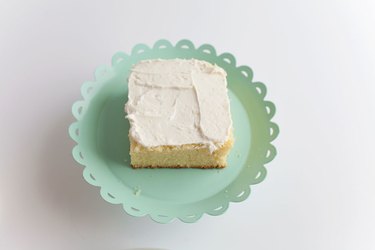
Then put on the first piece of the house cake, and frost the top.
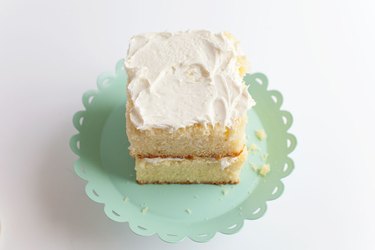
Then do the same for the next piece of the house cake.
Lastly put on the roof.
Step 5: Frost the Cake
Once all the pieces are put together it is time to frost the whole cake. Start by doing a layer of frosting. It doesn't have to be perfect, but somewhat smooth.
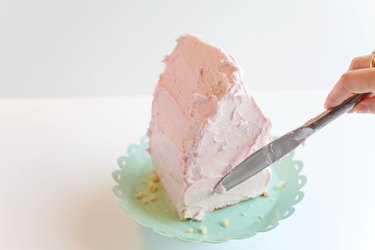
Put the cake in the fridge so the frosting hardens a little. Then apply the second layer of frosting. This time smooth out the cake. You can use anything with a flat long edge - A spatula, knife or a cake frosting tool.
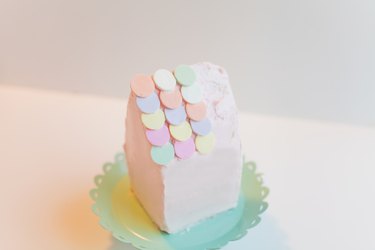
Step 6: Decorate the Cake
Once the frosting is smooth, it's time to decorate. Necco wafers make excellent shingles for the roof. Apply a small amount of frosting to each wafer and then stick on the the cake. Start from the bottom up and apply in rows.
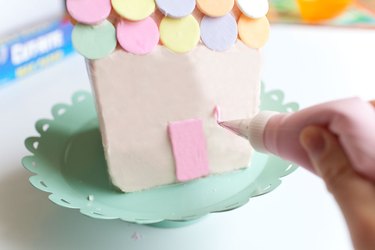
Next you can put on the doors and windows. Using left over frosting in a piping bag mixed with food coloring, or you can use royal icing for a smooth finish.
Put in a cake topper, or simply display the cake as is. Either way, your guests are bound to be impressed!

Video of the Day