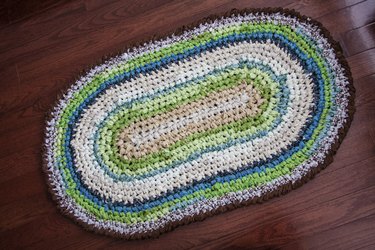
There's nothing cozier for your feet on a cool morning than a rug crocheted with super-bulky yarn; work it up in an oval spiral and you'll have a versatile floor covering that fits almost anywhere. That oval spiral also looks a lot like the charming rag rugs of yore. You can get even closer to that look by using recycled cotton "T-shirt" yarn to crochet the rug.
Materials Needed
Video of the Day
You'll need the following materials to crochet an oval rug:
Video of the Day
- Size M to size Q crochet hook -- it may take a little trial and error to find the right size.
- Super-bulky yarn, or several strands of worsted weight yarn held together.
- Scissors.
Gauge doesn't matter for this project, so you don't need a ruler and you don't need to work up a gauge swatch. You'll also need to know how to work chain and single crochet stitches.
Crocheting the Rug
Work a tight series of chain stitches that's about half as long as you want the finished rug to be. This will be the long axis of your oval.
Work a single crochet in the second chain from the hook, and continue working one single crochet in each chain except the last chain.
Work three single crochets into the last chain; these are your turning stitches. Single crochet back along the bottom of the starting chain, working three single crochets into the bottom of the last chain. These are also turning stitches.
Continue working single crochets around the start of your rug until you get to the turning stitches. Work two single crochets into each turning stitch -- now you have six turning stitches. Crochet back along the other edge of the rug and work two single crochets into each turning stitch again.
The next round establishes your pattern for the rest of the rug. Single crochet all the way down its length until you get to the turning stitches. Work two single crochets into the first three turning stitches -- these become the new turning stitches -- and then work single crochets until you reach the last three turning stitches on that end of the rug. Work two single crochets into those last three turning stitches; these become another set of new turning stitches.
Continue repeating the pattern around the rug -- a total of six turning stitches at each end -- until it reaches the desired size.
Finishing the Rug
Cut the yarn, leaving an 8-inch tail. Pull that tail through the last stitch on your crochet hook, and tug on the tail end to cinch down the final stitch. Then use the crochet hook to weave the loose tail back into the rug, switching directions a couple of times to ensure it won't unravel.
A Couple of Improvements
Crochet rugs are best done up plush and thick. If you don't have the thick yarn you need to make a soft, thick rug, you can make your own by cutting knitted sheets into 1-inch strips, or hold three or four strands of worsted-weight yarn together as you work.
If you're putting your rug on top of carpet, you probably don't need to worry about nonslip pads. But if you're putting a handmade rug on tile, vinyl, wood or any other smooth, slick flooring, you should stitch or glue a nonslip pad to the bottom of the rug. You might occasionally find nonslip pads in craft stores, but they're easiest to find in home improvement stores. For a quick, inexpensive alternative, use the same sticky nonslip shelf liner you'd put in your kitchen cabinets, and cut the liner to size.