
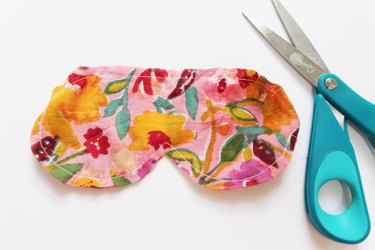
Handmade remnant fabric sleeping masks deliver big on beauty rest - they're the perfect gift for new moms in need of shut-eye or jet-setting friends enduring time zone shifts. Keep a few around the house for when you need a little R&R - they're also a nice (and easy!) addition to any guestroom night kit.
Things You'll Need
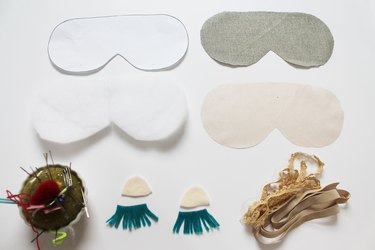
Cotton fabric scraps
Felt
1/2 inch elastic
Straight pins
Decorative trim
Sewing machine
Coordinating thread
Scissors
Mask template
Poly batting
Pencil
Iron and ironing board
Fabric glue (optional)
Video of the Day
Step 1: Print Template and Cut Pattern Pieces
Print and cut out a mask template from the free download here. Cut out one front mask piece, one back mask piece, and one poly filler piece.
Video of the Day

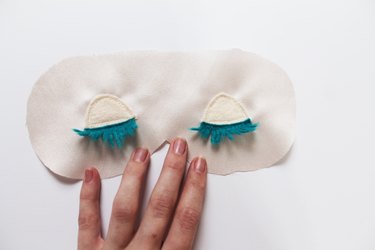
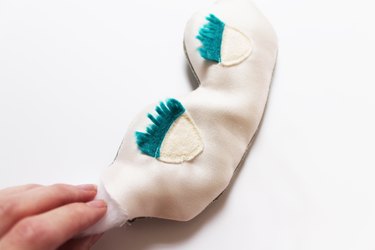
Step 2: Add Appliqué Details
If you would like to add felt appliqué facial features, cut them out and top stitch them onto your mask.
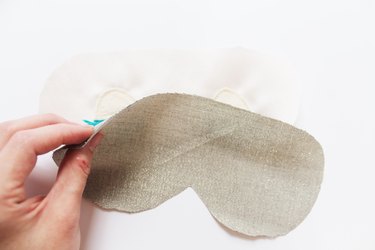
Step 3: Pin and Sew
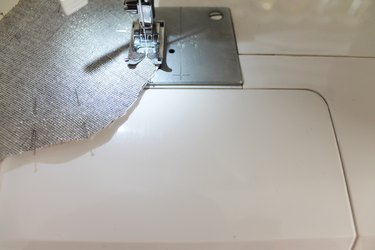
Align both mask pattern pieces right-sides facing in, and pin around the outside edge.
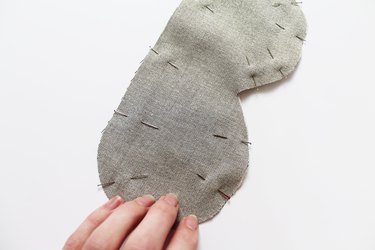
Align the presser foot with the edge of the fabric and sew a straight stitch along the edge of the mask, leaving a 2-inch gap on either side.
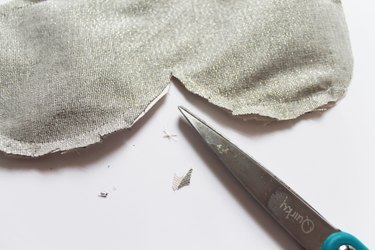
Step 4: Snip Curves
Before turning right-side out, snip 1/8-inch cuts along the curved edges of the mask. Cut a notch at the nose of the mask an 1/8 inch away from the seam to create a sharper corner when inverted.
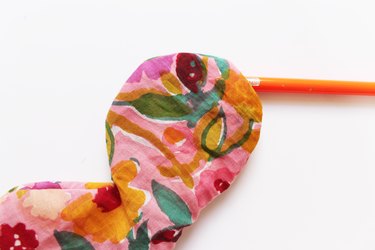
Step 5: Turn Corners
Gently turn your mask right-side out, using a pencil eraser to help round out the edges.
Tip
Press your mask before adding filling or attaching elastic.
Step 6: Insert Batting
Fold the poly batting in half and gently work into the side of the mask -- use a pencil eraser to work into corners if needed.
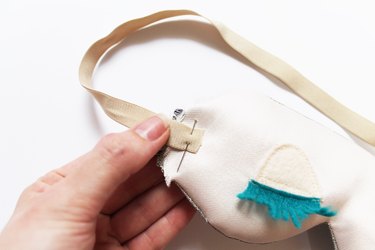
Step 7: Measure and Attach Elastic
Temporarily pin elastic to the sides of the mask to measure around your head for a comfortable fit. Give yourself a 1/4 inch extra on each side to insert into open side seams. Fold in extra seam allowance, insert elastic and pin before sewing into place.
Tip
Use a fun pompom trim to hide stitches attaching elastic.
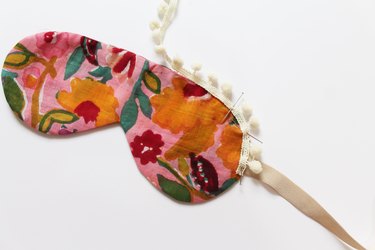
Step 8: Add Trim
Pin trim along the mask edge and secure with a topstitch or fabric glue.
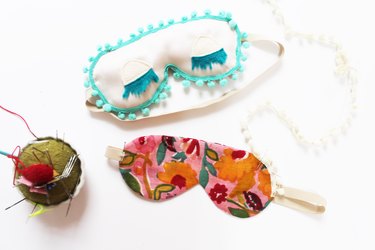
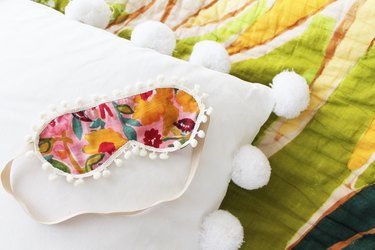
Enjoy stylish slumber with your new hand-sewn sleeping mask. Add pockets to the eyes of your mask for dried lavender sachets or cooling gel packs for a spa like experience.
Have questions or ideas for cute sleeping masks? Leave them for us in the comments below!