Things You'll Need
Prepared sushi rice
Nori sheets
Fillings, such as cucumber, jalapeno, avocado, tuna, salmon, crab, cream cheese, asparagus, snow peas, carrot, green onion
Small bowl of water
Sharp knife
Bamboo sushi mat or a 10" x 10" square of heavy tinfoil
Cutting board

Making sushi at home is a satisfying undertaking that is attainable for almost anyone. No specialized equipment is necessary – only a little patience and the willingness to learn a new technique. The results are sure to impress even the most critical guest, and another perk is that picky eaters can make their rolls to order.
Sushi: Roll With It
Step 1
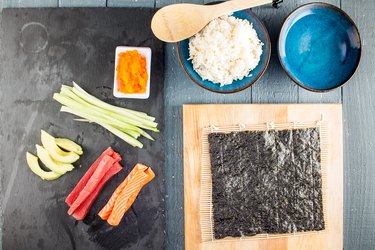
Set up the work station. Sushi rolls have a lot of parts, and ease of access is crucial to having a positive sushi-making experience. Central to the station is a sushi mat or square of heavy-duty aluminum foil where the sushi will actually be rolled. Within arm's reach lay the rice, prepared fillings, a small bowl of water for sealing the roll and a clean plate or cutting board for collecting the rolls as they are finished and before cutting.
Video of the Day
Step 2
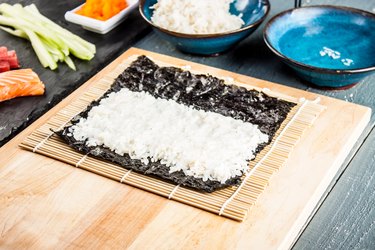
Spreading the rice on the nori takes some practice. With a square of nori placed on the sushi mat, scoop 1/2 cup of rice into the bottom center of the nori. Moisten fingers and begin pressing and molding the rice to cover the bottom half to three-quarters of the sheet, depending on the size of the desired roll. The rice may extend all the way to the sides, but always be sure to leave at least 1/2 an inch of exposed nori at the top – this will be where the roll is sealed.
Step 3
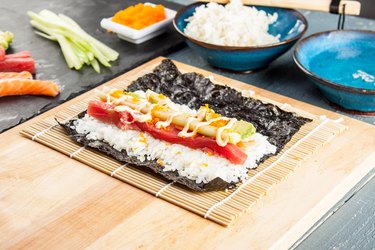
Lay the desired fillings in a thin strip along the bottom of the roll, about an inch from the edge. Press the fillings firmly into place as they are added and be careful not to over stuff the roll.
Step 4
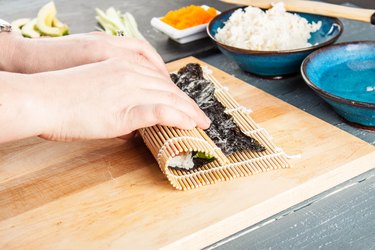
Tightly roll the nori from the bottom up, using the mat or foil to hold it and press it together as it's rolled. Keeping the roll firm and tight is key to preventing it from falling apart when it's cut. Right before the end is reached, dab water along the top swath of nori before rolling it sealed. Press the roll firmly to squeeze out any air and seal it completely.
Step 5
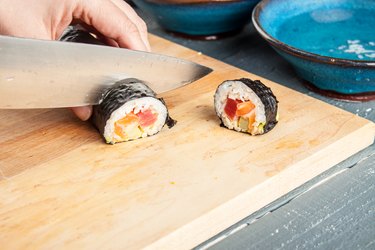
Use a sharp, clean knife to slice the sushi into desired thickness, anywhere from 1/4- to 1/2-inch wide. It is important to be gentle in this step so that the roll doesn't get squashed during slicing. A serrated knife will do, just be sure to make quick, light slicing motions rather than pushing the knife straight down.
Tip
For reverse sushi rolls where the rice is on the outside, first wrap the bamboo sushi mat in plastic wrap to prevent sticking. Press the rice on the paper as in a regular sushi roll, and then flip the nori around so that the filling goes on the plain nori side. Roll it up firmly. The rice will hold the roll in place. Alternatively, use any open-ended mold such as a cookie cutter to press the rice firmly into, about 1/2-inch thick. Remove the mold and top the rice shape with sashimi-grade fish and a slice of nori, if desired.
Warning
Always use sashimi-grade fish if eating it raw. Cook non-sashimi grade seafood to appropriate temperatures or until opaque all the way through.
Avoid cross-contamination of non-sashimi grade raw seafood with fresh veggies and nori by using a separate cutting board and knife or washing with hot soapy water in between cutting the fish and cutting the vegetables.
Always use caution with knives. Sushi knives should be very sharp for cutting through the rolls without squashing ingredients. Watch the fingers.
Video of the Day