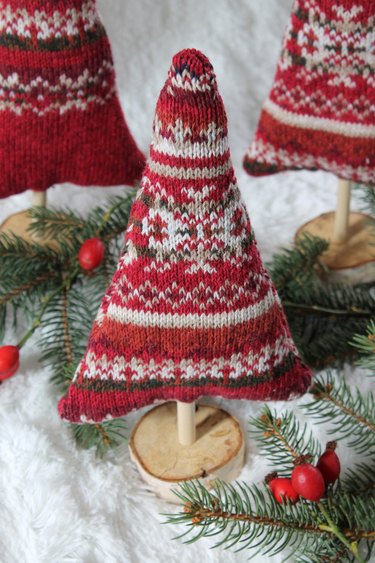
Ah, the sights, sounds and smells of the holidays: it's what fond memories are made of. But let's not leave out the importance of soft textures during this time of year, too — after all, feeling cozy is definitely a part of the celebration! If you've noticed that some of your cold-weather layers aren't fitting as well as they used to, then turn the most festive ones into "sweater trees" to place on your mantel this season. Whichever sweater you choose, these decorations will help transform your home into a winter wonderland with quirky and unexpected charm.

Video of the Day
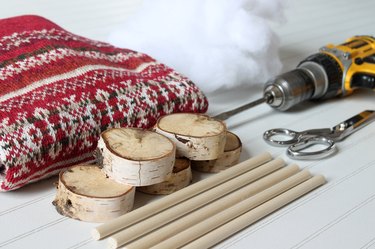
Things You'll Need
Pre-loved sweater
Scissors
Straight pins
Stuffing
9 inch x 3/8 inch wooden dowel
Needle and thread
Wooden base (pre-made or cut from a birch branch)
Drill
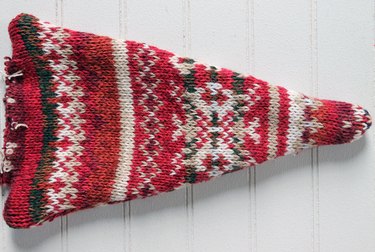
Step 1: Cut Two Triangles From a Sweater
Measure out a triangle that highlights the pattern you'd like to use onto the sweater. Use a pair of sharp scissors to cut out the triangle through both layers of the sweater.
Video of the Day

Step 2: Pin Together
Flip the triangular sweater pieces so that the right-sides of the sweater are facing each other. Pin along the two long sides of the triangles and part of the bottom edges. Leave a 3-inch or 4-inch opening in the bottom.

Step 3: Sew the Pieces Together
Sew a 1/4-inch seam along your pin lines, removing the pins as you sew. Leave a 3-inch or 4-inch opening on the bottom edge.

Step 4: Turn the Tree Right-Side Out
Pull the fabric through the bottom opening to turn the sweater tree right-side out. Use the eraser end of a pencil to push out the corners.
Step 5: Fill With Stuffing
Fill the tree with stuffing through the opening in the bottom. Keep filling until the tree has your desired fullness.

Step 6: Insert the Dowel and Hand-Sew the Bottom Edge
Place the wooden dowel into the stuffing and situate it so that the dowel is in the center of the bottom edge. Fold the raw edges inside, and hand-stitch across the bottom of the tree.

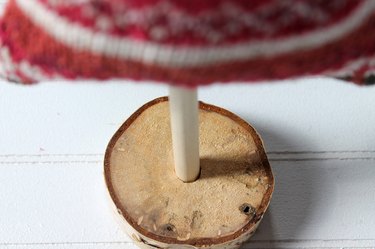
Step 7: Drill a Hole Into the Base and Insert the Dowel
Now, use a drill to make a 3/8-inch hole in the wooden base.
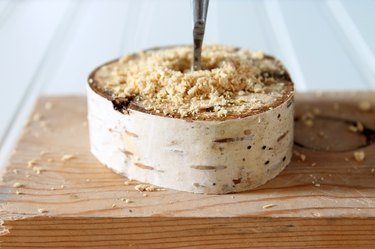
Insert the dowel into the hole.
Step 8: Deck Your Halls
Make several trees from your old sweaters, and then deck your halls with handmade cheer.