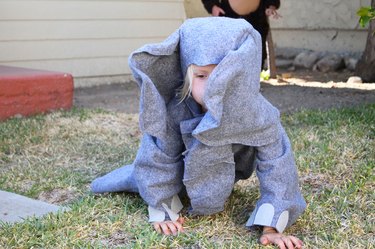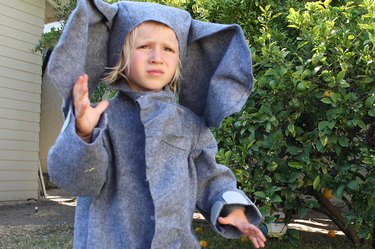
Make this cute elephant costume for any size child with some felt, wire, and a sewing machine. A printable DIY Halloween costume pattern is included that can be enlarged to scale for any size. Only basic sewing skills, like stitching around a curve, are required to put together this easy DIY elephant costume.
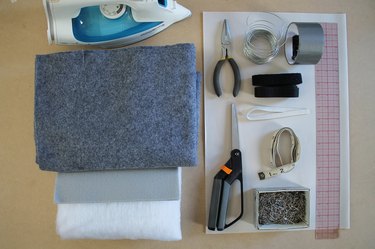
Things You'll Need
Tape measure
Pattern paper
Ruler
2 yards gray felt or fleece
1 sheet of light gray or white felt
Pins
Scissors
1/2 yard batting
All-purpose sewing thread in gray
Sewing machine with a standard all-purpose needle
16-gauge wire
Wire cutters
Iron
Duct tape
1/4-inch elastic
1/2-inch sew-in hook-and-loop tape
Felt glue or hot glue gun and hot glue
Video of the Day
Measure and cut
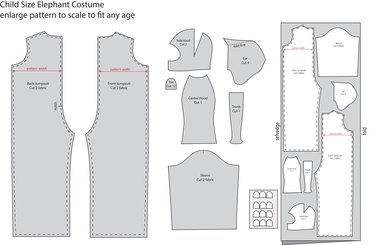
Measure around the chest of the child with a tape measure. Add 2 to 8 inches ease to that measurement depending on the size and loose fit desired. Divide that number by four to get the pattern width measurement. For example, a small kid's elephant Halloween costume may only need 2 inches of extra ease, while a 10-year-old may want 8 inches of extra room in the costume.
Video of the Day
Print and enlarge the pattern provided to scale until the pattern width measurement is the same as the width of the front jumpsuit at the red line. Check the length of the sleeves and legs and adjust as needed for the child.
For example, if the chest circumference is 20 inches with 2 inches of ease, then the pattern width would be 5 1/2 inches. If the chest circumference is 40 inches with 8 inches of ease, then the pattern width would be 12 inches. Print and enlarge the pattern to scale until the pattern width measurement matches the pattern width on the jumpsuit. In this case, the width of the pattern would be enlarged to 5 1/2 inches.
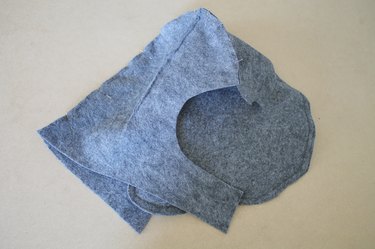
Pin the pattern pieces to the fabric as shown and cut out the pieces as indicated on the pattern.
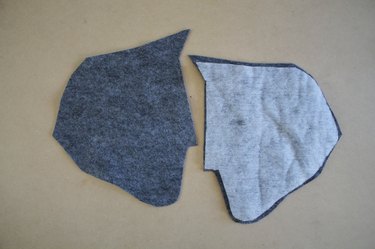
Add batting to the ear
Cut out a piece of batting using the ear pattern piece. Trim the edges approximately 1/4 inch on all sides so that it is slightly smaller than the felt pieces. Place the batting between two pieces of felt.
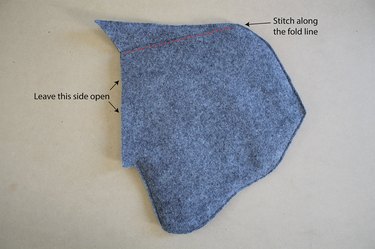
Sew the ear pieces together
Sew the three layers together around the perimeter of the ear and close to the edge as shown. Leave the straight side of the ear open. Stitch all three layers together along the fold line. Repeat this step for the second ear.
Tip
Align the edge of the fabric with the edge of the presser foot as you sew to get an even topstitch close to the edge of the fabric. A topstitch is when you sew through several layers of fabric on the top side of the fabric.
Add a wire support
Cut a piece of wire that is the length of the top edges of the ear as shown.
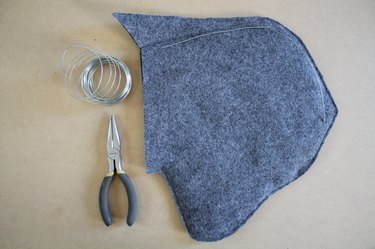
Wrap a small piece of duct tape around the sharp ends of the wire.
Make a channel for the wire
Place the wire inside the ear between the top layer of felt and batting. Push it up close to the seams and pin along the wire to keep it in place. Slowly sew along the pin line and remove pins as you sew. Use your fingers to feel the wire to ensure you do not sew over the wire and break a needle.
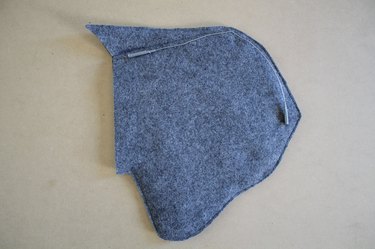
Finish the elephant ear
Stitch the bottom edges of the ear and the top edge of the fold 1/4 inch from the first stitch line. Fold the top of the ear down as shown and pin it in place. Sew along the straight edge of the ear to secure the folded edge.
Pin the ear to the hood
Lay the straight side of the ear along the edge of the dart line as shown. Keep the ear approximately 1/2 inch below the top edge to allow for seam allowance.
Sew in the ear
Fold the front of the hood over the ear and line up the raw edges of the dart with the raw edges of the ear. Sew all layers together 1/4 inch from the edge. Repeat this step for the second ear.
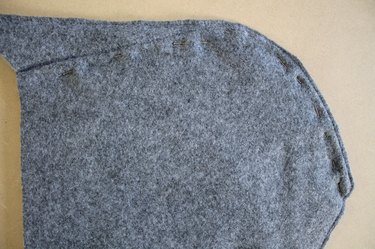
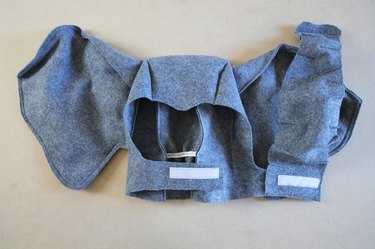
Sew the hood together
Pin the center piece of the hood to a side piece of the hood with right sides together. Sew 1/2 inch from the edge of the fabric around the curve. Use the sewing machine hand wheel to move one stitch at a time around the curve if needed. Repeat this step for the opposite side hood piece to sew it onto the center hood.
Tip
When sewing around a curve, place the fabric with the curve facing up like a bowl. Use the sewing machine hand wheel to move one stitch at a time slowly around the curved edge. To go around a sharp curve, place the needle down in the fabric and lift the presser foot. Turn the fabric slightly and lower the presser foot to continue stitching.
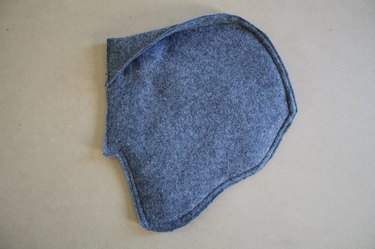
Iron the hood seam
Turn the hood right-side out. Place the curved seam around the edge of an ironing board. Iron the seam allowance down to one side.
Add the elastic
Cut a piece of elastic about the width of the center piece of the hood at the neck. Stitch the elastic down at one end, backstitching it to the hood to secure. With the sewing machine needle still lowered into the fabric and elastic, pull the elastic tight and sew over the stretched elastic. Trim the excess elastic.

Shape the elephant trunk
Make small darts in the trunk by pinching the fabric at the edge and sewing a diagonal line. The darts will add volume and shape. The darts on the top half of the trunk should be facing out with the pinched fabric on the top front of the trunk.
The pleats on the bottom half of the trunk should be folded so that the pinched fabric faces the back of the trunk. This will create an "S" shape in the trunk.
Continue to add darts in random sizes and directions. Add one or two darts at the bottom of the trunk with the pinched fabric facing forward.
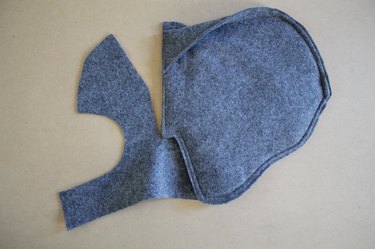
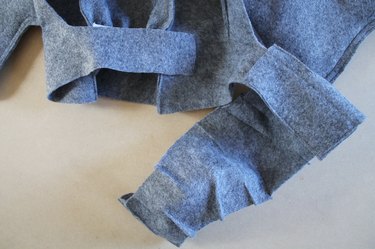
Attach the trunk to the hood
Lay the hood flat and fold the chin straps over each other at the center. Place the trunk on top of the chin straps and move it around until it is centered with the face opening.
Fold the top edge of the trunk over the chin strap and topstitch around all four sides.
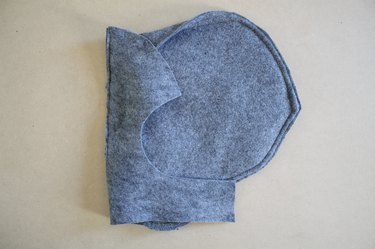
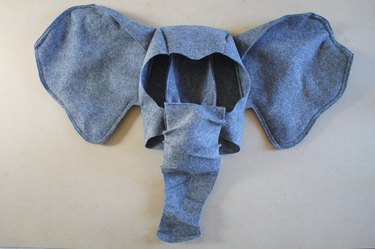
Add a closure
Cut a piece of hook-and-loop tape 2 to 3 inches long and place it between the two chin straps. Open one chin strap and place the opposite piece of hook-and-loop tape face up as shown. Topstitch the hook-and-loop tape around all four sides to secure it to the hood, completing the elephant mask.
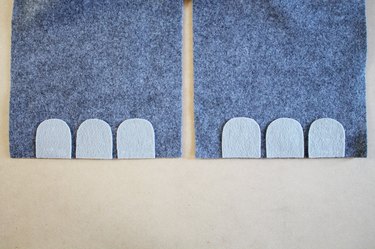
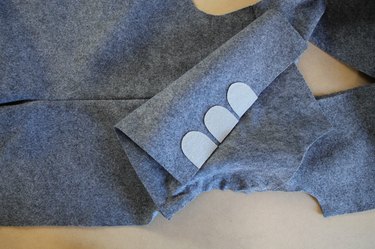
Make and secure the toenails
Cut out 12 toenails in a contrasting color of felt and lay them on the bottom edge of the sleeves and front leg pieces. Align the toenails on the sleeve toward the front side as shown. This will ensure that the toenails face forward on the arms of the costume rather than out to the side. Use felt glue or a hot glue gun to secure the toenails in place. You can also topstitch them in place for more security if desired.
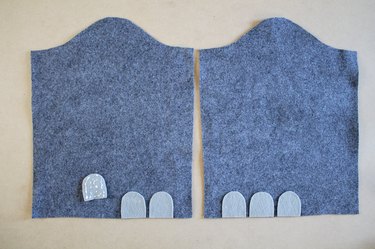
Center the toes at the bottom edge of the leg pieces and secure them with glue.
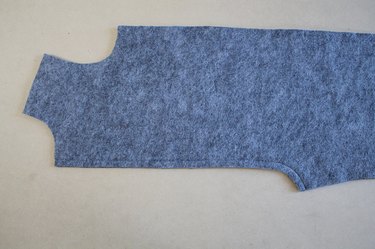
Sew the jumpsuit
Pin the two front jumpsuit pieces with the right sides of the fabric together. Sew a seam along the center front 1/2 inch from the raw edge. Pin the back jumpsuit together along the center back seam with right sides together. Sew a seam 1/2 inch from the edge below the notch. Leave the center back open above the notch to allow for hook-and-loop tape.
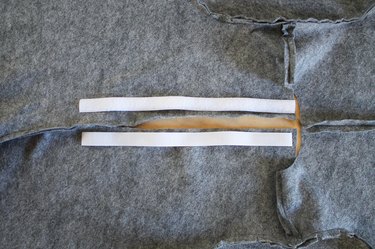
Add a closure
Cut a piece of hook-and-loop tape the length of the opening at the center back. Fold the seam allowance under 1/2 inch and sew one piece of the hook-and-loop tape onto the inside of the jumpsuit over the seam allowance. Topstitch through all layers. Sew the second piece onto the opposite side so that the hook-and-loop tape will lay over the first piece and close the jumpsuit.
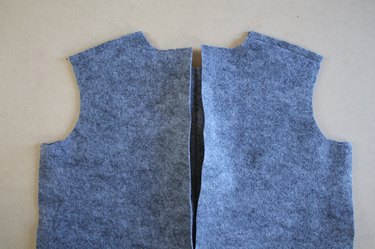
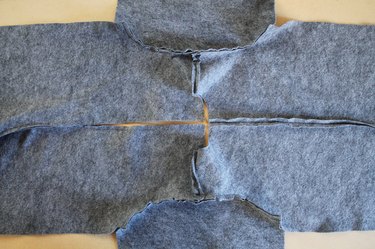
Sew the shoulder seam
Pin the right sides of the front and back jumpsuit together at the shoulders. Sew a seam 1/2 inch from the raw edge.
Sew in the sleeve
Lay the jumpsuit flat and pin the sleeve to the armhole. Position the toenails to face the front of the jumpsuit. The sleeve should lay flat at the armpit and buckle at the shoulder of the armhole. Stitch a seam 1/2 inch from the edge. Repeat this step for the second sleeve.
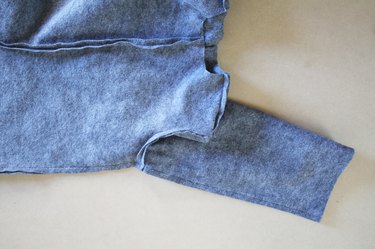
Sew the side seam
Lay the jumpsuit flat and pin the front and back pieces together at the side seam. Sew the side seam 1/2 inch from the edge from the ankle to the wrist. Backstitch at the armhole for a reinforced stitch.
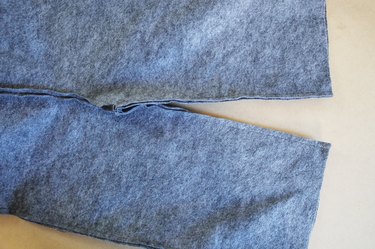
Stitch the inseam
Lay the pant legs flat and pin the front and back leg of the pantsuit together at the inseam. Stitch the seam closed 1/2 inch from the edge.
Turn the elephant costume right-side out
Turn the inside-out elephant costume right-side out.

Time to play
Dress your little one in your new DIY elephant costume. You're ready for trick-or-treating, Halloween party time or some jungle dress-up cosplay, which is especially fun with kids in other animal costumes!