Things You'll Need
Measuring tape
Cabinets to fit area
Screwdriver
Wood screws
Temporary plywood countertop
Planning a kitchen island with a slide-in range takes some extended thinking, as you will need to account for electrical or gas hookups and for a ventilation system. The electrical system can be run underneath the floor to come up inside an open cabinet where the electrical outlet can be installed. An overhead vent may prove to be tricky when you consider running the exhaust vents through the ceiling to the outside. Get quotes on how much it costs, based on your current kitchen layout, or use a range with a downdraft system installed.
Step 1: Measure for Your Kitchen Island With Slide-in Stove
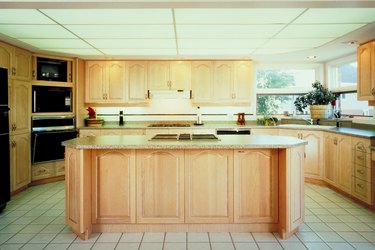
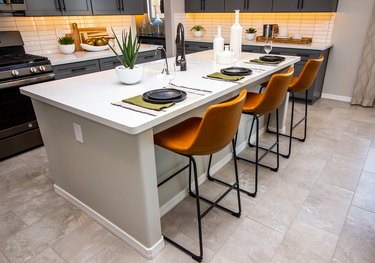
Measure the area where you plan to build your kitchen island with slide-in stove. Slide-in ranges are between 30 to 48 inches wide, 24 inches deep and 36 inches high, with no back rise. Controls are on the front of your range. Base cabinets come in standard sizes of 12, 15, 24, 28, 30 and 36 inches wide. All will be 34 1/2 inches high and 24 inches depth.
Video of the Day
Step 2: Choose Drawer Cabinets
Select drawer cabinets that hold cooking utensils and use larger cabinets to hold your cooking pots and pans.
Step 3: Leave Yourself Some Space
Leave enough walking space around your island design, roughly 36 inches or more, from your other wall cabinets and refrigerator. Always have enough walkway around the island so you are not cramped when moving from place to place.
Step 4: Add Cabinets and Shelving

Add cabinets on the other side in your design, if you have enough room, or plan to add decorative paneling as a finishing touch. You can also add shelving on the side and plan for the countertop to stick out about 10 inches from where the slide in range meets the cabinet back.
Step 5: Create Adequate Seating Space
Use the extra countertop depth as a place to seat folks so they can talk with you while you cook. There should be enough distance to avoid any grease splatter accidents, however.
Step 6: Call In the Electrician
Call in a certified electrician to decide where to put outlets for the range and refrigerator, and how best to extend the wiring under the floor. Find out what you need to have an overhead vent installed or set underneath for the downdraft system, and have the work completed before you install the cabinets.
Step 7: Make a Range Case
Once done, build a case for your range, consisting of two sides and a back. Begin installing your range and cabinets, making adjustments as you go along. Avoid bolting anything in until you have everything placed properly. Use 2-inch spacers between your slide in range and the cabinets on either side. Always leave enough room for a refrigerator door to open fully.
Step 8: Finish Your Kitchen Island With Slide-in Stove
Measure your island top once the cabinets and the range are set in place. Diagram the surface on paper with the measurements, then have a 4-foot-by-8-foot plywood sheet cut to fit the top to provide a temporary working surface. Do not bolt this down. Just use glued-on wood bracers to hold the top from sliding.
Step 9: Call In the Countertop Maker
Call in a countertop maker to do the professional measure and have the company install it if it is anything other than a laminate countertop. Granite and quartz is a great countertop selection for kitchen islands because of its sturdiness, but generally requires a professional installation.
Tip
Build a foot rest ledge for those seated at the island so they don't kick the cabinet sides and it makes seating more comfortable.
Warning
Avoid having people sit too close to the cooking area when seated at the island.
Video of the Day