Things You'll Need
Safety glasses
Saw
Mason cord
Chalk for markings
Water leveler
Post hole digger
Hammer
Drill
Bolts
Screws
Nails
Joist hanger
Post hanger
J-bolts
Carriage bolts
Tip
Sponsored tip: Need tools for your project? Check out RentalHQ and get connected with local businesses that’ll help you rent the equipment and tools you need.

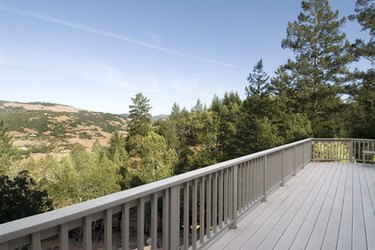
A patio deck can serve as your home's center for entertainment and relaxation. A well-built deck will not only add a new venue to your home, it will increase your home's appeal and value. Building a deck is not the easist project to take on, and proper planning is a must. Create a clear plan that fits within your desired location. Write your measurements down and double check them for accuracy.
Step 1
Speak with your local building inspector to determine zoning laws, permits and other requirements for decks. Show your plans to the inspector and inquire as to the number and positions of posts you will need.
Video of the Day
Step 2
Measure and mark the position of your ledger boards. Begin your top ledger board measurement 2 to 3 inches below your door sill. Mark the bottom ledger according to the thickness of your decking material. Transfer the markings to the edges of your future deck, using a level to ensure accuracy. Partially drive nails at the marks.
Step 3
Align a tape measure square to the house, and measure out the determined depth of your deck. Position a batterboard firmly into the ground 3 inches past the deck's measured edge.
Step 4
Create square and level lines that outline the parameters of the deck. Affix a Mason cord to one of the nails you positioned on the edge of the house. Walk the cord out to the batterboard, and cut the cord 3 inches past the board. Mark the cord with tape at the point which represents the edge of the deck. Attach the cord to the batterboard. Position the cord so that it meets the house and the batterboard at 90-degree angles.
Step 5
Position additional batterboards 3 inches outside of the mason cords, forming the shape of your deck, and intersect those cords at the taped points. Mark your post locations with stakes. Remove the cords.
Step 6
Create the footings for your deck with a power auger. Seek the assistance of another person to pour concrete into the holes and level off the top of each hole. Position J-bolts in the center of each concreted hole. Let the concrete dry with the bolts in place.
Step 7
Mark the lengths of your ledger board, ribbon joist and 2 beam boards with a framing square, and cut to the appropriate length, which will be the same for all 4 boards. Position the boards on your sawhorse, mark and cut.
Step 8
Install your joist hangers, and align the edges to your home. Place metal flashing between the ledger board and the siding, and fill the gap with polyurethane. Create four pilot holes, 3/8 inches in diameter, 2 feet apart, into the ledger board. Secure the ledger board to your home with 3/8" screws. Secure the holes with polyurethane, and drive the lag bolt into the holes.
Step 9
Secure the metal post hanger with a J-bolt, and affix it to the post anchor. Level the post anchor. Notch the post for the beams. Use your saw to cut the beams at the notch.
Step 10
Secure the two beam boards together with three screws on each side, about 2 feet apart. screws about. Make sure they are flush and the crown edges face the same direction.
Step 11
Position the beam in the notches, and set it in the post. Cut your joist boards to your predetermined measurements, and set each joist board in the joist hangers. Align the beams to meet your notch marks, and screw them to the joist hangers on the ledger board. Secure the ribbon joist to the positioned joists, securing with a nut, washer and bolt.
Step 12
Cut your remaining joist boards to the predetermined measurements and secure to the joists. Begin on the outer left and right edges, working your way to the center. Secure each joist with screws.
Step 13
Cut the deck boards to match the length of your deck. Lay the deck boards parallel to the house, and position them with screws or nails. Position all of the boards until the deck floor is complete.
Video of the Day