Originally, women wore a corset as an undergarment; the corset was used to train the waistline into an smaller circumference. Today, women wear corsets as fashionable outerwear, with or without the intention of creating a slimmer waistline. With a little crafty magic, transform a shirt into a sexy corset with minimal sewing. Converting a shirt requires little piecing because you retain the side seams of the shirt.
Video of the Day
Things You'll Need
Ruler
Liner Fabric
Corset Pattern
Pins
Scissors
Tailor’S Chalk
Hammer
Seam Ripper
Laces
Eyelet Setting Tool
Eyelets
Cutting Out the Corset
Step 1
Select a fitted shirt that is your size or one size smaller. When you cut and sew the back of the shirt for the corset laces, you lose a 1/2 inch of material. For the corset to lace closed, the shirt should fit near but not against your skin.
Video of the Day
Step 2
Remove the sleeves with a seam ripper.
Step 3
Lay the shirt on the work surface front-side up.
Step 4
Pin the front of the corset pattern to the shirt.
Step 5
Trace the top and bottom of the pattern onto the shirt with tailor's chalk, leaving a 1/4-inch seam allowance.
Step 6
Mark the edge of the shirt at the top and bottom of the pattern so you can match the back pattern.
Step 7
Flip the shirt over and pin the back of the corset pattern to the shirt, using the guide marks to align the pattern.
Step 8
Trace the top and bottom of the pattern onto the shirt with tailor's chalk, leaving a 1/4-inch seam allowance.
Step 9
Cut the shirt along the pattern lines you just traced.
Step 10
Make a vertical cut all the way through the front of the corset at its center.
Step 11
Open the shirt and lay it over the liner fabric with right sides together. Trace around the edge of the cut shirt with the chalk.
Step 12
Cut out the liner.
Sewing the Corset
Step 1
Lay the liner face up on the work surface and the shirt face down on top of the liner.
Step 2
Pin the two pieces of fabric together.
Step 3
Sew a 1/4-inch seam around the entire fabric except for one of the back sides.
Step 4
Pull the fabric right-sides out.
Step 5
Fold in the seam that you left open and pin it shut.
Step 6
Sew the edge shut and continue sewing all the way around the corset again to reinforce the seam.
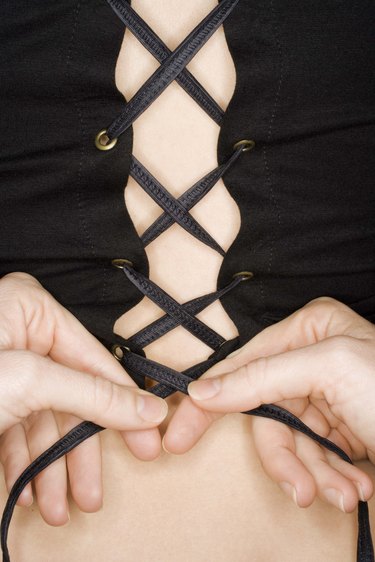
Adding the Eyelets and Laces
Step 1
Mark one eyehole every inch on both sides of the corset opening using a ruler and chalk.
Step 2
Cut a slit through the fabric no more than 1/4 inch long at each mark with scissors.
Step 3
Poke the post of the eyelet through the hole from the back of the fabric to the front.
Step 4
Place the other piece of the eyelet over the post and use the tool provided in the eyelet kit to hammer the eyelet together.
Step 5
Repeat until all eyes are installed on both sides.
Step 6
Thread laces through the eyelets. Tie the corset at the top or bottom of the piece.
Tip
Choose a fitted shirt with curved rather than straight sides. If you have a shirt with darting in the front, the added structure would enhance the appearance of the final corset.
Corsets traditionally lace up the back, but since lady's maids are no longer the norm, lacing up the front is easier to manage.
Sew two pieces of flexible plastic boning between the fabric layers, equally spaced on the front and back of the corset for a more authentic, structured look.