Under-Sink Storage Ideas for Renters: Organize Without Drilling
Most under-sink cabinets aren't too small. They're too disorganized to use. The problem isn't square footage; it's the assumption that pipes, a disposal, and the absence of a drill add up to an unworkable space.
This guide covers the practical under-sink storage ideas for renters that actually hold up: how to read the cabinet before buying anything, which no-drill methods work under which conditions, what goes where, and what to add before closing the door. CozySorted estimates renter-friendly methods can recover 30 to 50% of usable cabinet space currently lost to clutter and poor layout. The goal here is a setup you can build in an afternoon and remove without leaving a trace.
Before you start: Measure your cabinet's interior width and note whether you have a garbage disposal. Both will determine which solutions below apply to your space.
Step 1: Read the cabinet before you buy anything
Video of the Day
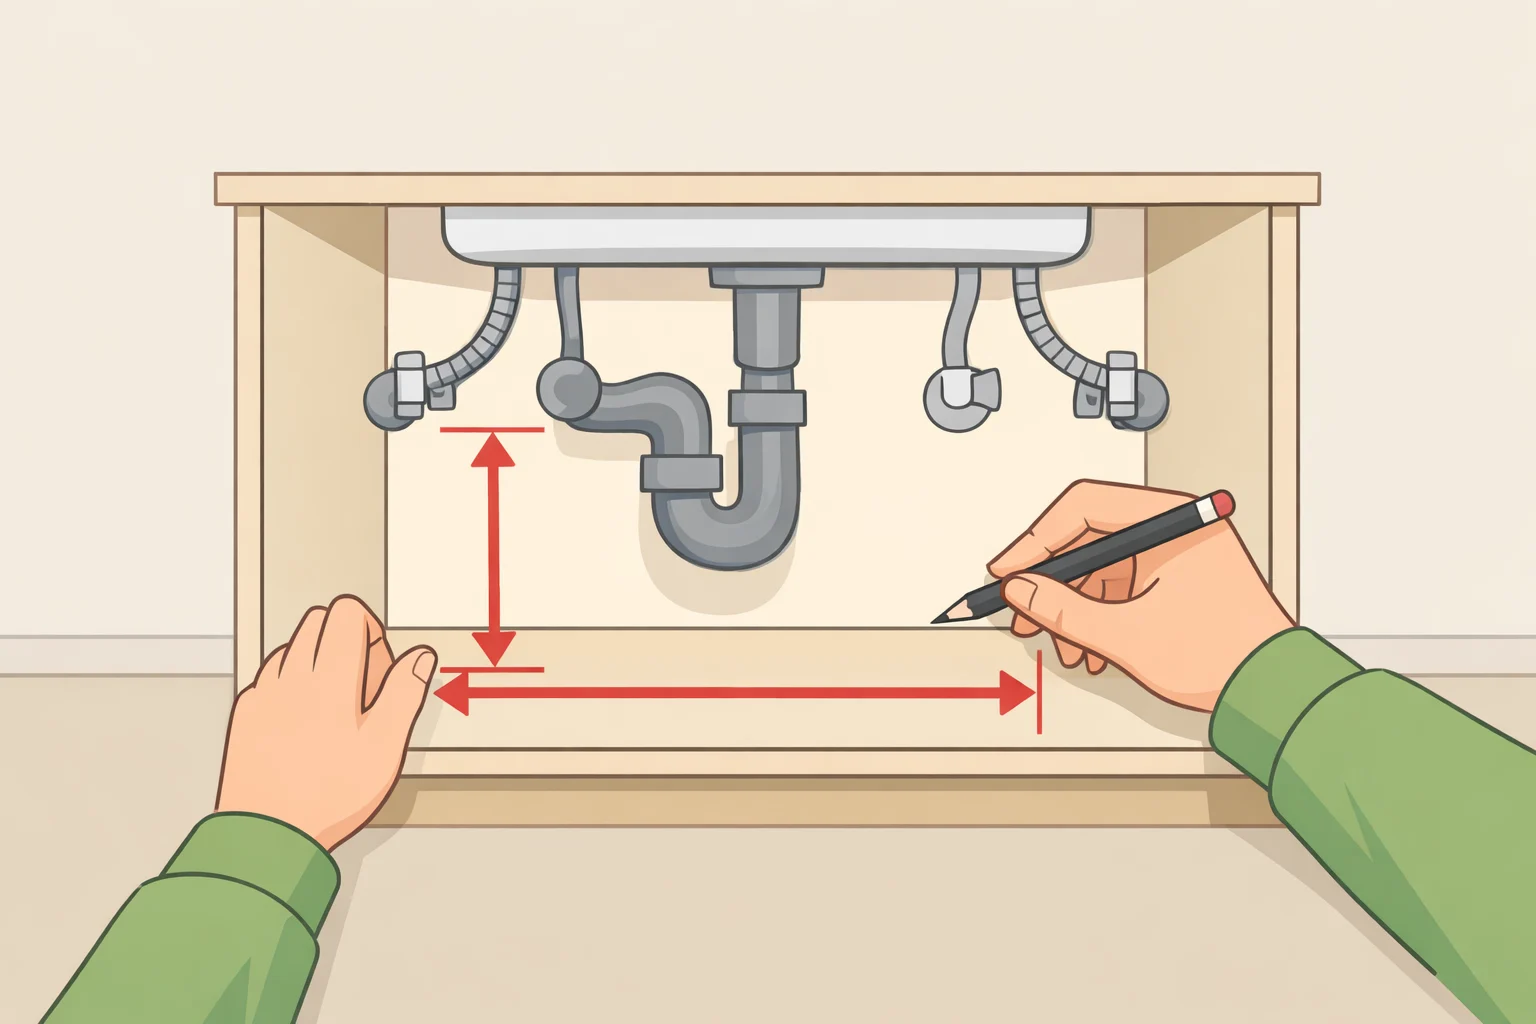
The most common under-sink mistake is buying storage products first and measuring second. Five minutes of assessment eliminates most bad purchases.
Three variables determine which products will actually fit: cabinet width, pipe position, and whether a garbage disposal is present, per CozySorted. A disposal doesn't just claim floor space; it also limits how far bins slide out and where a tension rod can sit. CozySorted cites NKBA standards estimating that a garbage disposal and its drain lines may consume 40 to 60% of usable floor space in a standard 24-inch base cabinet, which is why one-size-fits-all advice reliably fails here.
CozySorted notes that most under-sink cabinets offer 18 to 24 inches of vertical clearance above the pipe. That upper zone is where hanging solutions live; the floor zone is for bins and flat items.
Write down three measurements before shopping: the interior width measured at the back wall (not the door opening, which can be narrower), the depth available on each side of the drain pipe, and the height from the top of the pipe to the cabinet ceiling. Sketch a rough overhead view showing where the drain and supply lines run. That sketch is the layout you're organizing around, not the product photos on the packaging.
Cabinet door check: If you're planning to use over-door hooks, verify your door panel thickness. CozySorted cites KCMA cabinet standards noting that kitchen cabinet doors typically run 0.5 to 1.25 inches thick, and most hook products are built for that range but confirm before purchasing.
Video of the Day
Step 2: No-drill under-sink storage methods matched to your cabinet
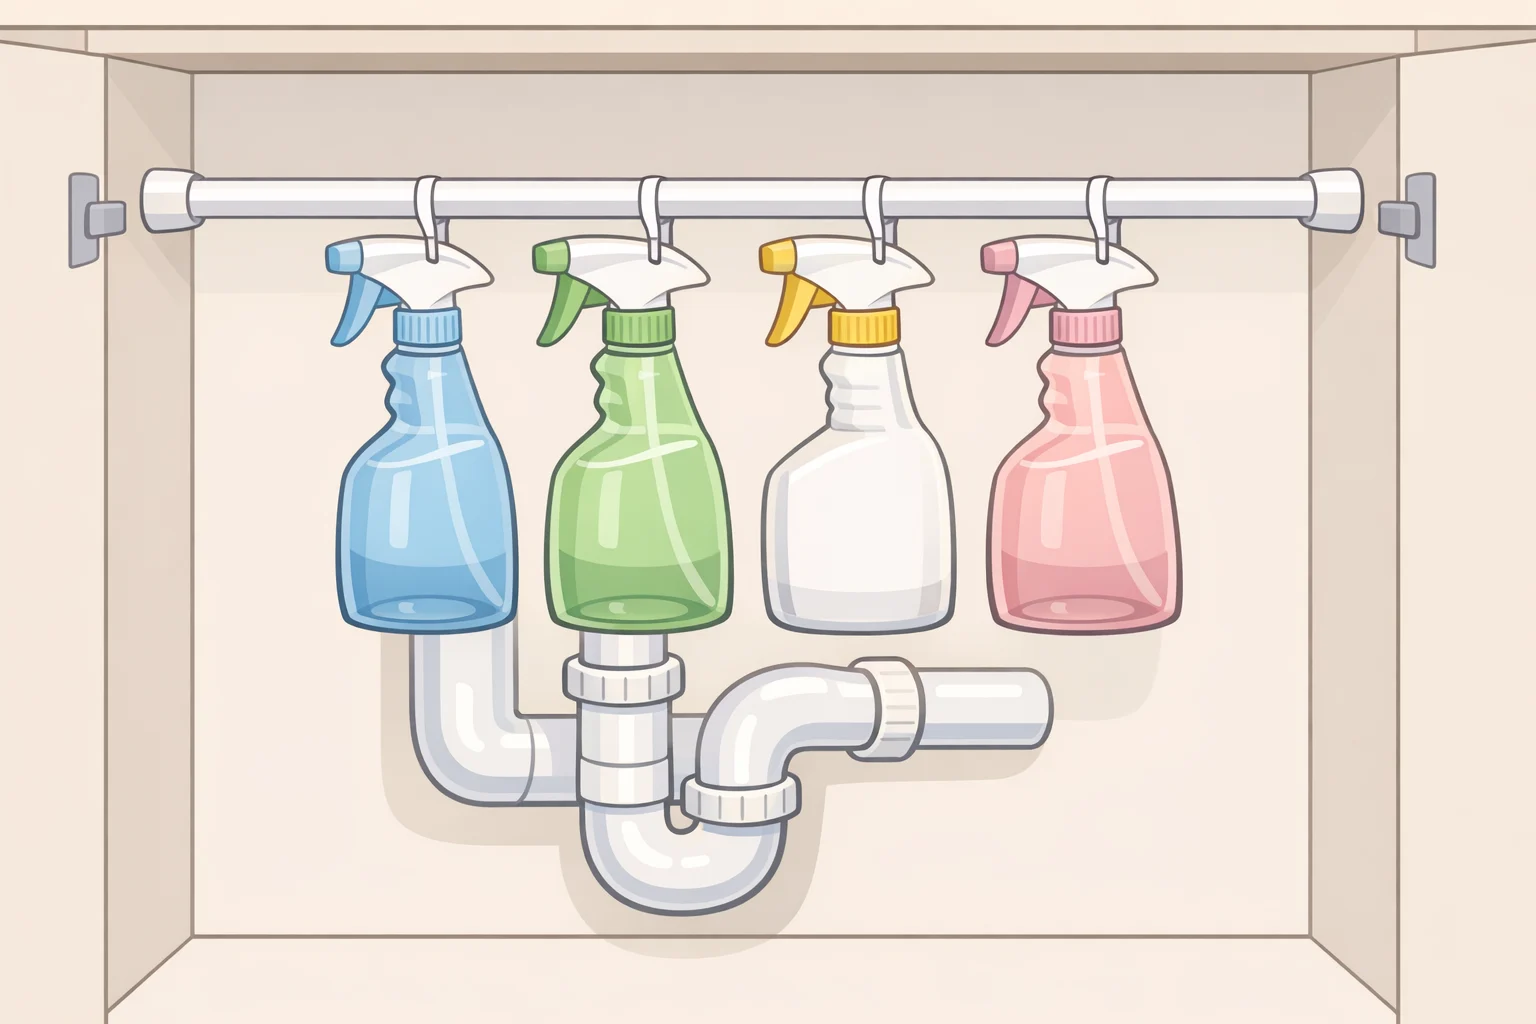
No single solution works for every cabinet. The right combination depends on what the assessment in Step 1 revealed. Here are three of the most useful no-drill methods and the conditions under which each one earns its place.
Tension rods for cabinets with at least 18 inches of clearance above the pipe
A spring-loaded tension rod extends from wall to wall using pressure alone no screws, no adhesive, no tools. Positioned horizontally in the upper clearance zone, a rod rated for 10 to 15 lbs can hold four to six standard spray bottles by their trigger handles, per CozySorted citing Consumer Product Safety Commission data. CozySorted cites NKBA standards indicating this approach works in cabinets 18 to 36 inches wide, covering most standard U.S. kitchen configurations.
When tension rods won't work: If the cabinet interior is under 18 inches wide, the rod may not get enough wall contact for reliable spring tension. If the pipe runs unusually high, the clearance above it may not fit spray bottles hanging from their triggers. Test it with a loaded rod before committing.
Maintenance note: Under daily use, spring tension degrades. Plan to replace the rod every 12 to 18 months, per CozySorted.
Slide-out bins for floor-level storage and maintenance access
Bins require no installation and solve a problem that fixed shelving creates. When a plumber or maintenance worker needs access, bins slide out in seconds with nothing to dismantle which matters in rentals where access can happen with little notice, per CozySorted. Position them on either side of the drain pipe. Use the disposal-free side for taller or heavier items. Organize by frequency: daily supplies in the front bin, refills and backstock in the back.
Look for open-top bins or pull-out caddies with side handles. Low-profile designs clear the drain pipe more reliably than deep rectangular bins when floor space is tight on both sides.
When bins won't work: If the floor space on either side of the drain is very narrow, the disposal or pipe may block the slide-out path. In that configuration, a tension rod combined with over-door hooks will likely deliver more usable storage than floor bins.
Over-door hooks for light items on cabinet doors
Hooks that clip over the cabinet door panel require no hardware, leave no residue per CozySorted, and work for anything light: dish gloves, small brushes, a spare spray trigger. Keep loads minimal. Over-door hooks are supplementary storage, not a primary system.
When over-door hooks won't work: If the cabinet door is inset rather than overlay style, the hook clip may not seat properly on the door edge. If hooks prevent the door from closing fully due to interior clearance, skip them a door that won't close creates more problems than the hooks solve.
Step 3: Decide what goes where
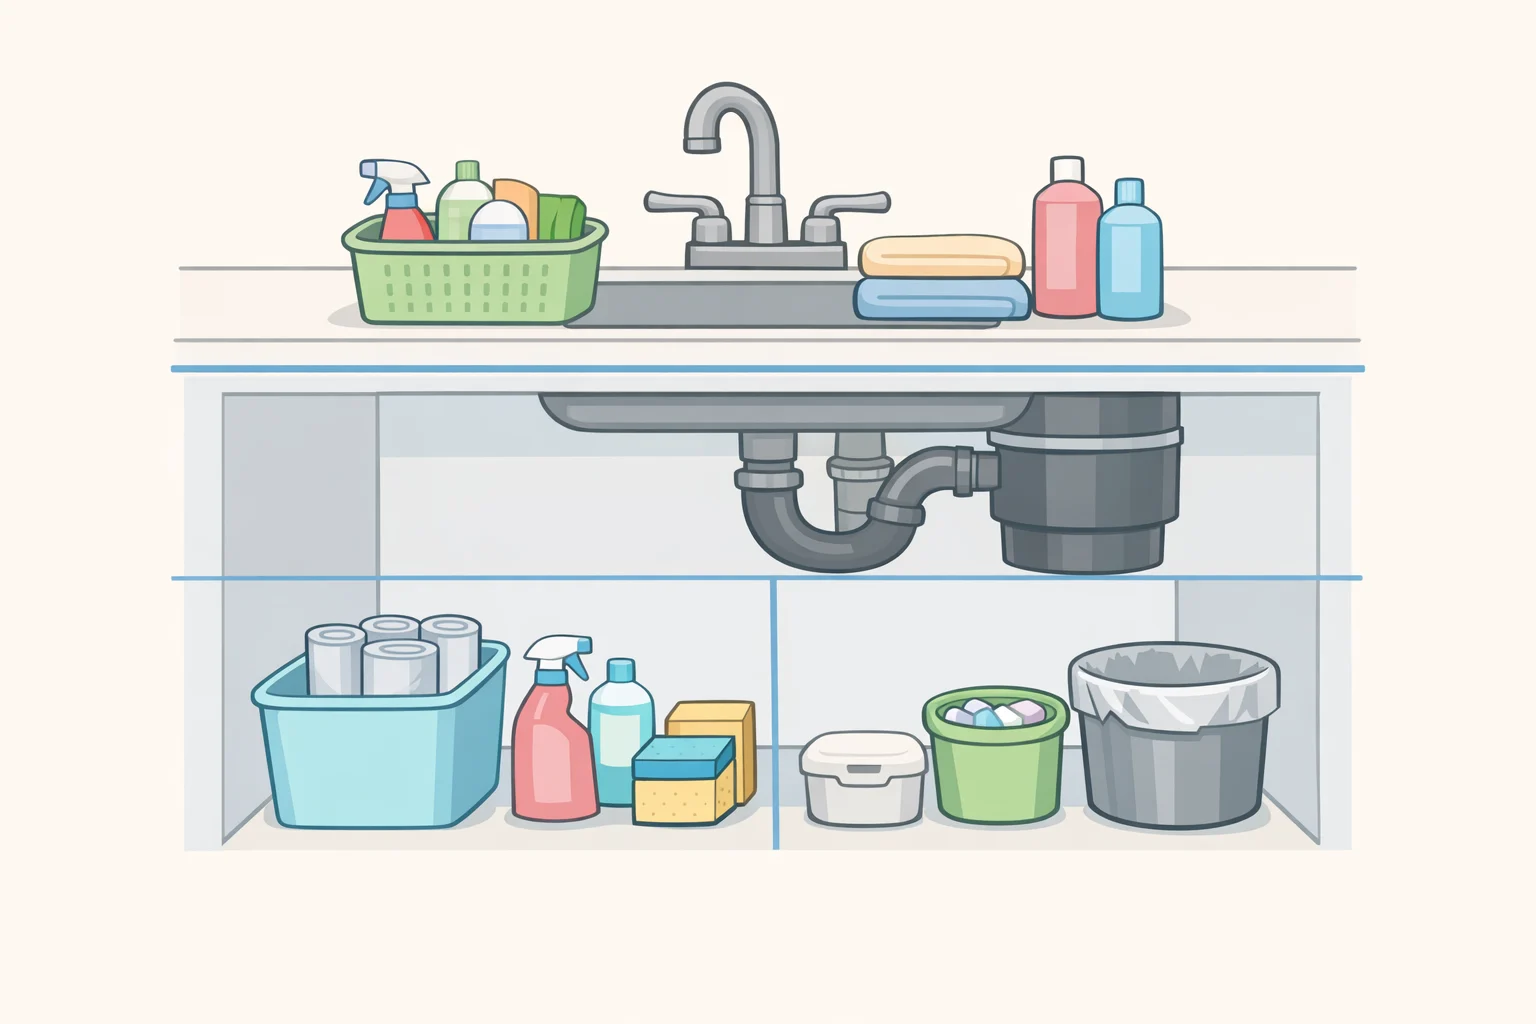
Products sorted, now place them deliberately. The under-sink cabinet divides naturally into three zones, and matching items to zones prevents the clutter that made the space unusable to begin with.
Upper zone (tension rod and hooks): Spray bottles hang by trigger handles on the rod. Light tools a bottle brush, a spare sponge, rubber gloves go on over-door hooks. Nothing heavy, nothing moisture-sensitive.
Floor zone, disposal-free side: This is the highest-yield floor space in the cabinet. Use it for the items accessed most often: dish soap refills, a cleaning caddy, or a low-profile bin with daily supplies. Taller items fit here because the disposal isn't eating into vertical clearance.
Floor zone, disposal side: Limited but usable. A single shallow bin for backstock or infrequently used items works well. Avoid anything that requires a clean slide-out path, since the disposal housing will block part of the egress.
What doesn't belong under the sink: Anything that would be damaged by a slow drip paper products, cardboard packaging, open bags of powder cleaners. Flammable products like certain furniture polishes or aerosols in quantity. And bulk supply hoarding: the cabinet holds what it holds; overloading defeats the layout.
This zoning logic holds whether or not you have a disposal. The disposal just shifts the weight of each zone.
Step 4: Use adhesive strips correctly or not at all
Adhesive hooks and strips are the most misused tool in under-sink organization. The products aren't the problem; the loads and environments people put them in are.
A large-format 3M Command strip has a maximum rated capacity of 7.5 lbs, per CozySorted citing 3M product data. A single full gallon jug of liquid detergent weighs 8.5 lbs per CozySorted already over the limit before anything else is added.
Adhesive failure under the sink isn't sudden. Overloaded hooks stretch and release over 24 to 72 hours, typically dropping what they're holding onto the pipe or cabinet floor without warning, per CozySorted. Oil, grease, and cabinet-finish residue can reduce adhesion by 40 to 60%, per CozySorted citing 3M's application guide, and the under-sink environment often includes all three.
Where adhesive strips belong: Lightweight components in low-moisture zones a small squeegee, a sponge caddy, or an adhesive magnetic child lock (see below). For anything heavy or moisture-adjacent, use a tension rod or bin instead.
When adhesive is appropriate, follow the prep protocol exactly: clean with rubbing alcohol, dry for 60 seconds, press the strip for 30 full seconds with even pressure across the whole surface, wait one hour before loading, and stay at or below 80% of the rated load maximum, per CozySorted.
Two renter protections worth adding before you close the cabinet door
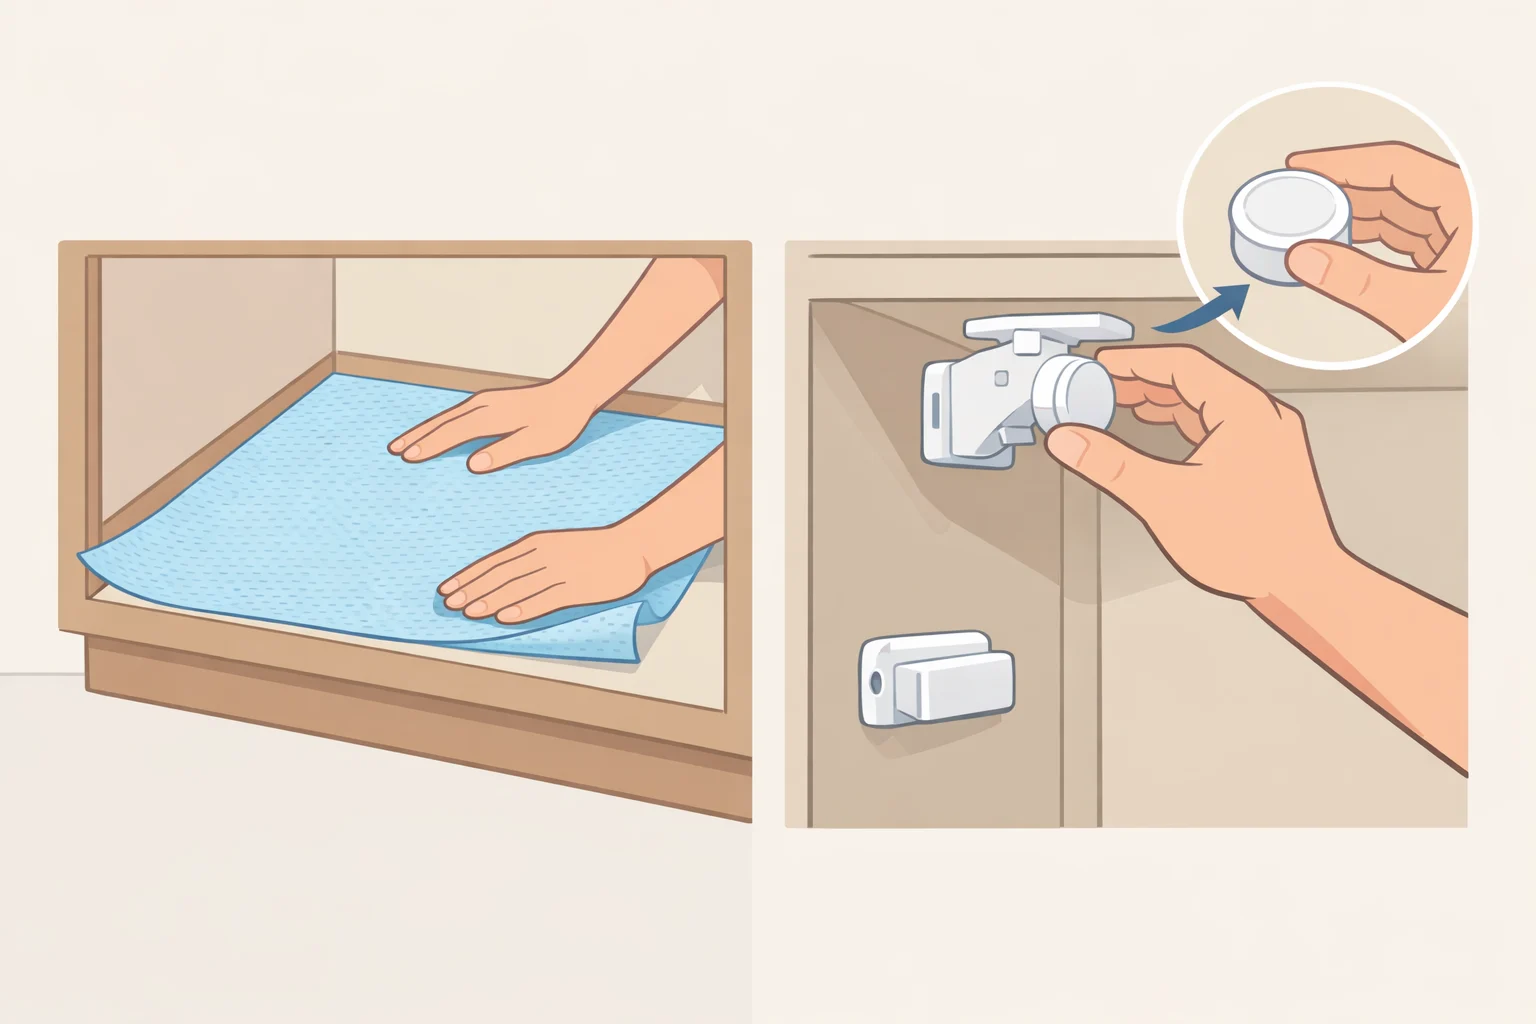
These additions address two common renter risks: water damage and child access to cleaning products.
Waterproof liner
A slow drip from a P-trap connection or supply valve can warp a particleboard cabinet floor within 48 to 72 hours, per CozySorted. CozySorted also cites the National Apartment Association listing undetected water damage among the top causes of security deposit deductions and renters lose an average of $200 to $500 from deposits due to drilling and cabinet damage, making leak prevention the cheaper outcome. A non-adhesive shelf liner, cut to fit and laid flat, creates a barrier with no permanent modification. Silicone and vinyl options wipe clean in under 60 seconds. Duck Brand non-adhesive liner runs $6 to $12 per roll at Target and Walmart, per CozySorted.
Practical note: moisture under the liner during a routine clean is an early warning sign worth investigating before it becomes a repair bill.
Cabinet lock for households with young children
Children aged 1 to 3 account for 44% of household cleaning product poisoning cases reported annually to U.S. Poison Control Centers, per CozySorted citing the American Association of Poison Control Centers. Damage-free magnetic cabinet locks mount with adhesive to the interior cabinet frame and remove cleanly. Safety 1st and Jool Baby sell kits for $15 to $25 at major retailers, per CozySorted. Because these are lightweight components mounted to a dry interior surface rather than carrying hanging loads, adhesive performs more reliably here than it does in the heavier applications described above.
No-drill under-sink storage ideas by cabinet type
The setup process above produces different configurations depending on what the assessment revealed.
- Wide cabinet without disposal (24+ inches, no obstruction): Tension rod for spray bottles in the upper zone, two slide-out bins on the floor, liner underneath. This configuration makes full use of all three zones and suits the most common renter kitchen layout.
- Cabinet with garbage disposal: Minimize floor bins on the disposal side. Use a single bin on the clear side and rely more on the tension rod and over-door hooks for spray items and light tools.
- Narrow cabinet under 18 inches wide: A tension rod may not get reliable purchase against the walls. Lead with over-door hooks and a single low-profile bin on the floor. Keep adhesive to the lightest possible items only.
The no-drill constraint most renters treat as a limitation is actually a useful filter. It eliminates hardware that's harder to maintain, harder to move out with, and more likely to create the deposit problems it was meant to prevent. The layout-first logic here measure the constraints, match the method, zone the contents transfers directly to bathroom vanity cabinets and laundry room shelving. Different cabinet, same approach.