Golden Grahams S'mores Bars: No-Bake Recipe with Brown Butter
No oven, no campfire, and 45 minutes start to finish. These Golden Grahams s'mores bars skip the baking entirely: the process is stovetop-plus-fridge, and the only thing that requires real attention is browning the butter. Get that right and the rest follows.
The case for this format over a baked version is straightforward. Delish calls its baked s'mores bar "the perfect shareable s'more without any campfire needed," which is fair, but that recipe requires assembling layered dough, freezing it for at least 45 minutes, and baking from frozen for another 45 to 50 minutes. The no-bake cereal bar clocks 15 minutes of prep, 10 minutes of cooking, and 20 minutes in the fridge for a total of 45 minutes (For the Love of Cooking, this spring).
Brown butter is what separates this from a standard cereal treat. The caramelized milk solids add a nutty, slightly smoky depth that plain melted butter won't deliver. It's not difficult, but it requires attention. Everything else in this recipe is forgiving.
Why these Golden Grahams s'mores bars work
Video of the Day
The Golden Grahams cereal does double duty here. It provides the graham cracker flavor of a real s'more without requiring a separate cracker layer, and its rigid structure holds up better in a no-bake bar than most cereals would. The brown butter adds caramel depth. The torched marshmallows add char. Together they replicate the campfire experience in a way that melted butter and plain marshmallows simply don't.
The reserved marshmallows on top serve two purposes: texture contrast from the intact, soft whole pieces against the pressed base, and the visual cue that tells anyone looking at the pan exactly what they're getting.
Video of the Day
Recipe at a glance
Yield: 12 generous bars or 16 smaller ones from a 9x13 pan, depending on cut size (For the Love of Cooking, this spring) Total time: 45 minutes (15 min prep / 10 min cook / 20 min fridge) Difficulty: Beginner
Equipment you'll need:
- A large, wide pot (not a small saucepan; you need room to fold in 5 cups of cereal)
- 9x13 baking dish lined with parchment paper, with overhang on two opposing sides
- Kitchen torch (optional, but meaningfully improves flavor; see Step 3)
- Sharp knife for slicing
Ingredients (For the Love of Cooking, this spring):
- ½ cup unsalted butter
- 12 oz mini marshmallows, divided (reserve about one-third for the topping)
- 2 tsp vanilla extract
- 5 cups Golden Grahams cereal
- 1-2 Hershey's milk chocolate bars, broken into pieces, to taste
- Flaky sea salt, optional
Step-by-step: making the bars
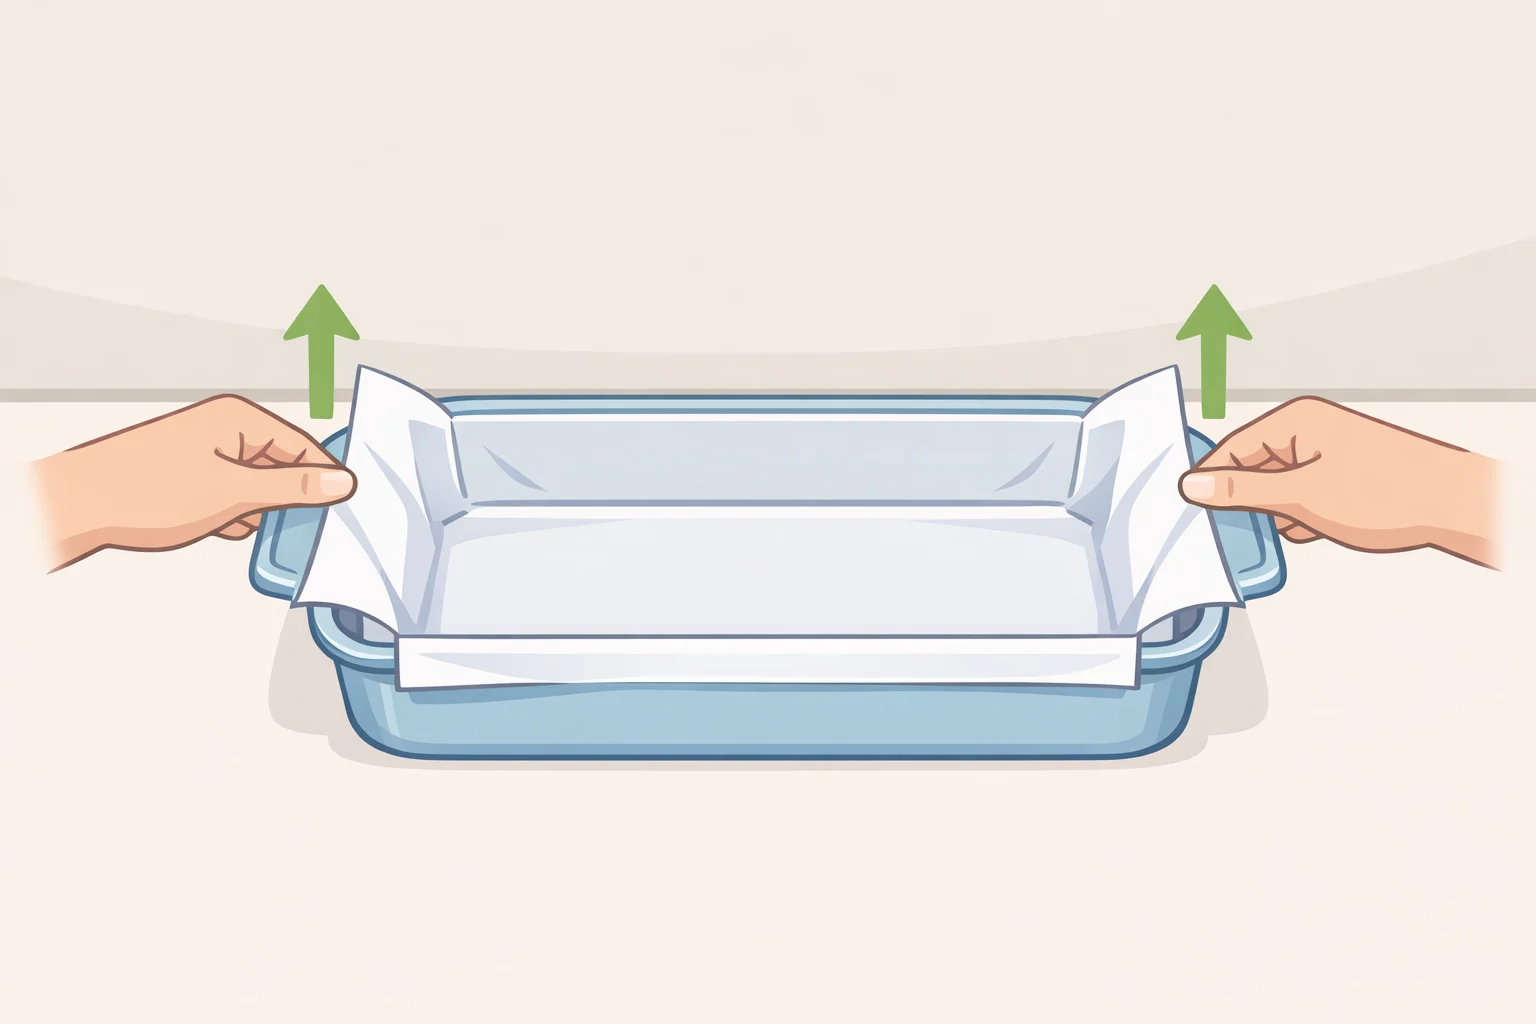
Step 1. Prepare your pan.
Line a 9x13 baking dish with parchment paper, leaving overhang on two opposing sides. This is how you'll lift the bars out cleanly later. Set aside.
Step 2. Brown the butter.
Add ½ cup unsalted butter to a large, wide pot over medium heat. Stir occasionally. The process takes about 3-5 minutes, and the turn happens quickly (For the Love of Cooking, this spring), so don't leave the stove. It will foam, the foam will subside, and then amber-brown solids will collect at the bottom with a nutty, toasty smell. That's your signal. Pull it off the heat immediately.
If you skip browning: Melt the butter instead. The bars will still taste good, more like a classic cereal treat with chocolate on top. But the caramelized depth that makes this feel like a s'more rather than a Rice Krispie treat comes from those browned milk solids. It's worth the extra four minutes.
Step 3. Toast and melt the marshmallows.
Reserve roughly one-third of the marshmallows (about 4 oz) for the topping. Add the remainder to the pot with the brown butter. If you have a kitchen torch, briefly pass the flame over the marshmallows before stirring; this replicates campfire char and adds a second layer of toasted flavor. Then stir constantly over low heat until fully melted and smooth, about 3-4 minutes (For the Love of Cooking, this spring).
Without a torch: Skip straight to stirring. The brown butter carries most of the depth on its own.
Step 4. Add vanilla and fold in the cereal.
Stir in 2 tsp vanilla extract. Add all 5 cups of Golden Grahams and fold to coat every piece. Work quickly, because the mixture begins to firm as it cools. Use a folding motion rather than vigorous stirring to keep some cereal pieces intact. You want a mix of textures in the finished bar, not uniform crumble.
Step 5. Press into the pan.
Transfer the mixture to the prepared pan. With lightly greased hands or a sheet of parchment, press into an even layer. Press firmly enough that the bars hold together when cut, but not so hard that the cereal turns to crumbs. Deliberate pressure, not force.
Gotcha: If the mixture is too hot to press without making a mess, let it cool in the pot for 60-90 seconds before transferring. Don't wait much longer, though. Once it starts to set, pressing it flat becomes a fight.
Step 6. Add the toppings while warm.
Scatter the reserved whole marshmallows across the surface, then lay the broken Hershey's pieces over the top. Place them gently so they stay visible and distinct rather than sinking into the base. Adding chocolate to still-warm bars lets it soften just enough to adhere without fully melting away, as Recipes by Clare found testing a similar technique (early 2025). Finish with a pinch of flaky sea salt if using.
Step 7. Refrigerate to set.
Transfer the pan to the fridge for 20 minutes. Don't skip this step. The bars need the chill to firm up enough to lift and slice without collapsing (For the Love of Cooking, this spring).
Step 8. Slice and serve.
Lift the bars out of the pan using the parchment overhang. For clean cuts, dip a sharp knife in hot water and wipe it dry between each slice (Recipes by Clare, early 2025). A 9x13 pan cuts cleanly into 12 generous bars or 16 smaller ones.
When things go wrong: four common problems
Even a simple recipe has specific failure points. These are the ones most likely to come up.
Too sticky to cut. The bars haven't set long enough, or too many marshmallows went on top. Recipes by Clare tested the marshmallow-to-chocolate ratio across multiple batches and found that an excess of marshmallows creates a surface that's impossible to cut cleanly (early 2025). Return uncut bars to the fridge for another 10-15 minutes, and treat the topping marshmallows as garnish, not a second filling layer.
Too hard and dry. The butter burned rather than browned, or the mixture sat too long in the pot before pressing. If the solids turn very dark and the butter smells sharp rather than nutty, it's burned. Start over with fresh butter. The bars can also turn dense and brick-like if pressed too aggressively; ease up on the pressure.
Bars falling apart when cut. Insufficient pressing at Step 5, or the bars were cut before they'd fully set. Both are fixable: press more deliberately, and always refrigerate the full 20 minutes before slicing.
Chocolate sliding off. The bars cooled too much before the toppings went on. Chocolate pieces need residual warmth to adhere, so add them at Step 6, not after refrigeration. If the bars are already cold, a very brief pass under a broiler on the lowest setting may re-warm the surface enough, but watch it the entire time. That's a practical workaround, not a tested fix for this specific recipe.
If you want a baked version
Two alternatives worth knowing about. For a chewier, more structured bar, Recipe by Risa uses browned butter cookie dough pressed over a graham cracker base and baked at 350°F for 20-25 minutes (about ten months ago). For a crowd-scale option, Recipes by Clare's seven-layer format, with graham cracker crust, sweetened condensed milk, marshmallows, and chocolate chips baked in stages, yields 32 bars from one 9x13 pan (early 2025). Both require an oven and more staging time. The cereal bar format beats them on speed by a significant margin.
Storage and make-ahead
Stored in an airtight container in the fridge, the bars keep for up to one week (For the Love of Cooking, this spring). Room temperature is fine for same-day serving at a cookout or party; the fridge matters for anything beyond a few hours, particularly in summer heat, which softens the marshmallow base.
For make-ahead: prepare the bars the day before, refrigerate overnight, and cut the morning of your event. They hold their shape well cold and soften slightly after 20-30 minutes at room temperature.
Baked versions of s'mores bars freeze reliably for up to 3 months, according to both My Everyday Table and Recipes by Clare (both 2025). This no-bake version may also freeze acceptably, but that specific method wasn't tested in the source recipe. If you try it, cut into bars first, wrap individually, and thaw at room temperature for about an hour before serving.
One thing to get right
Brown the butter. That's the whole recipe. The pressing, the topping placement, the chill time: all of it is straightforward once the butter is done correctly. Nail the 3-5 minute browning window, keep the marshmallow topping restrained, add the chocolate while the bars are still warm, and refrigerate before cutting. Follow those and the batch will hold together, slice cleanly, and keep through the week.