Berry cream cheese bars recipe: make-ahead summer dessert
Before you start
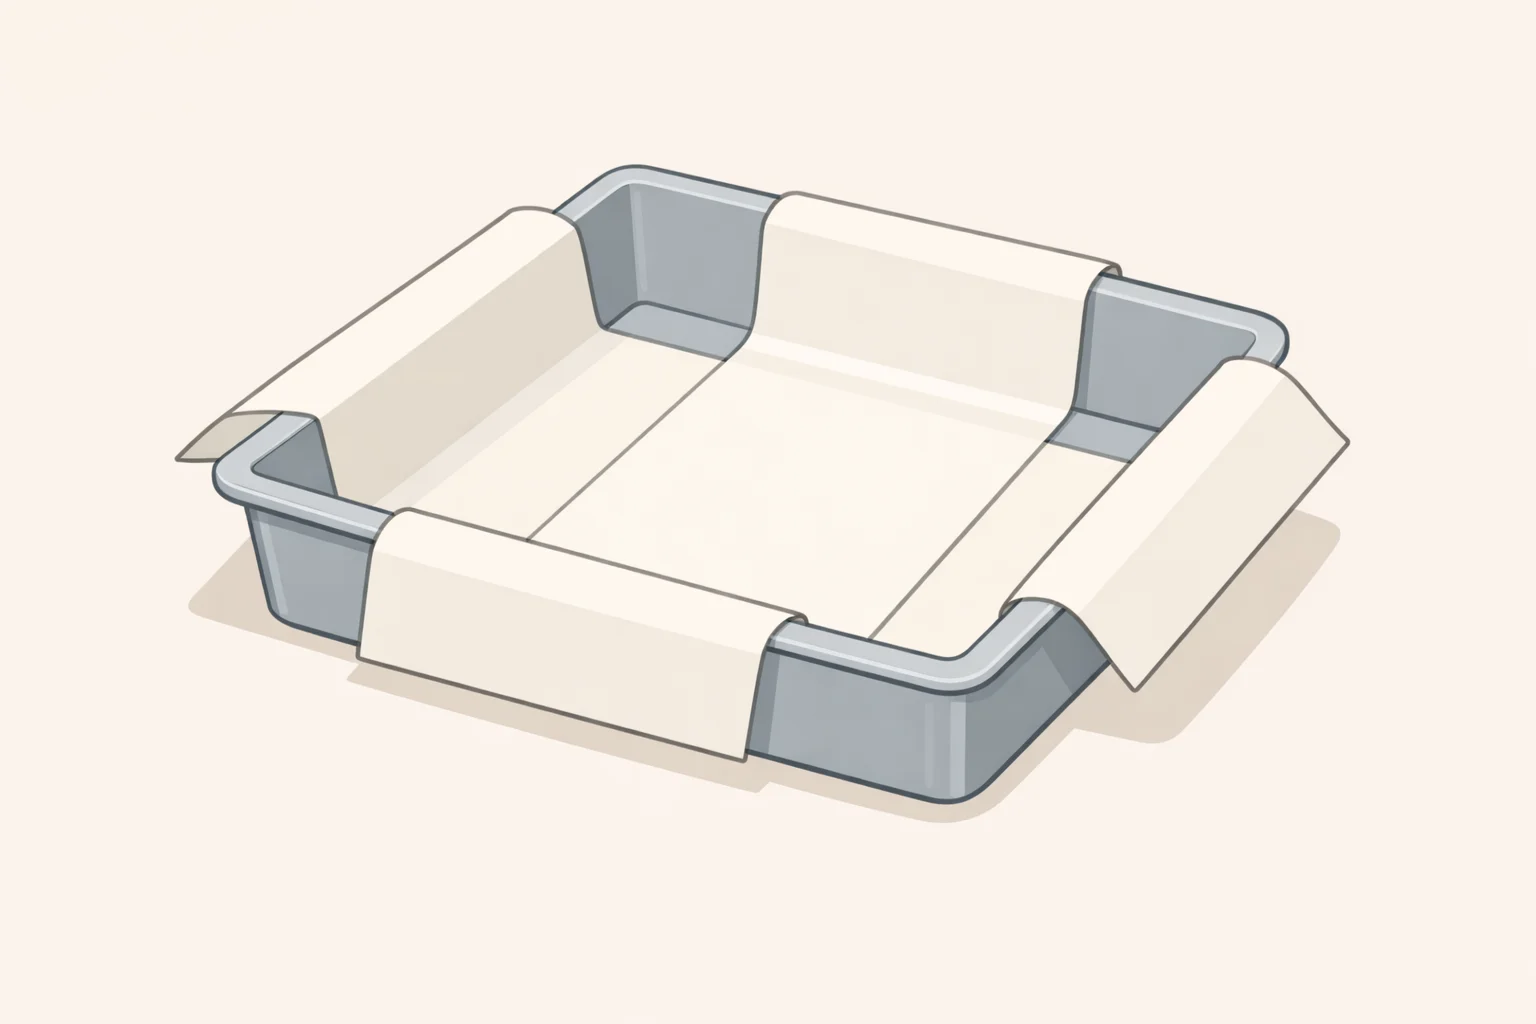
Pull the cream cheese and eggs from the refrigerator at least an hour before you start. Cold cream cheese will not blend smooth, and lumps that form early don't disappear with more mixing. You'll need a 9x9-inch baking pan and two strips of parchment paper arranged as a sling perpendicular sheets with 2-inch overhangs on all sides. A food processor or stand mixer handles the filling. Plan for a minimum 3-hour refrigerator chill; overnight is better. Start the evening before.
Video of the Day
Video of the Day
Why this berry cream cheese bars recipe works
The appeal of these bars is logistical as much as culinary. Make them the evening before, refrigerate overnight, lift them out by the parchment, and slice them in the morning. They arrive cold and already portioned while everything else is still being assembled on the grill. That's why the format works.
The Kitchn describes the format as "cheesecake without the effort," and the make-ahead requirement is the design, not a constraint. One 9x9 pan yields 9 to 12 bars; Oh Sweet Basil suggests doubling it for a 9x13 pan when feeding a larger crowd. Serious Eats notes the bar format makes portioning and transport cleaner than a full cheesecake, since bars can be sliced in advance and carried without serving drama.
This guide gives you one reliable default build to follow start to finish, then covers the two decisions that allow for real adaptation topping method and crust and the three technique points that determine whether the bars set cleanly and hold together in transit. The flexibility exists, but the technique doesn't change.
Step 1: The default build
Follow this version on your first pass. It's the most straightforward path to a filling that tastes genuinely like cheesecake, and it skips the water bath entirely.
1. Preheat the oven to 350°F. Line your 9x9 pan with the parchment sling.
2. Make the crust. Stir one box of yellow cake mix with 10 tablespoons of melted unsalted butter until combined. Press the mixture evenly into the lined pan. Bake 10 minutes until lightly golden. The crust must be prebaked skip this and it will soften and go soggy under the filling, as Vintage Kitchen Notes warns. Remove from the oven and lower the temperature to 325°F. Let the crust cool slightly while you make the filling.
- The 350°F to 325°F shift matters. The higher heat sets the crust quickly; the lower heat lets the filling bake through without the edges overcooking before the center sets. Vintage Kitchen Notes and The Unlikely Baker both use this two-step approach, and it's worth doing deliberately rather than leaving the oven at one temperature.
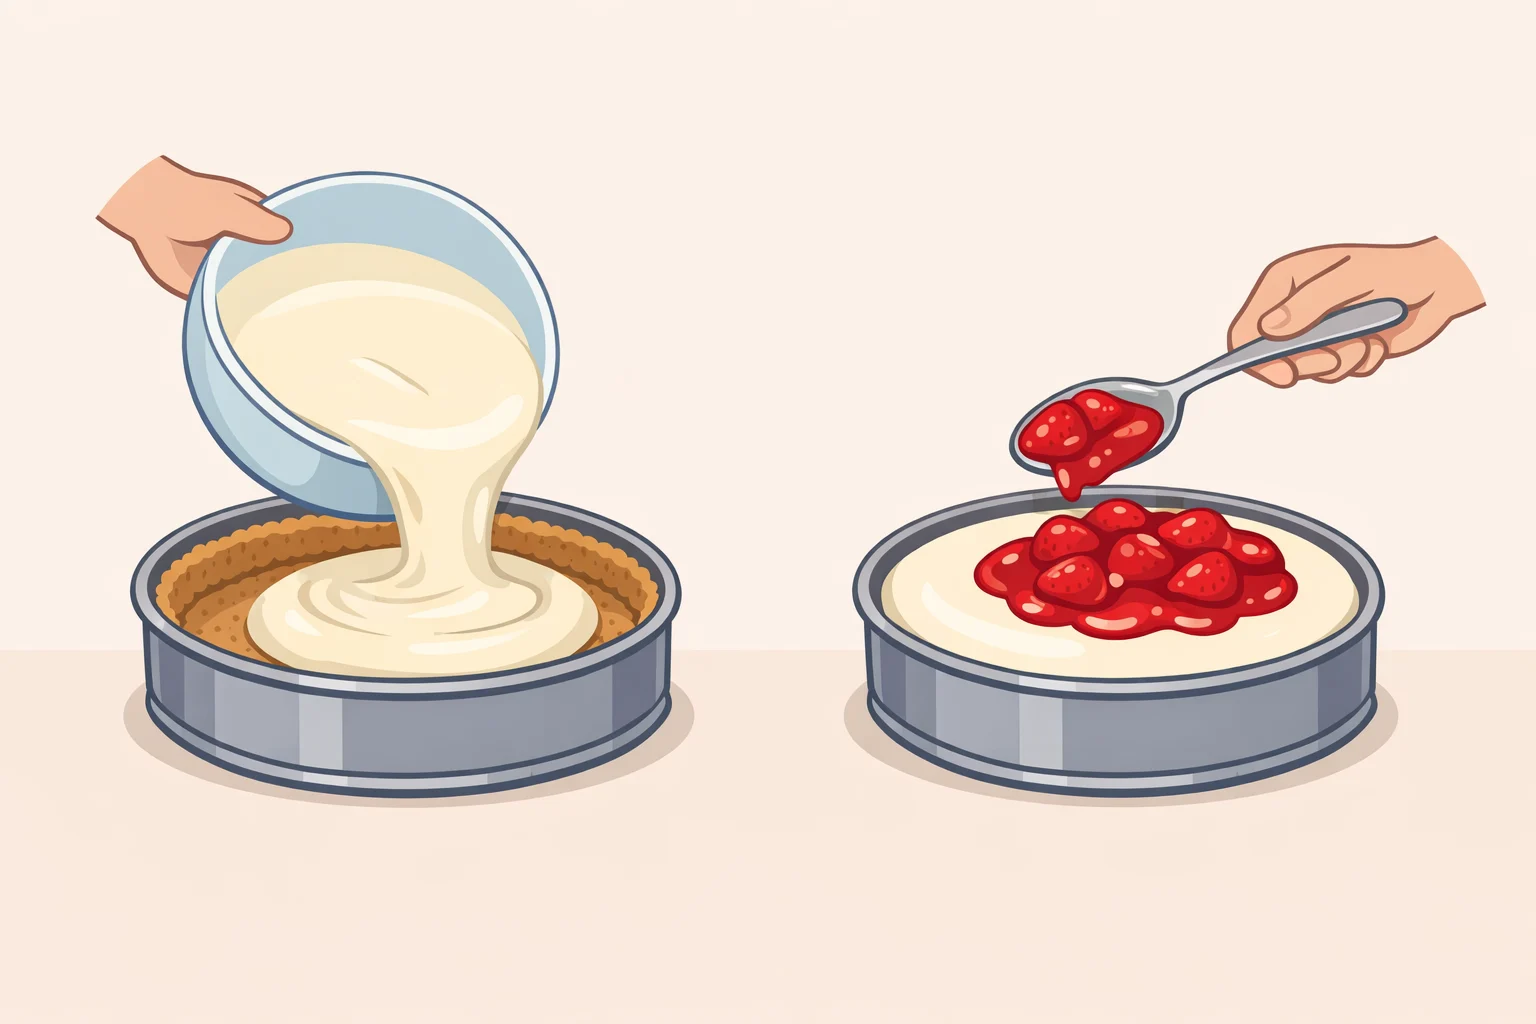
3. Make the filling. In a food processor or stand mixer, beat 16 ounces of room-temperature cream cheese until completely smooth and fluffy, 1–2 minutes. Add ½ cup granulated sugar, 2 teaspoons lemon zest, 3 tablespoons lemon juice, 1 teaspoon vanilla extract, and a pinch of kosher salt. Mix until combined. Add 2 room-temperature eggs one at a time, pulsing or mixing on low just until incorporated. Stop mixing as soon as the eggs disappear overbeating after this point introduces air that causes puffing and cracking. Pour the filling over the prebaked crust.
4. Add the topping. Stir one 21-ounce can of strawberry pie filling with 1 cup of fresh blueberries. Spoon over the filling layer. The canned filling is pre-thickened, which means no excess liquid bleeding into the batter that's what makes it the fastest and most reliable option.
5. Bake at 325°F for 40–45 minutes. The bars are done when the edges look set and the center still wobbles slightly as a single mass, not like liquid. That wobble is correct the filling finishes setting in the refrigerator, not the oven. Overbaking to eliminate the wobble dries out the texture. Both Dear Old Bakehouse and Serious Eats describe the same doneness cue.
6. Cool, then chill. Let the bars cool at room temperature for at least 30 minutes before refrigerating a hot pan goes straight into the fridge and you get condensation and uneven cooling. Then refrigerate for at least 3 hours, or overnight. The Kitchn recommends overnight for best results.
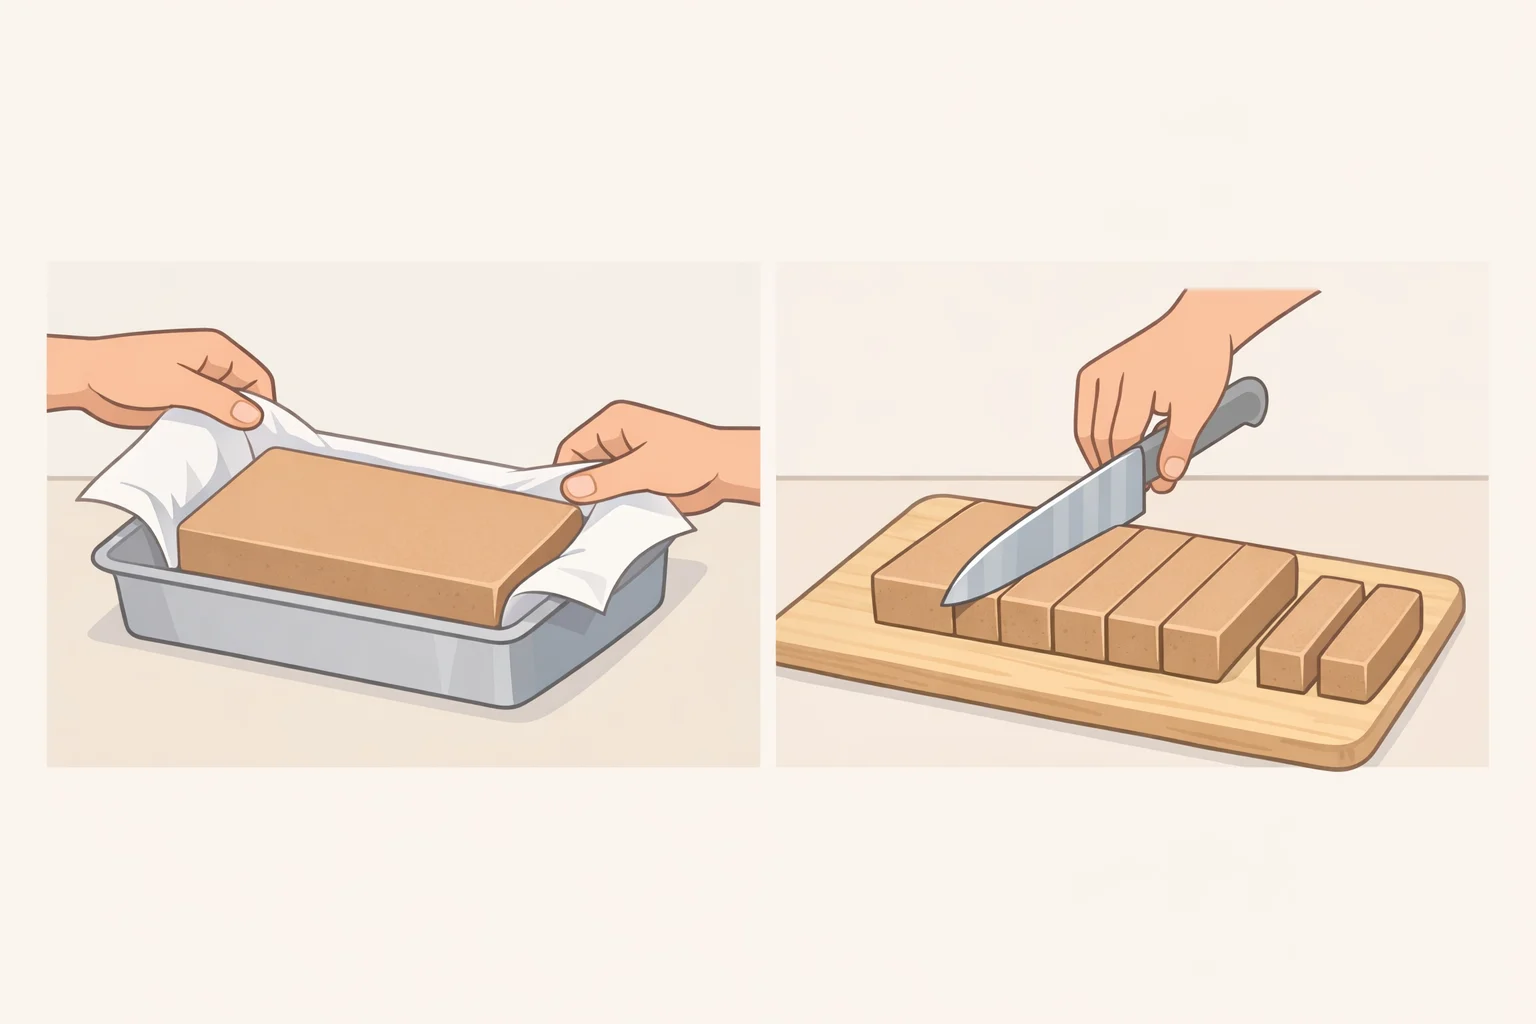
7. Cut and serve. Lift the slab out of the pan using the parchment sling and transfer to a cutting board. Cut cold, straight from the refrigerator, with a sharp knife wiped clean between every cut. Vintage Kitchen Notes is direct on this: cold bars give the cleanest edges; room-temperature bars will smear.
Practical timeline: Bake in the evening. Refrigerate overnight. Cut in the morning. No day-of baking required.
Step 2: Adapting the topping and crust
The default build is the right first choice. Once you've made it, here's how to adjust based on what you have and what you need.
Topping options for mixed berry cream cheese bars
The topping has the most impact on moisture. Too much liquid is what causes a filling that won't set firmly.
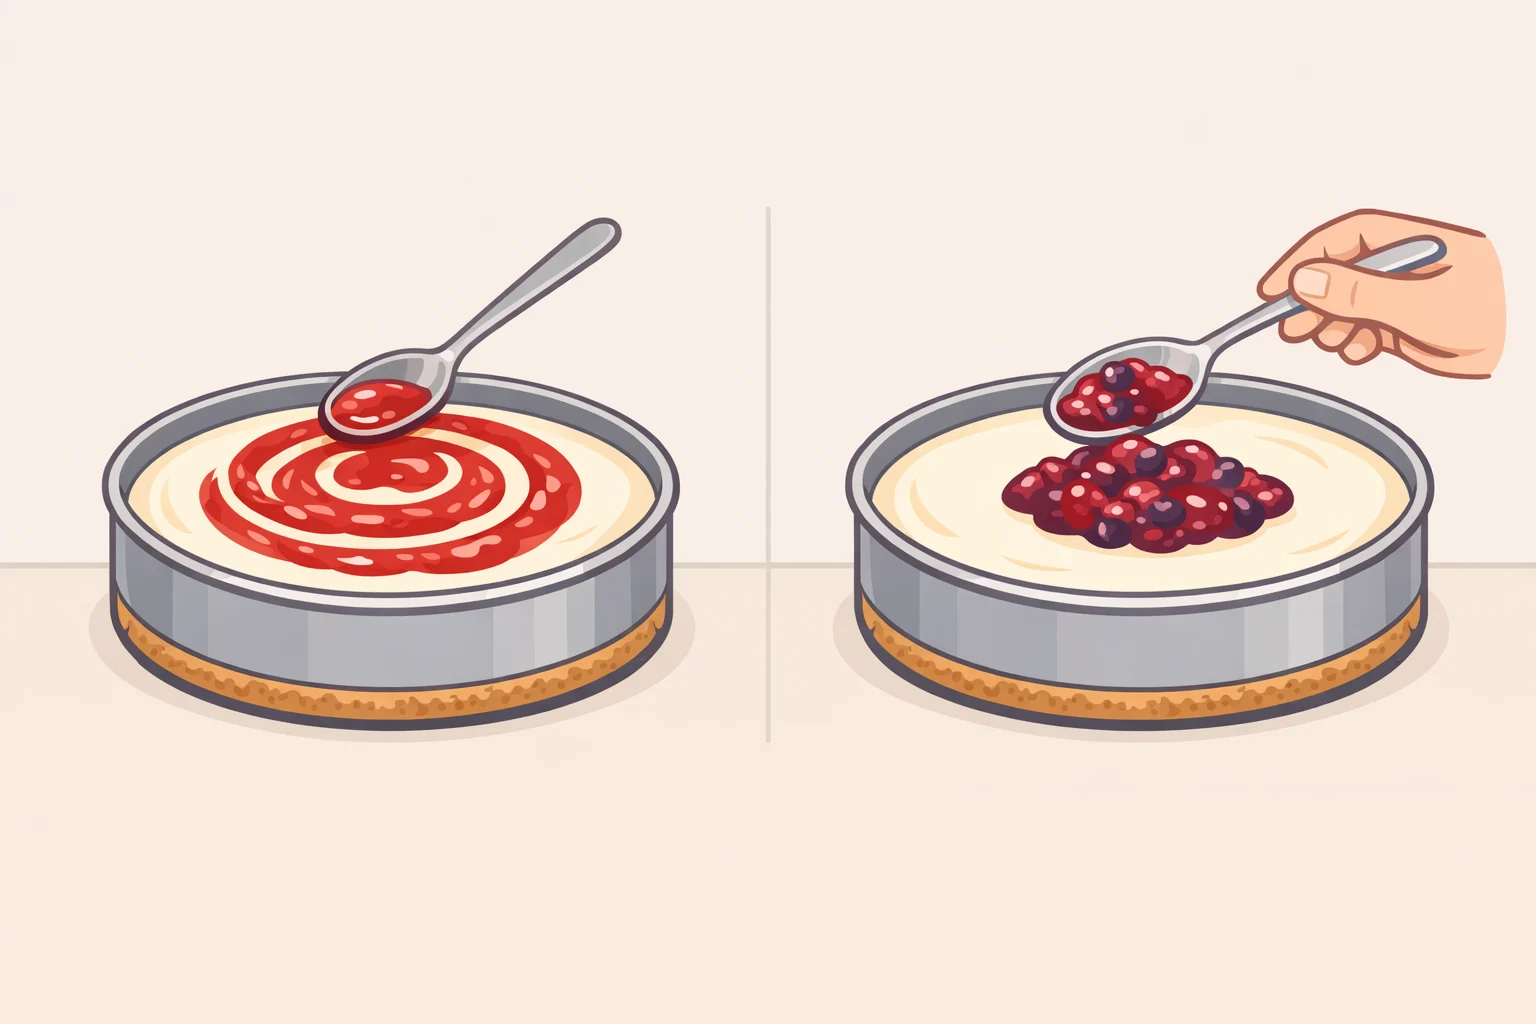
- Canned pie filling + fresh berries (fastest, most reliable): This is the default build. Pre-thickened filling means no moisture risk. Best when you're short on time or want a no-cook approach. Fresh berries stirred in at the end add color and brightness.
- Store-bought preserves swirled in (decorative, good with fresh or well-drained frozen berries): Spoon dollops of raspberry or blueberry preserves over the unbaked filling and swirl with a fork. Dear Old Bakehouse notes that store-bought preserves take less than half the time of homemade but thin them with 2 tablespoons of water before swirling, or they'll tear the filling surface rather than marble cleanly. Best when presentation matters.
- Cooked berry compote (best with frozen fruit or when you need precise, clean slices): Cook berries with sugar and a small amount of cornstarch over medium heat for about 5 minutes, until they just begin to break down. Serious Eats explains why this works: cooking concentrates fruit flavor and the starch binds liquid that would otherwise bleed into the batter and prevent a clean set. The right choice when you're working with frozen berries.
On frozen berries: They work, but the moisture they release as they thaw is what causes a filling that won't set properly. The compote method handles this automatically the cooking step drives off excess liquid before the berries ever touch the filling. If you're using frozen berries raw in a swirl method, drain and pat them dry first. Vintage Kitchen Notes says to drain them; The Unlikely Baker says remove as much moisture as possible. Both are saying the same thing: don't skip the drainage step.
Berry substitutions: Raspberries, blackberries, blueberries, and strawberries all work and swap by volume. Softer berries very ripe strawberries, raspberries release more juice than firmer ones like blueberries. With soft berries, the compote method is safer than swirling them in raw.
Crust options
All three options below require the same rule: prebake the crust before the filling goes in, and drop the oven to 325°F before baking the assembled bars.
- Cake mix + butter (fastest, least measuring): The default build. Reliable buttery result with no flour measuring.
- Graham cracker crumbs + butter + sugar (classic): About 1 cup crumbs, ¼ cup melted butter, 1–2 tablespoons sugar. Dear Old Bakehouse and Serious Eats both use this as their standard. Digestive biscuits or shortbread cookies swap in cleanly.
- Shortbread from scratch (bakery-style, doubles as a crumble topping): The Unlikely Baker uses a shortbread dough flour, butter, sugar, egg yolks, vanilla that presses into the base and crumbles over the top. Because a crumble covers the surface, there's no exposed filling to crack. Use this when you want a bar that looks more finished on a dessert table.
One optional variation worth trying: Serious Eats adds goat cheese alongside cream cheese in the filling for a noticeably silkier texture and a pleasant tang that plays well against sweet berry toppings. Worth noting: that version does use a water bath, so it's a different production than the default build described here.
Storage and transport
Refrigerator: Store covered in an airtight container or wrap the pan tightly in plastic. The Kitchn puts the fridge window at 3 days; Serious Eats says up to 5 days. Plan to finish them within 3–4 days for best texture.
Freezer: Fully chilled bars freeze well. Wrap individually or transfer the whole slab to a freezer-safe container. The Unlikely Baker recommends up to 2 months; Oh Sweet Basil says up to 3 months. Thaw overnight in the refrigerator room-temperature thawing softens the texture unevenly.
Transport: These bars travel best as a slab. Carry them in the pan with a lid or tight plastic wrap, lift out with the parchment sling on arrival, and cut on-site. A cold slab holds its shape; cut bars are more vulnerable in transit.
What actually determines whether these work
Pick your version based on what you're working with. Short on time and using fresh berries: canned pie filling plus fresh blueberries gets you there fastest. Working with frozen fruit or need neat slices for a party tray: a quick compote gives you the most reliable set. Want something that looks finished on a dessert table: the shortbread crumble version covers the surface and removes any cracking concern entirely.
Whichever path you take, three things don't change. Prebake the crust a raw crust under wet batter goes soft, per Vintage Kitchen Notes. Control berry moisture cook or drain the fruit so it doesn't interfere with the set, per Serious Eats. Cut cold, with a clean knife, per The Kitchn. The bars that hold together at the cookout, in the car, and the next day straight from the fridge are the ones where none of those three steps got skipped.