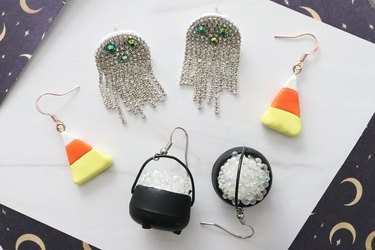
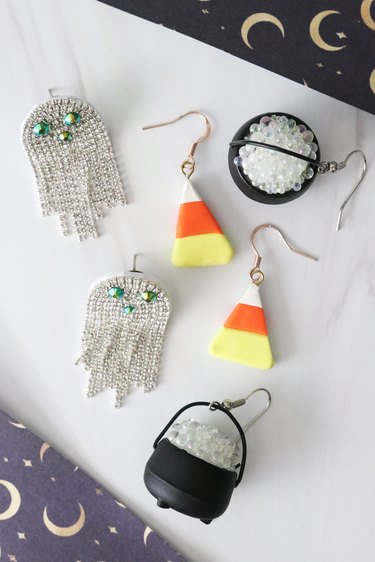
Looking for an easy way to "Halloween-ify" your outfit? Make a pair—or three—of Halloween earrings! Our tutorial includes three scarily cute styles: rhinestone ghost earrings, bubbly cauldron earrings and polymer clay candy corn earrings that look good enough to eat.
Since each version has a totally different vibe, there's sure to be something that suits your aesthetic. For example, if you love sparkle, our rhinestone ghost earrings will be right up your alley. Adore kitschy pieces? Go for the bubbly cauldron dangle earrings, which are made with mini dollhouse decor items (so fun!). If you're all about sweets during Halloween, our cute candy corn earrings might already be on your wishlist.
Video of the Day
Of course, there's a good chance you'll want to make all three pairs of Halloween earrings because they're just so darn charming. Whether you're hosting a Halloween party, carving jack-o'-lanterns with family or baking pumpkin pie in style, these DIY earrings are sure to steal the season. Let's get crafting!
Video: Boo-tiful DIY Halloween Earrings, From Candy Corn to Cauldrons!
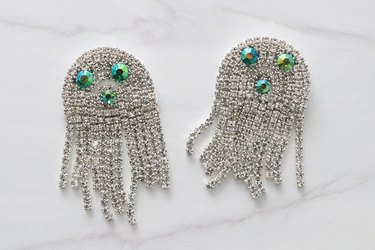
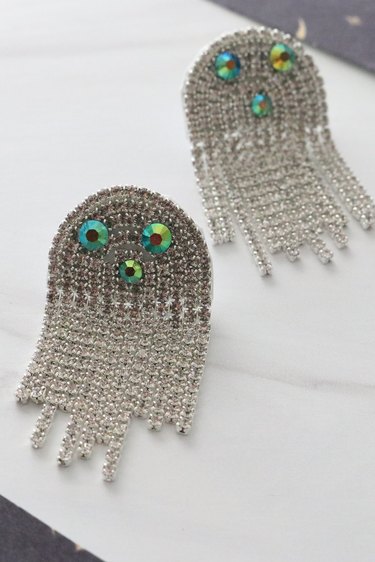
1. Rhinestone Ghost Earrings
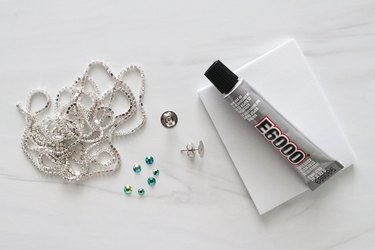
Things You'll Need
White craft foam
4 rhinestones (5 mm.)
2 rhinestones (4 mm.)
2 blank earring posts
Super glue (like E6000)
Scissors
Craft tweezers (optional)
Tip
Instead of foam, you can use white leather or vinyl scraps.
1. Make ghost shape
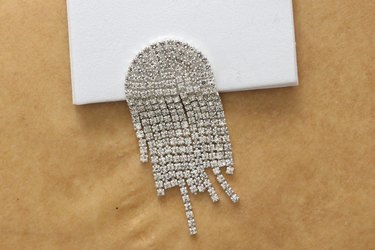
Glue strands of rhinestone trim to foam in a half-circle shape (like a rainbow), letting bottom two-thirds hang off edge.
The length of each strand of trim is up to you! For our sparkly ghosts, we used strands of different lengths to create a random edge. But if you want a straight and even edge, you'll be able to cut down rhinestone trim later. Either way, your best bet is to cut strands longer than you think you'll need. You can always cut the trim, but you can't add it back.
Glue vertical strands of rhinestone trim in center of "rainbow." Again, let bottom two-thirds hang off edge. Repeat to make second ghost.
2. Add rhinestone face
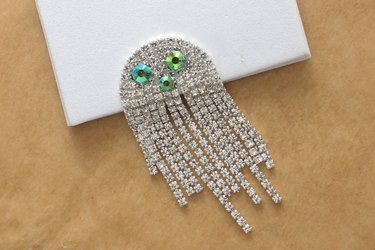
To each ghost, glue two 5 mm. rhinestones for eyes and one 4 mm. rhinestone for mouth.
Tip
For eyes and mouth, feel free to use rhinestones of any color. Black, purple, green and blue are perfect for Halloween, but anything goes. For our ghost drop earrings, we used dark green rhinestones from Etsy.
3. Cut out ghosts
Let ghosts dry completely. Next, cut away extra foam, moving carefully around rhinestones. At this point, trim rhinestone strands if necessary.
4. Add earring posts
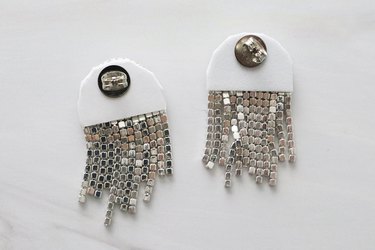
To transform ghosts into stud earrings, glue a blank earring post to the back of each.
Tip
If you don’t have pierced ears, glue clip-on earring blanks instead.
2. Bubbly Cauldron Earrings
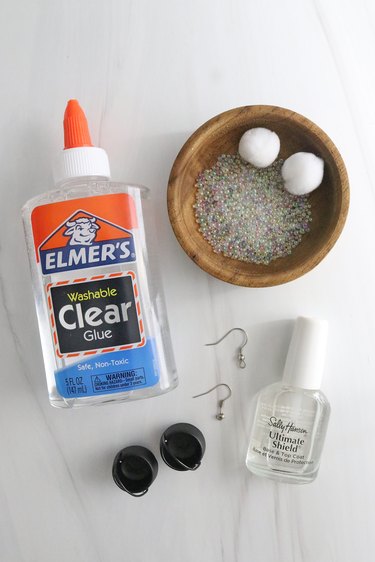
Things You'll Need
Clear craft glue
Clear nail polish
Parchment paper
Iridescent clear microbeads
2 white pompoms
2 earring hooks (ear wires or leverbacks)
2 dollhouse cauldrons
Craft tweezers
Jewelry pliers
Mixing tool (like a polymer clay sculpting tool or toothpick)
Tip
Microbeads are typically used for decoden projects, fake desserts and homemade slime. You can purchase them on Etsy.
1. Fill cauldrons with pompoms
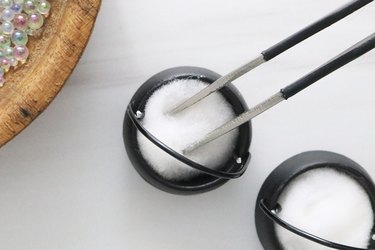
Glue a pompom in each mini cauldron. This will help fill cauldron while keeping it lightweight.
2. Top with microbeads

Add a dollop of clear craft glue to parchment paper. Scoop microbeads onto glue and then mix to combine. Microbeads are ready once they clump together and there are no loose or dry pieces.
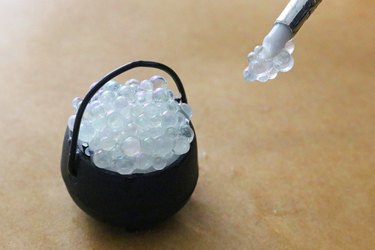
Scoop mixture onto pompoms, topping with more clear glue to keep beads in place if necessary. When microbeads are mostly dry, brush with clear nail polish to seal. Let dry and repeat once more.
3. Add earring hooks
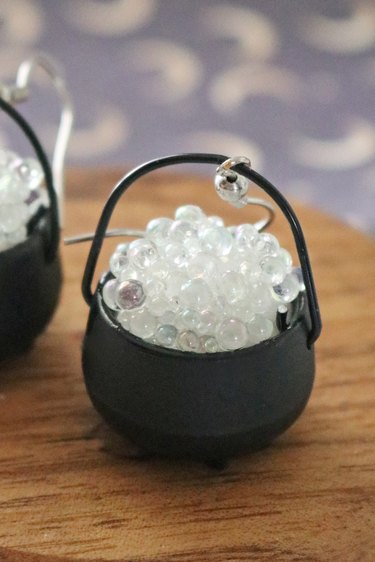
With jewelry pliers, open the loop of each earring hook and add the cauldron. Then, bend it closed. Use sterling silver hooks to make your earrings hypoallergenic.
Tip
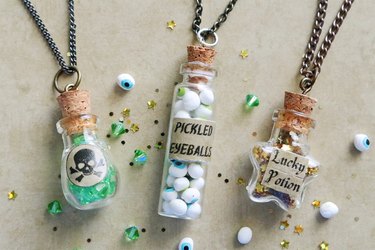
Looking for more Halloween jewelry? Simply add the cauldron to a long chain to make a necklace!
3. Candy Corn Earrings
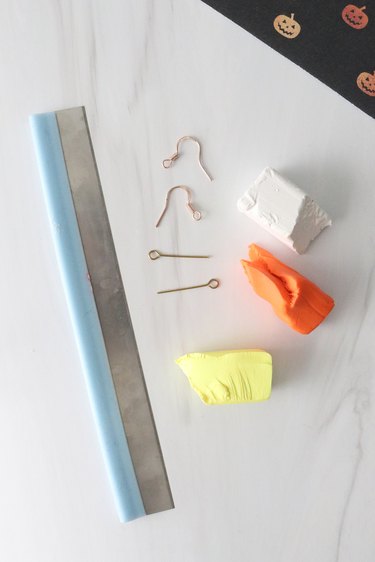
Things You'll Need
White polymer clay
Orange polymer clay
Yellow polymer clay
Clay cutting tool
2 earring hooks
2 eye pins
Jewelry pliers
Clay rolling pin
Parchment paper
Baking sheet
Tip
Use nickel-free hooks and eye pins to make these earrings hypoallergenic.
1. Prepare clay
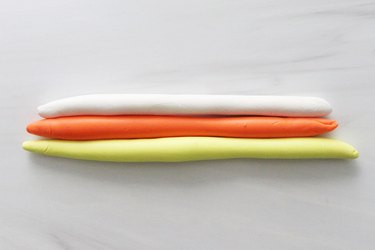
Roll white, orange and yellow clay into ropes. Stack on top of each other and then gently press together with your fingers.
Tip
For a fun twist on this project, use glow-in-the-dark clay instead of regular white clay, or if you like chocolate candy corn, replace yellow with brown polymer clay.
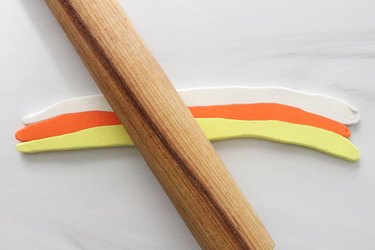
Run a rolling pin over clay until it's about 1/2 in. thick.
2. Cut candy corn
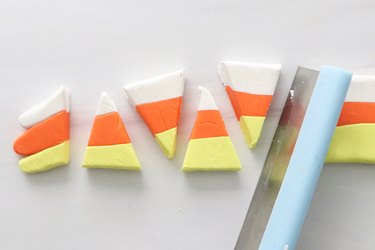
Using cuttings tool, cut clay into triangles.
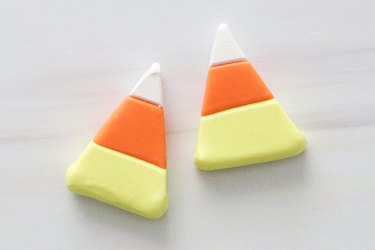
Gently round off edges with your fingers.
3. Add eye pins and bake

Carefully insert an eye pin into the top of each candy corn.
Place on parchment-lined baking sheet and bake according to clay's directions.
4. Add earring hooks
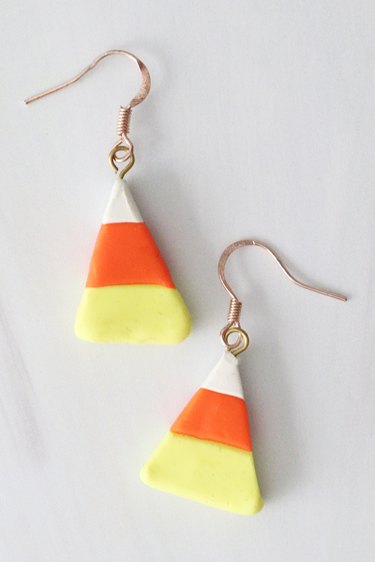
When candy corns have cooled, add an earring hook to each eye pin. You're officially ready to trick-or-treat (or pass out candy) all night!
Tip
If you prefer hoop earrings, add candy corn charms to hoop earring blanks. If you already own pumpkin earrings, you could mix things up and wear one of each for a delicious food-themed getup.
The best part of wearing these boo-tiful homemade earrings? When you're inevitably inundated with compliments, you can boast about making them yourself!