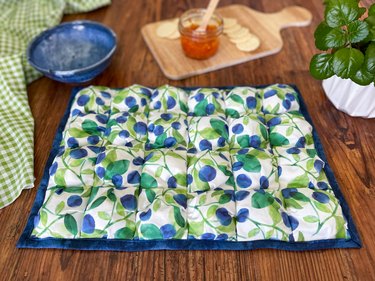
If you're up to speed on the latest crafting trends, you've probably heard of puff quilts. These soft, pillowy quilts are perfect for keeping you and your loved ones warm (and ridiculously comfortable) on chilly nights. But why not share the cozy vibes with your dinnerware? Yes, that's right — we're bringing fluffy goodness to the dining room table with DIY puff quilt placemats.
In this tutorial, we'll show you how to create puff quilt (sometimes referred to as biscuit quilt or bubble quilt) placemats that will make your guests feel like they're dining on clouds. And the best part? This project is so easy that even a beginner-level quilter can pull it off in no time.
Video of the Day
Video: Puff Quilt Placemats to Dress Up the Table
Let's fluff up those placemats!
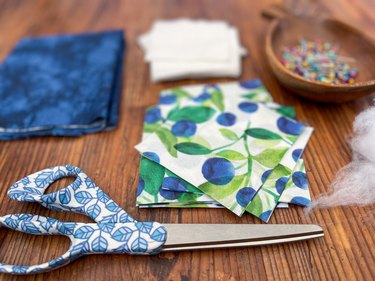
Things You'll Need
24 3 1/2-in. squares of muslin for bottom of puffs
24 4-in. squares of fabric for top of puffs
Poly-Fil stuffing
Straight pins or wonder clips
13 in. x 19 in. piece of coordinating fabric for backing
Tip
The cool thing about this project is that you can mix it up by changing the size of each puff. This means you can make a baby quilt, lap quilt or even a full-size quilt—the possibilities are endless! Oh, and get this—you can also use fat quarters, a jelly roll or scrap fabric to make this quilt. We chose to create our quilt design using the same fabric on puff squares, but you can design your own patchwork quilt top with any fabric. So, even if this is your first quilt, you'll crush it by following our step-by-step sewing project.
Part 1: Create Square Puffs
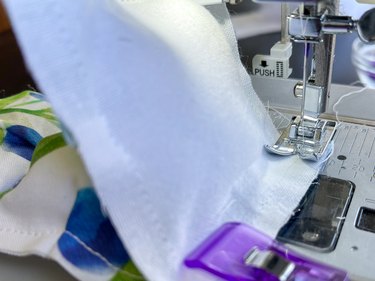
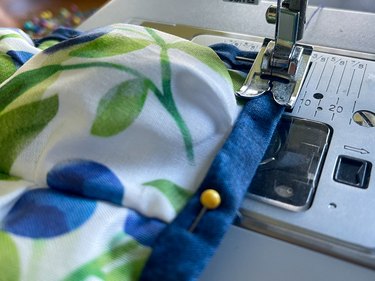
1. Sew pleats
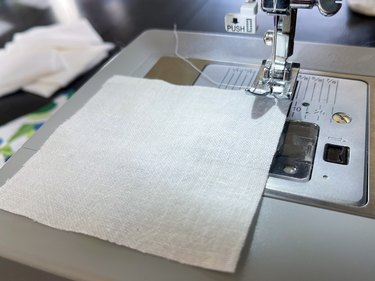
Place 3 1/2-in. square fabric onto a sewing machine. Next, set a 4-in. square piece on top, making sure to line up the top and bottom corners.
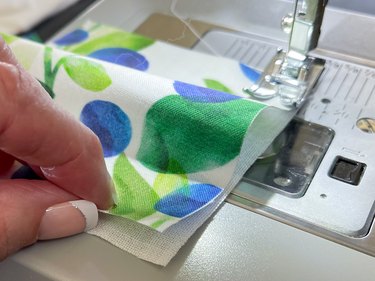
Begin sewing with a 1/4-in. seam. When you've sewn a bit, gather up extra fabric and pinch it in the middle to create a pleat. Sew over the pleat but stop approximately 1/4 in. from bottom edge.
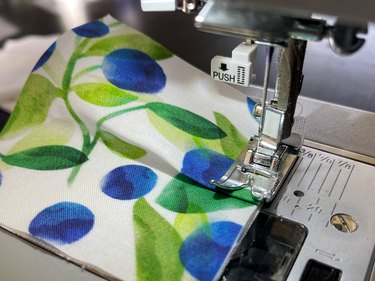
Keep the needle down, lift up the presser foot and turn the fabric 90 degrees. Then, put the presser foot back down and follow the same pleating process on the next two sides of your square.
2. Stuff puffs
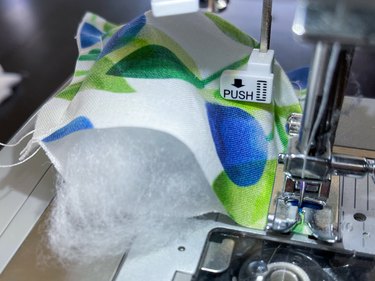
Stop sewing about 1/4 in. from the bottom of the third side but don't lift up that needle just yet. Before turning the corner and sewing the fourth side, fill the square with fiberfill stuffing. Once you have it stuffed to your liking, turn that corner, start sewing again and create another pleat on the fourth side. And just like that, you have a perfectly plumped puff.
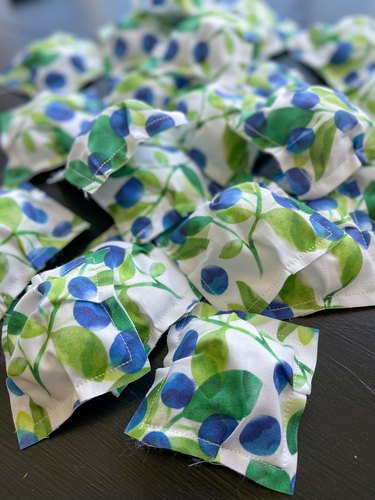
Keep sewing, pleating and stuffing until you've made a grand total of 24 square puffs.
Part 2: Assemble Placemat Top
1. Create strips
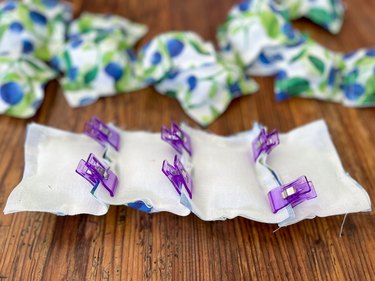
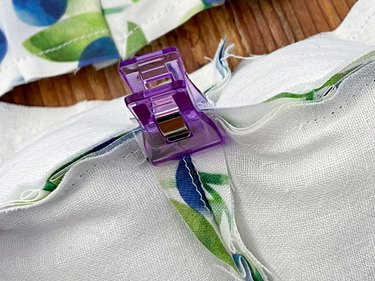
Clip four puffs together, ensuring the right sides face each other, to create one long strip.
Sew along each edge with a 1/4-in. seam. Be sure to remove the clips as you sew and backstitch on each edge.
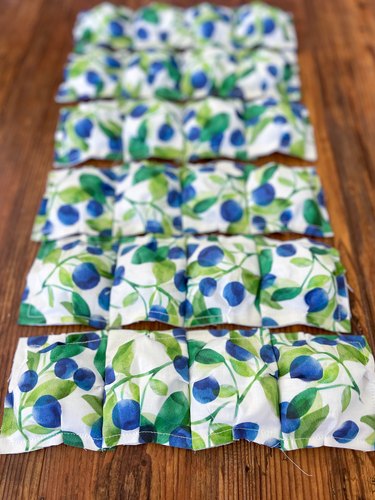
You'll end up with six puffy strips.
2. Sew strips together
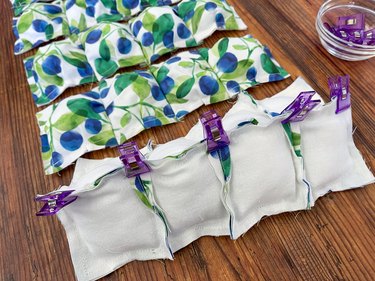
Clip two strips together, making sure the right sides face each other. Don't forget to open up the seams so you don't end up with a bulky mess. Then, simply sew with a 1/4-in. seam.
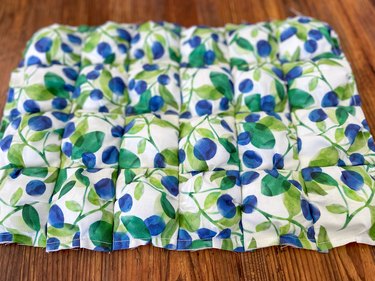
Continue clipping and sewing until all strips are adjoined to create the top of the placemat.
Part 3: Attach Backing
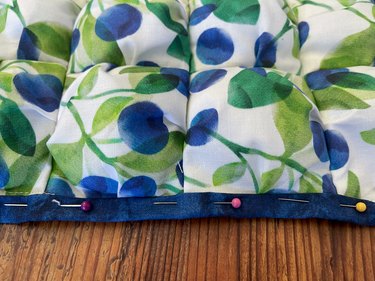
1. Pin and sew
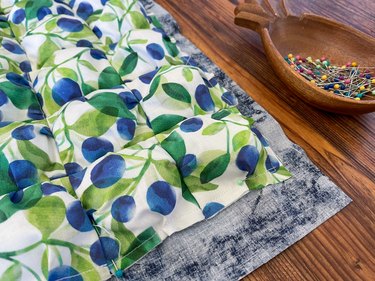
Now, center the wrong side of the placemat top on wrong side of the backing. Pin along the edge of the placemat top to hold it in place.
Using a 1/4-in. seam allowance, sew around all four sides of the placemat top.
Part 4: Add Binding
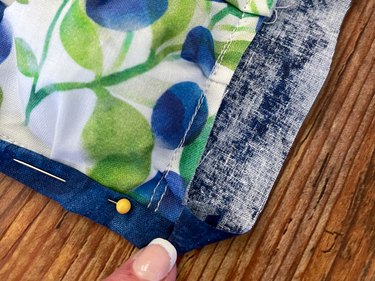
1. Fold and pin backing fabric
Fold over backing fabric so the raw edge lines up with the raw edge of the placemat top. Fold again so it covers the stitching you just completed around the edges of the placemat top. Pin or clip in place.
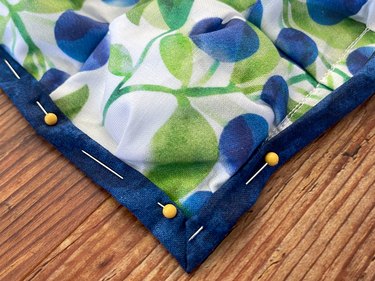
2. Create mitered corners
To create a clean mitered corner, fold the corner at a 90-degree angle so it lines up with the raw edge of the placemat top.
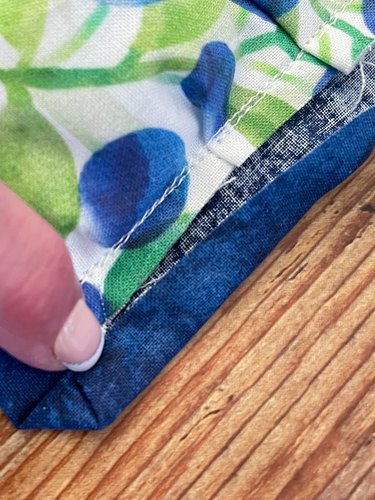
Fold the backing fabric so the raw edge lines up with the raw edge of the placemat top.
Fold again so the backing fabric covers the stitching and pin in place.
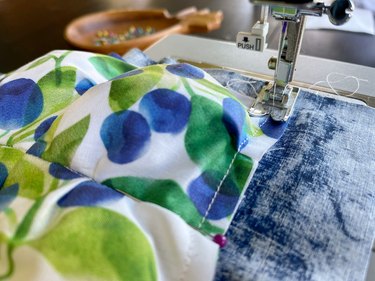
3. Sew binding
Using coordinating thread, sew around the entire placemat. Keep stitching very close to the inside folded edge.
Tip
To add a vintage feel, many quilters like to hand stitch around the edges of the quilt instead of using a sewing machine.
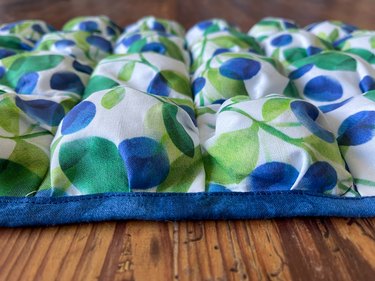
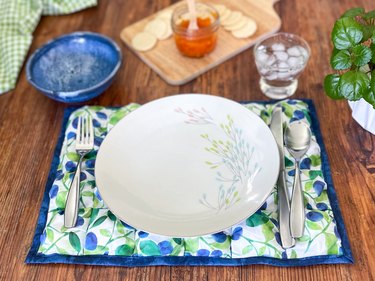
Well done, DIYers! You've successfully created beautiful puff quilt placemats to elevate your dining experience. Not only do these puffy quilt placemats add a touch of charm to any table setting but they're also practical and easy to clean. So, go ahead and host that dinner party you've been putting off or simply enjoy a cozy meal with your family. Whatever the occasion, your new placemats are sure to impress.