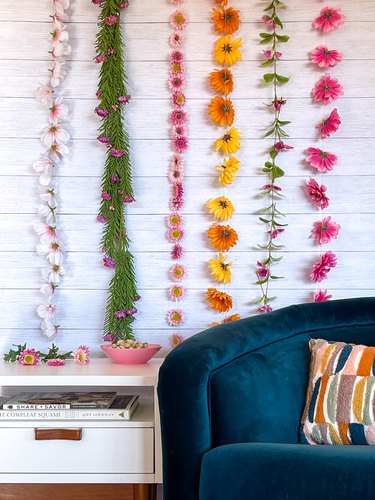
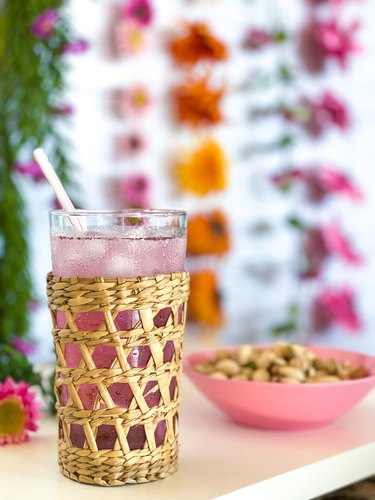
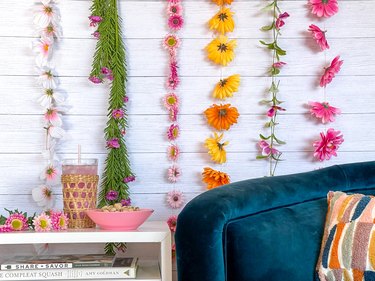
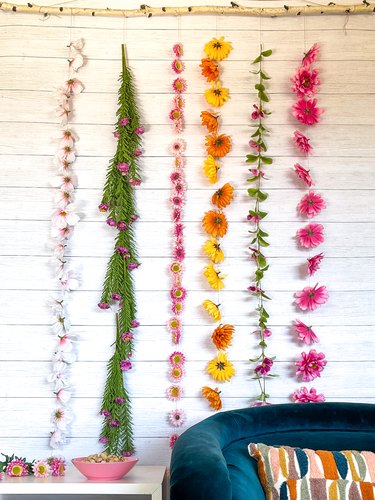
We ain't dandelion when we say this DIY floral wall hanging will instantly and affordably add warmth, texture and color to your living room, entryway or any room decor. No worries if your peonies are past their prime—both real and artificial flowers work well for this DIY project.
And there's no need to stop at boho home decor. Just imagine the incredible photo opportunities this flower wall hanging will create. It can be used for wedding decor as a beautiful floral backdrop behind the wedding party, or DIY it for a bridal shower or baby shower as a flower backdrop for a photo booth.
Video of the Day
Video of the Day
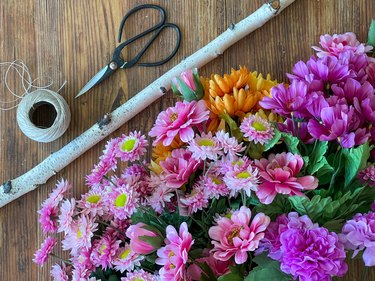
Whatever you create it for, this will not be your typical DIY art print. So, gather a few bunches of real or faux flowers, a few green leaves, some twine and a branch so we can show you how to create this beautiful flower wall hanging decor once and floral.
Things You'll Need
18 bunches of faux flowers (approximately three bunches for each flower garland) with greenery
Scissors
Sewing needle
Twine, fishing line or embroidery thread
Hot glue gun
One 24- to 36-inch branch
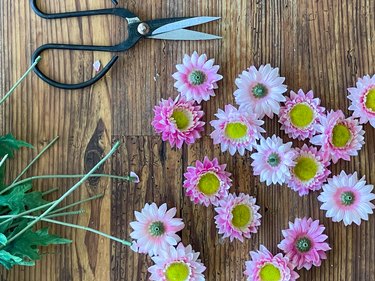
1. Snip, snip!
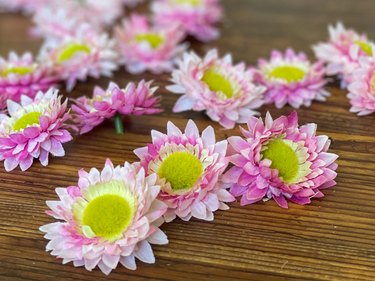
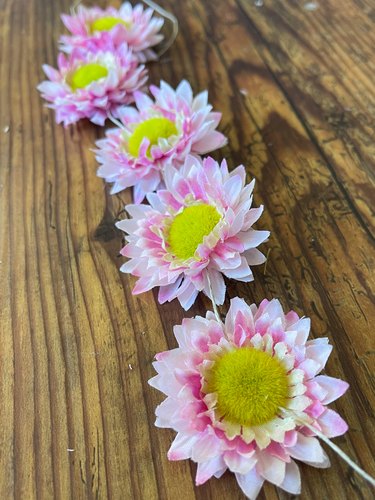
Here's your chance to channel your inner Morticia Addams and snip off the blooms of fresh or faux flowers. Use a pair of sharp scissors to clip each flower blossom from the stem. If you're using fake flowers, you might be able to simply pull each bloom from the stem. Leave the stems if you're working with delicate flowers or plan on hanging the stems in addition to the blossoms.
Tip
If you decide to use fresh flowers, choose flowers that dry nicely, such as roses, carnations, lavender, coneflowers and baby's breath. You can hang them with twine just like the artificial flowers.
You can also use silk flowers, succulents and even paper flowers to create your DIY flower wall.
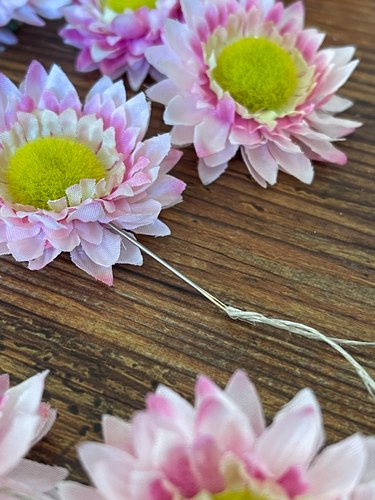
2. Thread a needle
One way to create the flower garland is by threading the blossoms onto twine. Thread a needle with thin twine, fishing line or thread. Push the needle through the center of the fake flower and pull the twine through. Leave 12 inches of twine at one end so you have enough twine to tie to the branch when hanging the garland. After each bloom is threaded onto the twine, tie a knot below the blossom to keep the flower from slipping down the twine when it becomes part of your flower wall decor. Keep threading the flower blossoms and tying knots until your flower garland is the desired length.
3. Hang stems and all
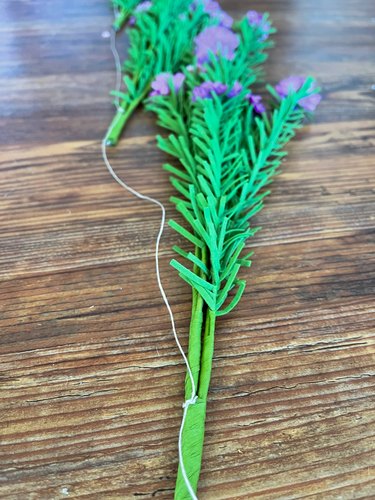
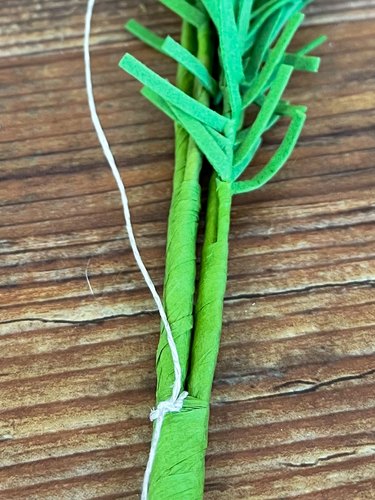
Another way to create some visual interest and variety in your flower garlands is to fasten the flowers to the twine, stems and all. Tie the twine to the end of the stem, leaving about 12 inches of twine so you can attach the flower garland to the branch later. Layer the stems the way you'd like them to hang and tie the twine to the next stem, continuing until your garland is the desired length.
4. Break out the glue gun
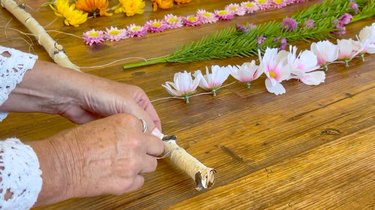
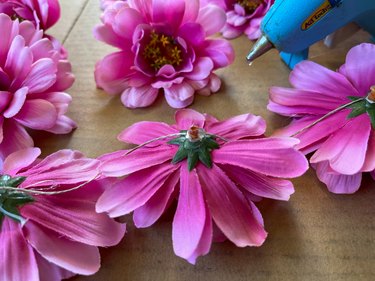
If needles and thread make you break out in a cold sweat, you can use your trusty glue gun to attach the blooms to the twine instead. And there's no need to be a hot (glue gun) mess either—just use some old cardboard to set up a gluing station when you attach your flowers to the twine with glue. Turn over each flower, put a dot or two of hot glue on the bottom of the flower and wrap the twine around the glue. Once again, be sure to leave about 12 inches at the top of the twine. Hold the twine in place on the hot glue until it is secure. Continue attaching the line of flowers until they are all glued to the twine.
5. Go ahead and branch out
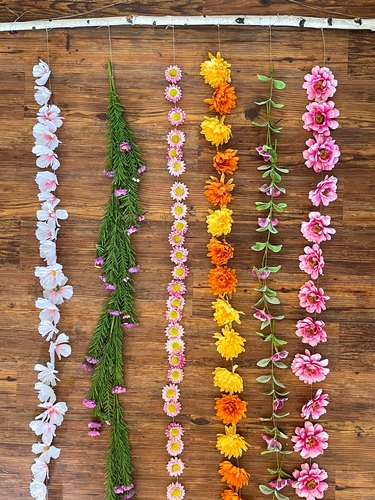
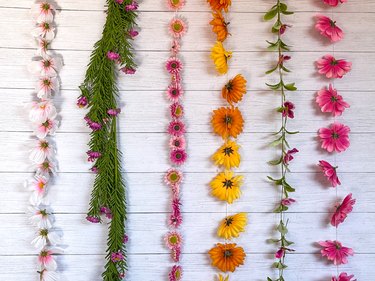
Once you have created enough floral garlands for your flower wall art, you are ready to tie each of them to the branch. Here's where you can get a little exercise in the great outdoors if you'd like. Head outside to find the perfect branch to use for a hanger. Any branch will do—birch, willow, cherry or oak. Just make sure you like the shape and the length. First, lay out the finished garlands on the floor with the 12 inches of extra twine at the top of each flower garland to determine what order looks best. When you get them in just the right order and just the right distance apart, you can tie each garland to the branch.
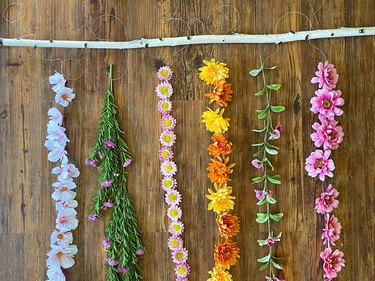
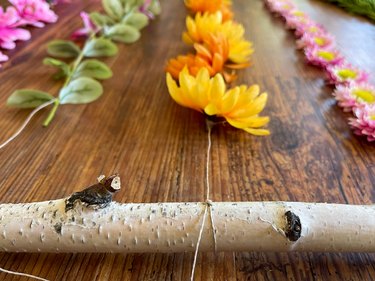
6. Last bud not least, hang with a string
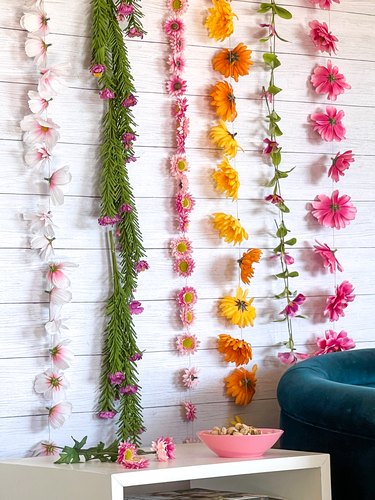
Tie a length of twine on each end of the branch to use as a hanger. Display your beautiful DIY floral wall decor and enjoy it all year long!