eHow may earn compensation through affiliate links in this article.
Inspired by the beautiful wall hangings made by fellow blogger Jeran of Oleander & Palm, I couldn't help but try my hand at this kid- and adult-friendly DIY yarn art form.
Video of the Day
Video of the Day
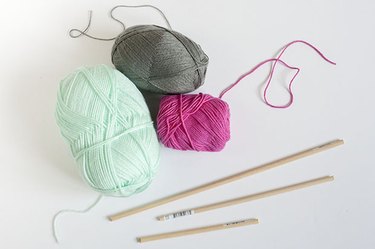
I think the best part about this project is how cheap it is. Because I had both of the supplies needed on hand — yarn and dowel rods — it cost me absolutely nothing! That said, if you had to purchase the materials from your local craft supply store, the tally likely wouldn't exceed $10 (and those spools of yarn could carry you through dozens of projects).

Things You'll Need
Scissors
Step 1
The first step in creating your own DIY yarn wall hangings is to grab a dowel rod —I worked my way through three rods to create a collection, but you can use however many you'd like. Next, cut your yarn into multiple pieces — about 4 feet in length for the longest dowel and 3 feet for the pair of smaller dowels. By cutting your yarn ahead of time, you'll be able to work your way across the dowel rods much faster.
Tip
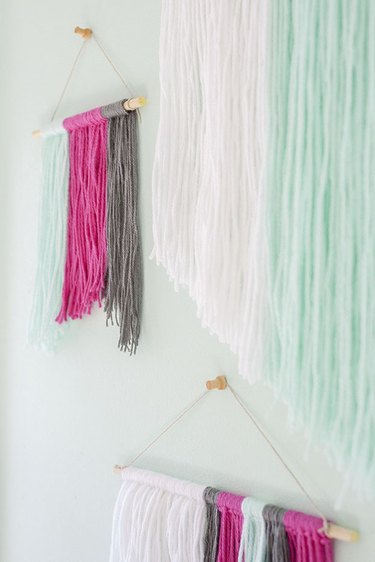
For your own collection of yarn wall hangings, you can skip or repeat colors as you go to create thick or thin stripes. There’s no right or wrong way to mix your colors, so have fun with it and experiment until you get just the right scheme.
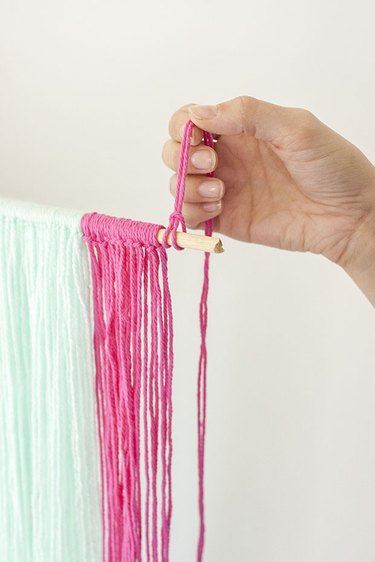
Step 2
If you know how to make fringe, you already know how to complete this project. Grab the first piece of yarn and hold it up in the center so that it dangles in half. Then, hold it against one side of the extended rod and put your thumb and pointer finger inside the loop. Then, as demonstrated in the photo, bring the lower dangling ends of the yarn through the loop, to the other side of the rod, and pinch them with your thumb and pointer fingers to knot.
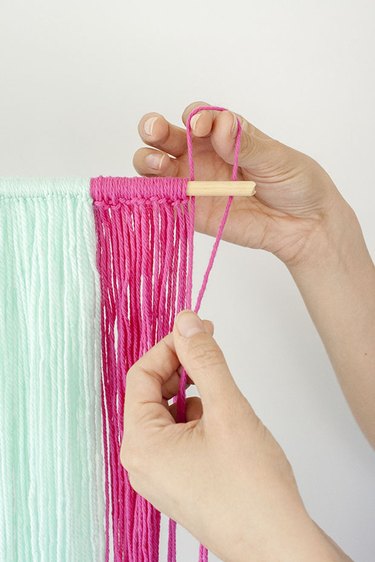

Finish by pulling the dangling ends of the yarn through the loop and pulling tightly. Repeat these steps across the entire dowel rod, making sure to push each loop of yarn right up against the one next to it. The tighter the configuration, the better, because the yarn will lay better and look fuller.
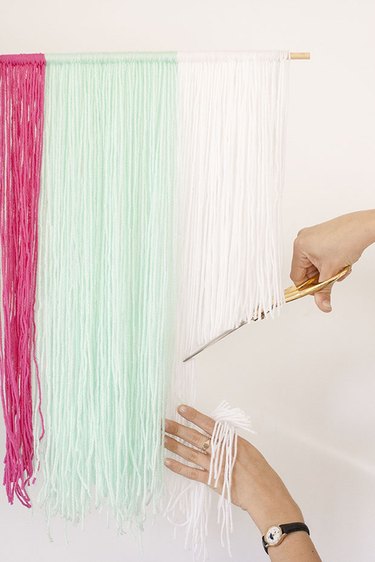
Step 3
With the yarn in place, now comes the final finishing touch. Grab a pair of extra-sharp scissors and snip through the uneven dangling ends of the yarn. Think of it as cutting hair. You can try a sheer angle, making the strands come to a banner-like point, or even do one high angle and one short for an asymmetrical finish. Although it's difficult to mess this up, you may want to start toward the bottom of your hangings just in case you need to try again and cut more yarn off.
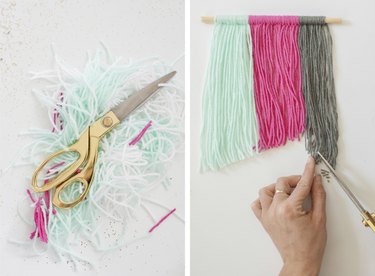
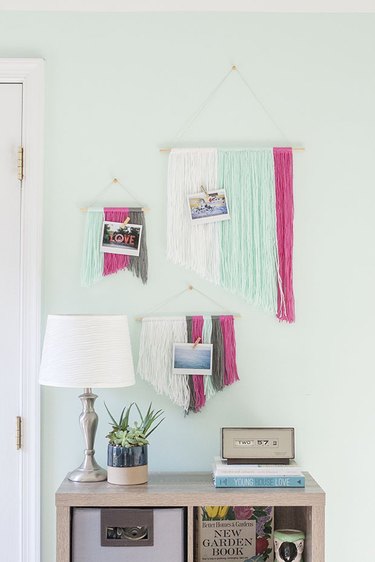
Step 4
To hang your yarn art, simply cut a piece of yarn or twine and tie it in knots on either end of the dowel rods. Then, stick a push pin in the wall and loop the twine on top. I chose to get a little creative with my finished wall hangings by adding polaroid photos to the yarn using mini wooden clothespins, but feel free to leave yours simple and sweet without embellishments. Whatever you choose to do, rest assured that this is one art project that won't break the bank!