Whether you're looking for a cozy DIY project or resolving to make your own gifts throughout the coming year (handmade Valentine or bridal shower gifts, anyone?), felted soap fits the bill. It's a terrific craft project for kids and beginners—and it's completely useful too. Felted soap, aka bars of soap wrapped in felted wool, give a rich lather and are gently exfoliating. Think: a washcloth and a bar of soap all tucked into one soft, sudsy package!
In this tutorial, you'll learn the magic of using wool roving and hot water to create gorgeous bars of felted soap. We recommend using high-quality natural soap, but really any commercial brand will do. The beauty of this craft is that you can use any type of soap, so if you have stray bars in a cupboard, use them up!
Video of the Day
Video of the Day
Things You'll Need
Wait. What in the World Is Wool Roving?
Good question! Wool roving is wool that’s been combed, washed and carded (and sometimes dyed) but not yet spun into yarn. It’s generally made from Merino wool and is very soft and fluffy. Roving comes in a wide variety of colors, from undyed natural to rainbow hues, so no matter your palette preference, you can create the felted soap of your dreams!
How to make Felted Soap:
1. Choose (or make!) your soap
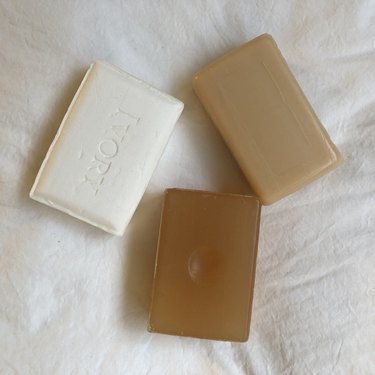
For felted soap, you can use existing scented bars—lavender and lemon verbena are especially popular fragrances. Small-batch handmade soap is generally scented with essential oils rather than chemicals, so it might be a more suitable option for people with sensitive skin.
If you're looking for handmade soap that's not terribly expensive, do a quick online search for "soap seconds." Many soap companies sell bars whose shape and size don't meet their exacting standards. But when you're making felted soap at home, size and shape are of no concern.
Do you make your own homemade soap? If so, this is a great opportunity to take your crafting to the next level!
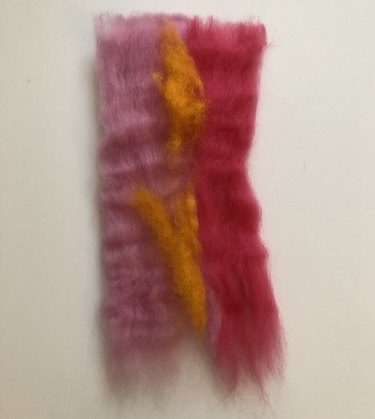
2. Select wool colors
You can use a single base color of wool roving and add accents or mix several together for a tie-dyed look. Experiment! Have fun with it. The finished bar of soap will likely look different than you expected, but it will always look fabulous.
Tip
Roving is often sold in multipacks of six or eight colors as well as individually. Order it online or purchase it at your local craft store. You can also check out Etsy for a sampling of what’s available.
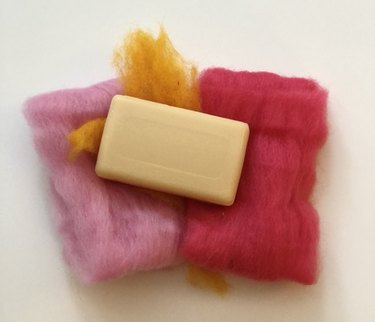
3. Separate wool roving
Wool roving should be torn, not cut. Tease the fibers apart so you have a piece as wide as your soap bar with enough material to wrap it around twice. If you're going for a multicolored effect, lay pieces of different-color roving on your work surface and overlap them slightly. For a more complex design, pull out small wisps of several colors and layer them on top.
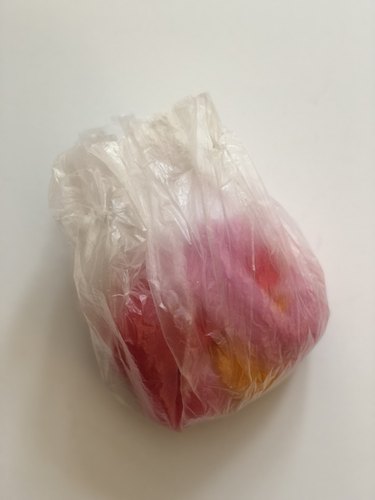
4. Wrap and bag soap bar
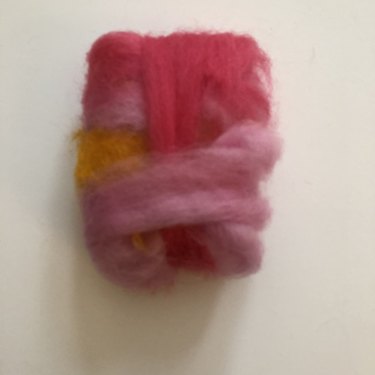
This part of the felting process can feel a little awkward but persevere—it's going to come out looking terrific. The wool layer should be so thick that you can't see the soap through it. Try to keep it smooth, as big lumps will make the wet felting process more challenging. Wrap the soap in both directions so every side is covered.
Put the wrapped soap into a produce bag and poke a few holes in the bag so water can flow through. Cut the bag so that you have enough to completely cover the soap—any extra plastic or fabric will get in the way and make the felting process more difficult. If you're using a bag, poke several holes so hot water can flow in and out easily.
The reason we use this added layer is to provide extra friction, which plays an important role in getting those wet wool fibers to mat together. If you don't have a bag or an old pair of nylon stockings, it's OK to simply use your hands. But the addition of a pouch or bag will make this DIY project easier for kids and beginners.
Tip
Don't have a produce bag or trying to avoid plastic? An old nylon stocking also works.
5. Felt the soap
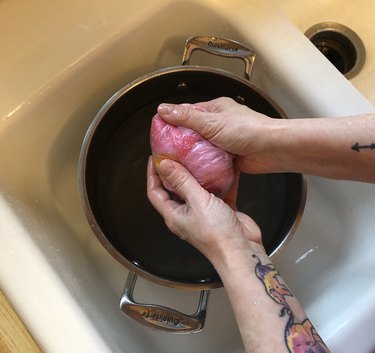
Fill the sink or a large pot or basin with hot water. Heat causes the fibers to mat together, creating the felted wrapper for your soap bar. So keep it hot but not so hot that you'll scald yourself! Test the water with your hand—if it's uncomfortably hot, add a little cold water.
Dip the soap into the hot water. You can start by just squeezing it—you'll see that the wool begins to shrink and mat fairly quickly. Be gentle at this stage so you don't pull the wool right off the soap. Rub each side and the ends with your palms, dipping frequently into the hot water. As the water cools, intermittently add more hot water to your basin so the temperature remains high enough for fiber matting. Once it feels like you have a single sheet of wool under your hands (rather than individual strands), you can start handling it more firmly.
As the felting process begins, you'll feel the difference. It's almost like holding a tiny sweater in your hands! The soap will release plenty of suds, but don't worry about using it up before you get it felted. This lather actually helps in the felting process. Now, you can turn the bar around and around in your hands just as you would if you were trying to work up a lather.
6. Rinse and dry felted soap
Tip
Be patient! It might seem that you’re not making much progress, but you are. It can take 10 to 15 minutes to get the wool well felted.
Once the wool has started to felt, remove the soap from the bag or nylon stocking. Continue to work it vigorously. The more agitation, the tighter the felt will be around the soap.
When the wool feels tight and you can't lift it with your fingernail, it's fully felted! Rinse well with cold water. There might still be some suds visible even after rinsing. Set your bars of felted soap on a towel to dry. They can take up to a day to dry out completely. Moving them to a dry part of the towel every so often when they're wet will speed up the drying process.
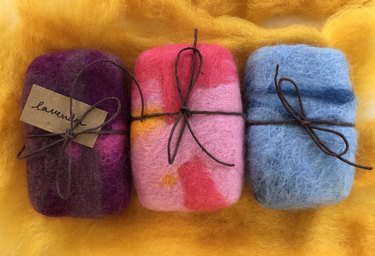
7. Label completed soap

If you're sticking your soap in a gift basket or presenting it for a special occasion, a tag is the perfect finishing touch! Using twine or ribbon and a small section of brown paper, label the soap with its fragrance and/or the recipient's name. Felted soap bars are so visually pleasing that they truly don't need additional wrapping! This handcrafted treasure is sure to delight, and it's so nice to give a gift you know will be put to good use.
Tip
Wool roving is compostable! So once you've gotten every last bit of sudsy goodness out of your felted soap bar, you can toss the wool wrapper in the compost pile.
You can keep these homemade beauties for yourself, of course. They're refreshing to use—the wool acts as a washcloth or soft loofah, so it's gentle and luxurious. No matter who receives your finished product, we hope you have a fun and sudsy crafting adventure!