From butterfly clips to bucket hats, the '90s are back, and it's better than ever. If you grew up in that decade — or if you just love retro designs — there's a good chance you're all about this trend. Luckily, it's easy to recreate '90s-inspired DIY fashion jewelry, even if you're a beginner crafter. Pinky promise!
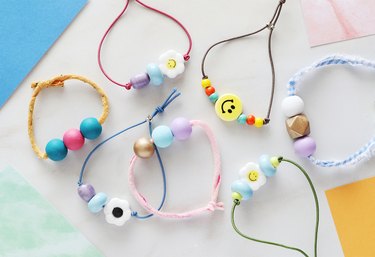
This tutorial for beaded bracelets is the perfect example. One version is a beaded stretch bracelet made with elastic and chunky ceramic beads, including ones with retro motifs, like smiley faces and daisies. The other version calls for nothing more than colorful wooden beads and scrap fabric, resulting in a fun bracelet that's eco-friendly to boot.
Video of the Day
Video of the Day
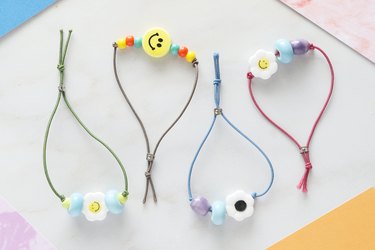
What's more, this bracelet set can be customized to your heart's desire. For example, you can choose a color palette that suits a specific outfit or use chunky beads with your favorite vintage symbols, like hearts or peace signs. From there, try styling the pieces with fine gold-tone chain bracelets for a modern look or wear them on their own. It's a simple yet trendy jewelry-making project that will make you so nostalgic.
Beaded Elastic Bracelet
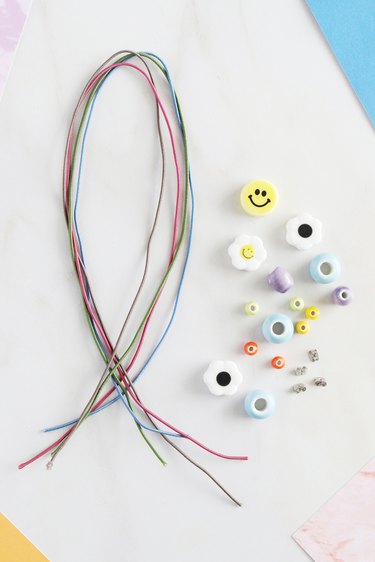
Things You'll Need
Elastic cord (about 1.2 millimeters thick)
Ceramic beads, including shaped and round beads
Yellow gold or sterling silver earring backs (also known as ear nuts)
Scissors
Tip
You can find chunky ceramic beads on Etsy or Amazon or in the jewelry-making section of your local craft store.
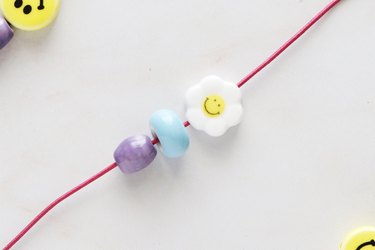
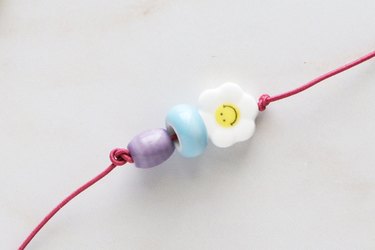
1. Design your colorful beaded bracelet
If you haven't already, cut a strand of elastic cord measuring twice the diameter of your wrist.
String three or four beads onto the elastic. Don't hesitate to get creative with this step! If you're using a combination of smaller and larger beads, you can add more.
2. Tie two double knots
On one side of the beads, tie a double knot. Repeat on the other side. These knots will keep the ceramic beads in place.
Tip
This step uses a standard double knot. However, to make sure the knot is in the right place, try to tie it to the beads as close as you can. Before tightening the knot, guide it toward the beads before pulling it taut.
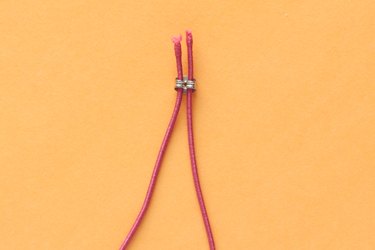
3. Insert the elastic through the earring backing
Thread one end of the elastic through one hole of the earring backing. Repeat with the other end and hole.
Tip
An earring backing, or ear nut, is normally used to keep an earring in place while you’re wearing it. In this project, it acts as a slider to make the bracelet adjustable. Of course, this isn’t a typical use for this item, but it certainly gets the job done. You can find earring backings in the jewelry-making section of a craft store. Another option is to use a bead spacer if you can find one with a hole that fits two strands of elastic.
4. Enjoy your DIY adjustable bracelet
Try on the bracelet and slide the ear nut toward your wrist. Once the bracelet fits snugly around your wrist, remove it and tie a knot about 1 inch beneath the ear nut. Finally, cut away the excess elastic cord.
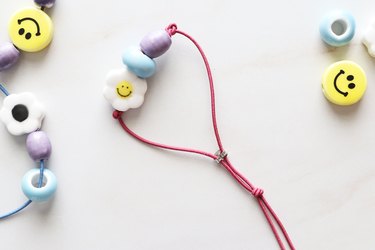
And just like that, you have a multicolor bead bracelet. You can make an entire bracelet set by using different beads and cords in various colors.
These pieces are fun and nostalgic on their own, but if you want to style them with other jewelry, we recommend pairing them with simple chain bracelets and necklaces. For older kids and teenagers, this project is ideal for making friendship bracelets. However, avoid giving these pieces to babies and younger children, as the smaller pieces may present a choking hazard.
Tip
To turn this project into an anklet, all you need to do is make the bracelet slightly bigger. It's so fun!
Chunky Wooden Bead Bracelet
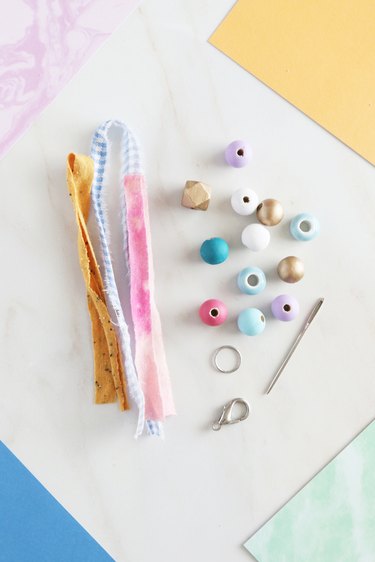
Things You'll Need
Scrap cotton fabric
Tapestry needle
Colorful wooden beads with large holes
Extra-large lobster clasp (about 19mm)
Extra-large jump ring (about 14mm)
Scissors
Tip
You can find colorful wooden beads at a craft store. If you’re unable to find colors you like, consider buying plain wooden beads and coating them with acrylic paint.
1. Prepare your scrap fabric
If you haven't already, cut a strip of fabric measuring twice the diameter of your wrist. It should be about 1/2 inch wide or thinner.
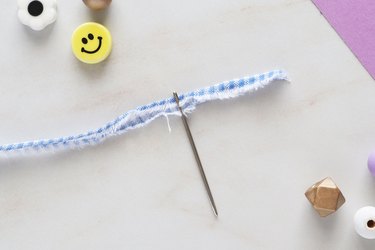
Insert one end of the scrap fabric through the tapestry needle.
Tip
It’s essential to use a tapestry needle for this project. A tapestry needle has a large hole, which will be big enough for the scrap fabric.
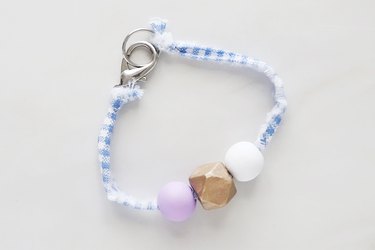
2. Design your bracelet
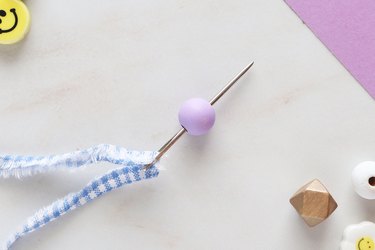
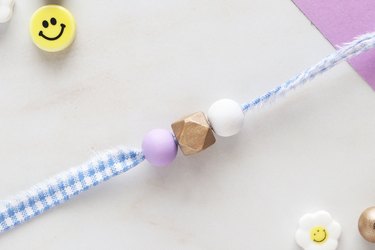
Insert the needle into one bead and then slide the bead on to the fabric.
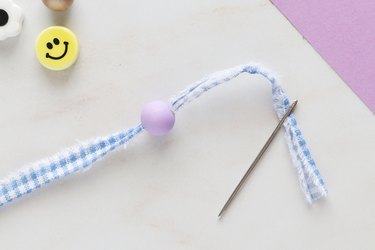
Add another two beads using the same technique.
3. Finish your beaded fabric bracelet
Once you've added all your beads, insert the needle into the loop of your jewelry clasp. Tie the fabric into a knot to secure it.
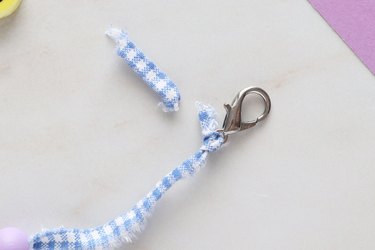
Insert the other end through the jump ring and then tie another knot to secure it. Cut away the excess fabric.

Tip
Before securing the knot around the jump ring, make sure the bracelet fits your wrist. To do this, measure the length between the jump ring and lobster clasp. This should match your wrist measurement.
Beaded Stretchy Bracelet With T-Shirt Fabric
To make a stretchy version of the chunky wooden bead bracelet, use a strip of T-shirt fabric instead. This type of fabric is stretchy.
Simply add the beads using a tapestry needle, just as you would with the cotton fabric. Instead of adding a clasp, you can simply tie the ends in a knot.
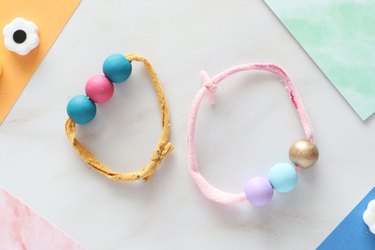
Other Beads to Use
For an elegant touch, consider adding freshwater pearl beads to your pieces. Just make sure the elastic or fabric can fit through the hole of each bead. Glass beads are another beautiful option.
Again, you can also use plastic beads for these wrap bracelets. Plastic beads are lightweight, inexpensive and available in a wide range of colors, including trendy pastel shades.
If you want to make a charm bracelet, add a few metal charms. For a boho look, add tassel charms to a stone beaded bracelet.