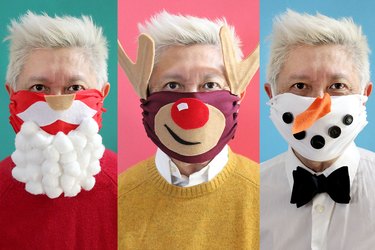
This holiday season, don't let wearing a mask make you a grinch. Masks can be fun. Here are three festive masks you can make yourself with absolutely no sewing required. They are made with two layers of t-shirt fabric, with only the top layer decorated. Since the two layers are not sewn together, you can easily separate them and wash the layer that touches your face. So, will you be Santa, Rudolph or Frosty the Snowman? No matter which mask you wear, you'll be spreading holiday cheer — instead of germs.
Video of the Day
Warning
These masks are not intended for use in any clinical or surgical setting or where exposure to bodily or hazardous fluids may be expected, or where the risk of exposure through inhalation is high. The masks are not surgical masks, personal protective equipment, or filtering respirators (such as N95 masks). They do not replace other recommended measures to stop the community spread of COVID-19. Please continue to follow CDC guidelines, practice social distancing, wash your hands, and refrain from touching your face.
Things You'll Need
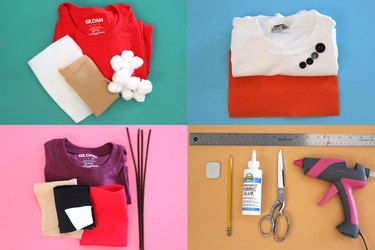
Red t-shirt (Santa)
Scissors
Ruler
Pencil or fabric chalk
White felt
Fabric glue
Tan felt
Cotton balls
Hot glue
White t-shirt (Snowman)
Orange felt
Black buttons
Brown or burgundy t-shirt (Reindeer)
Red felt
Black felt
Pipe cleaners
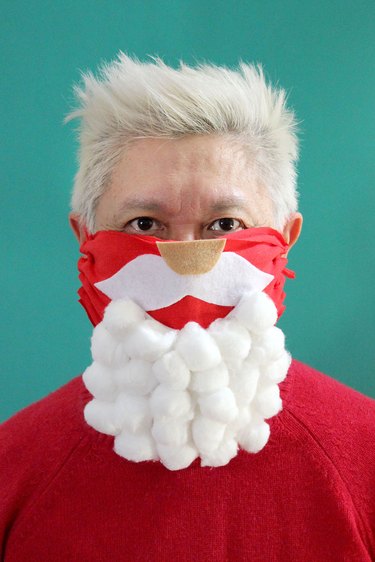
Santa Face Mask
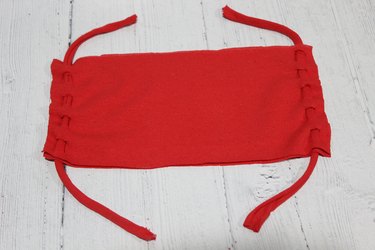
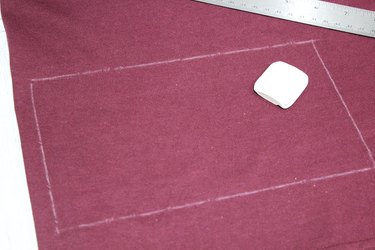
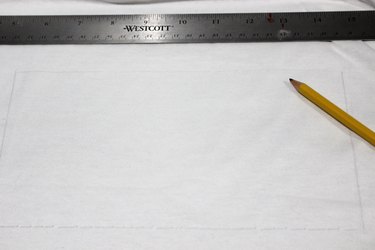
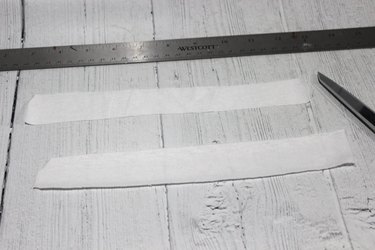
Step 1: Cut Fabric
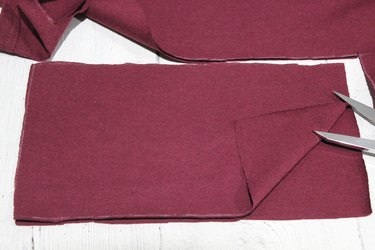
Using a ruler and pencil or fabric chalk, mark a five-inch by nine-inch rectangle on a red t-shirt. This size works well for an average adult face, but you may want to adjust it according to your own.
Video of the Day
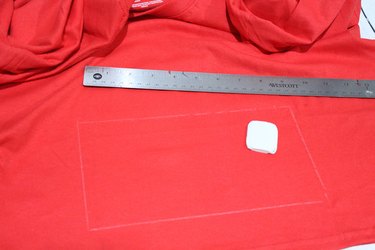
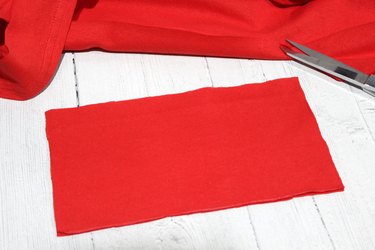
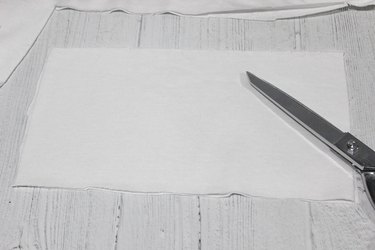
Cut out the rectangle, being sure to cut through both layers of the t-shirt so you have two identical layers.
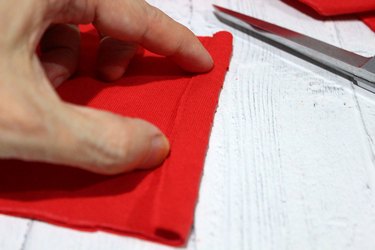
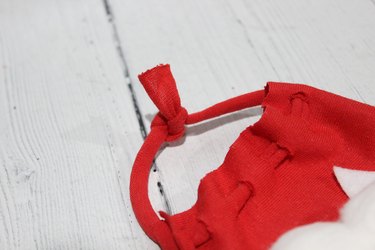
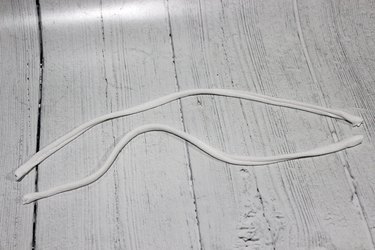
Step 2: Add the Side Straps
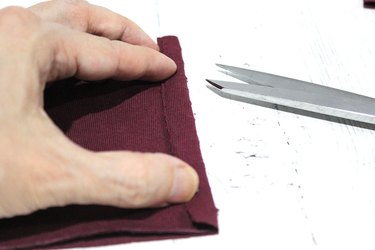
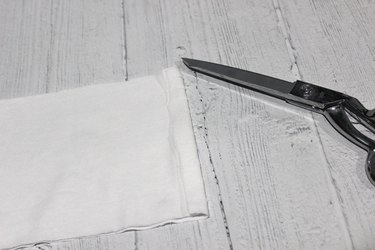
On both the left and right sides, fold the edge over about a half inch and cut evenly spaced slits on the edge. There will be room to make about 10 slits. This will create the holes for threading the straps.
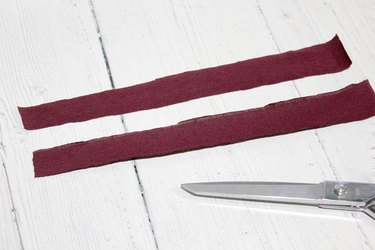
Cut two strips of t-shirt that are one inch by nine inches.
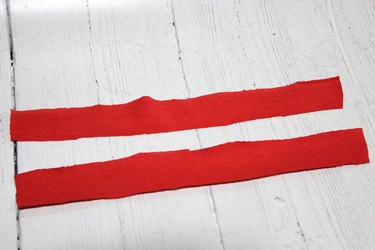
Pull the strips tautly, and they will turn into pieces of stretchy t-shirt yarn. These will be the ear straps.
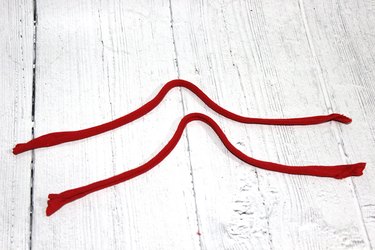
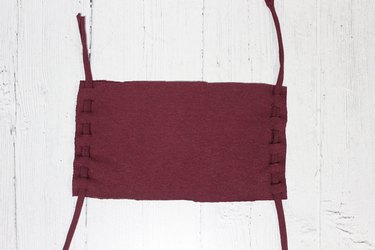
Thread the straps through the slits you cut in the mask, joining the two layers together.
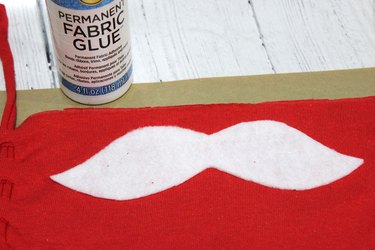
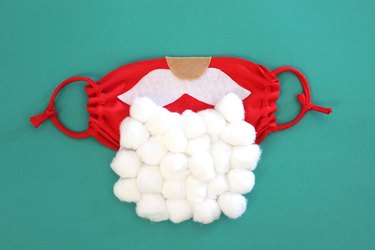
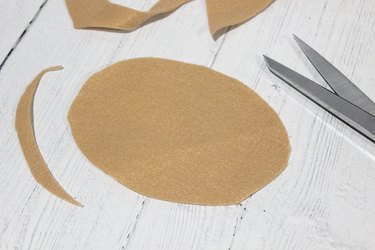
Step 3: Make a Mustache
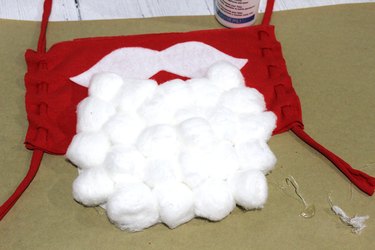
Cut out a large mustache out of white felt that is about six inches wide.
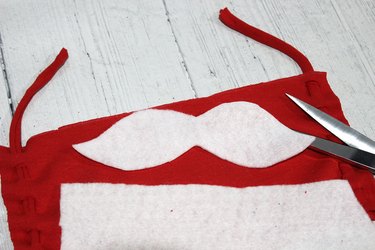
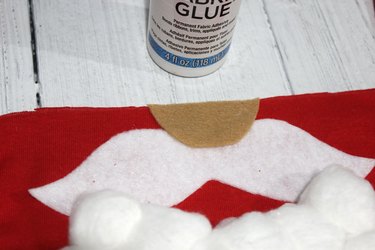
Adhere it to the top of the mask with permanent fabric glue. You can also use a hot glue gun, but fabric glue is more flexible. Leave a little room at the top for a nose.
Step 4: Grow the Beard
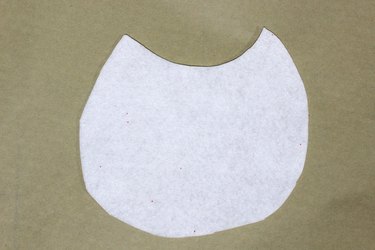
Cut a beard shape out of white felt that looks like a circle with a bite taken out of the top.
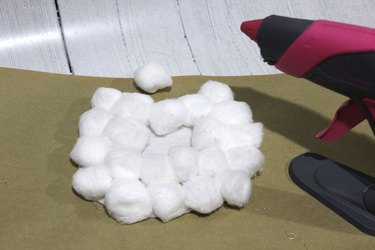
Hot glue cotton balls to the beard to make it nice and full.
Adhere the beard to the mask with fabric or hot glue. The upper curve of the beard creates a smile when placed over the mustache.
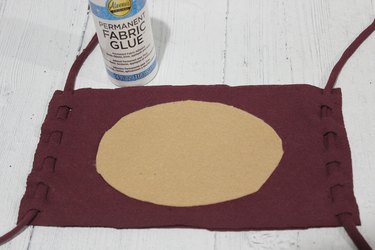
Step 5: Add the Nose
Cut a semicircle out of tan felt and glue it to the top of the mask above the mustache.
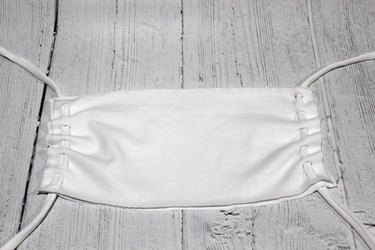
Step 6: Adjust the Ear Straps
Tie the ends of the ear straps to form a loop. Adjust it as needed so the mask is secure around your face.
Wear this mask, and you'll be on Santa's "nice" list.
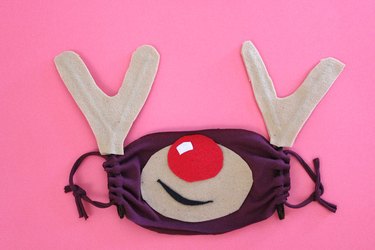
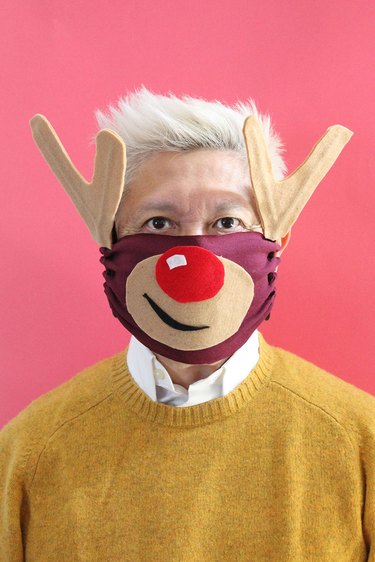
Reindeer Face Mask
Step 1: Cut the Fabric
As with the Santa face mask, mark a five inch by 9 inch rectangle on a t-shirt. For the reindeer, choose a brown or burgundy t-shirt.
Cut the shape out with scissors, cutting both layers at the same time so they line up perfectly.
Step 2: Attach the Ear Straps
Fold the left and right sides and cut about 10 evenly spaced slits along the edges.
Cut two strips of t-shirt fabric to one inch by nine inches.
Pull on the the strips to stretch them out, and they will become the ear straps for the mask.

Thread the ear straps through the slits you cut in the mask.
Step 3: Create the Muzzle
Cut an oval that is about six inches long out of a piece of tan felt for the reindeer's muzzle.
Attach it to the center of the mask with fabric glue.
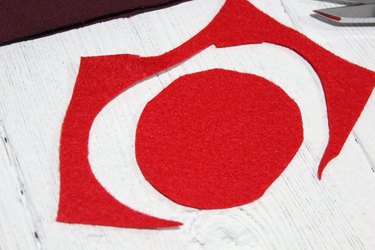
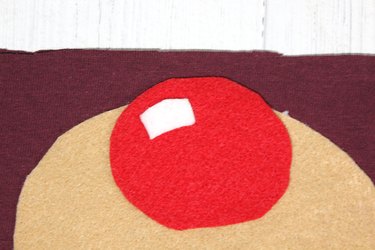
Step 4: Add the Nose
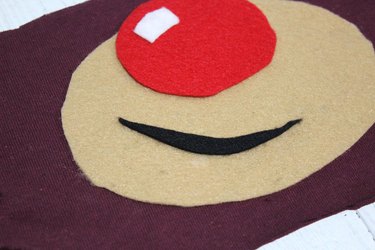
From a piece of red felt, cut a round circle that is about three inches in diameter for the reindeer nose. The red nose is for Rudolph. If you're making a generic reindeer, you can use brown or black felt.
Glue the nose to the top of the muzzle. Also, since Rudolph has a very shiny nose, glue a small white piece of felt to the nose to indicate shininess.
Step 5: Give Him a Smile
Cut out a smile shape out of black felt and glue it to the muzzle. I attached my smile off-kilter to create a grin.
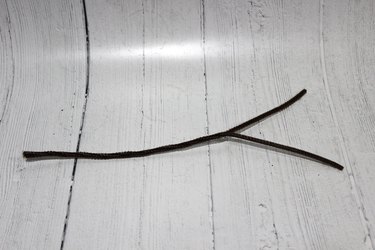
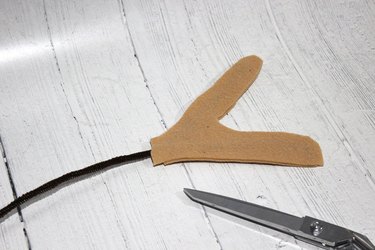
Step 6: Make the Antlers
Adding antlers to this mask is completely optional, but believe me, they really make the mask. Start by twisting two pieces of brown pipe cleaners together to form a V shape at the end.
Place the V-section of the twisted pipe cleaners on top of a piece of tan felt.
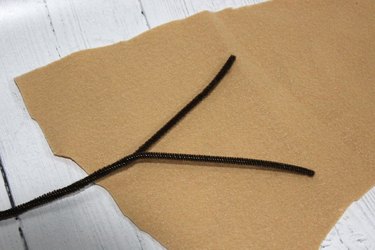
Apply hot glue around the V and place another piece of tan felt on top. Press the two layers of felt together.
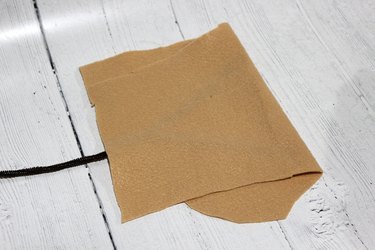
Cut around the V to reveal the antlers. You'll want to make two sets of antlers.
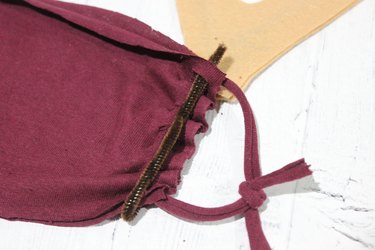
Step 7: Attach the Antlers
Thread the pipe cleaners through the same slits you used for the ear straps.
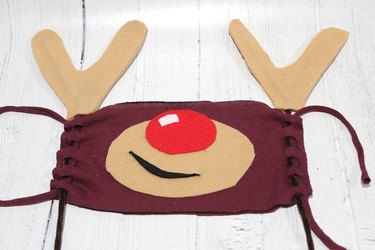
Fold back the excess length of pipe cleaner on the back of the mask and secure it by slipping it through one of the slits. Tie the ear straps so they fit snuggly around your ears.
This is a face mask that, like Rudolph, will go down in history.
Snowman Face Mask
Step 1: Cut the Fabric
Again, mark off a five-inch by nine-inch rectangle, this time on a white t-shirt.
Cut a rectangle out of the two layers of t-shirt fabric.
Step 2: Make the Ear Straps
Fold over the two edges of the mask and cut about 10 evenly spaced slits along the edges.
Cut two pieces of t-shirt fabric that are one inch by nine inches.
Pull the strips to stretch them out.
Thread them through the slits in the mask.
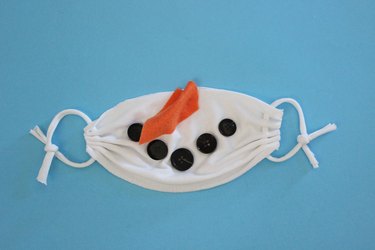
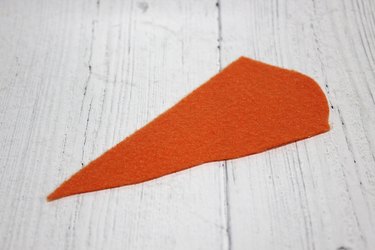
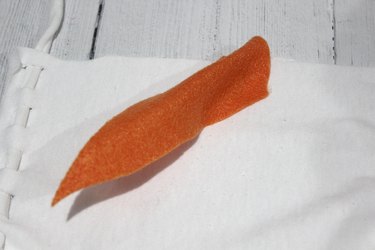
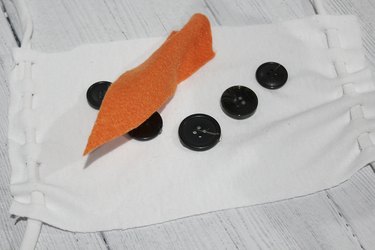
Step 3: Make a Nose
Cut a four-inch long carrot shape out of orange felt.
Hot glue the base of the nose to the top center of the mask. Pinching the base while gluing adds dimension to the nose. Because the nose is sticking out and needs more support, hot glue will work better than fabric glue for this task.
Step 4: Add the Smile
Hot glue some buttons in a smile pattern beneath the nose.
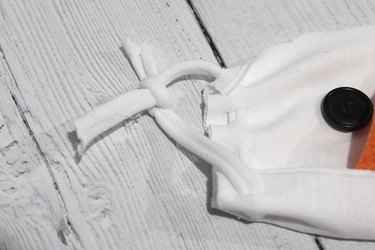
Step 5: Adjust the Ear Straps
Tie the ear straps into a loop, and adjust as necessary so the mask fits snugly around your face.
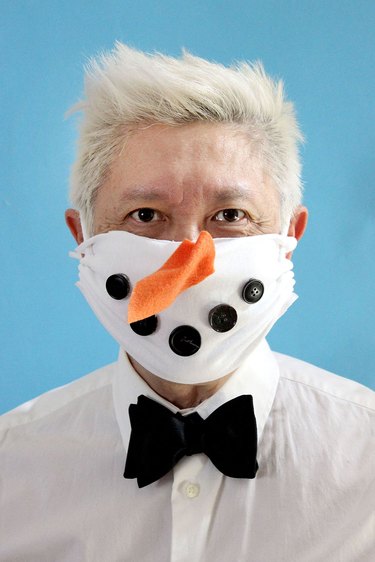
When you wear this mask in public, the reception will be anything but frosty.