eHow may earn compensation through affiliate links in this article.
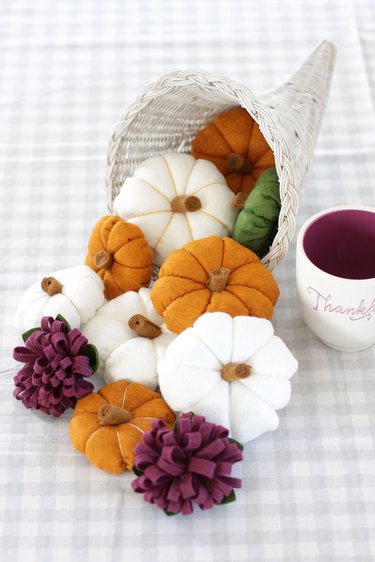
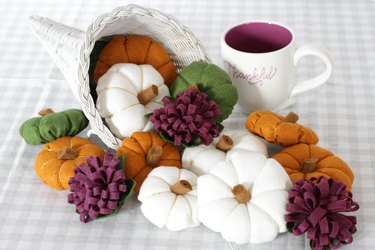
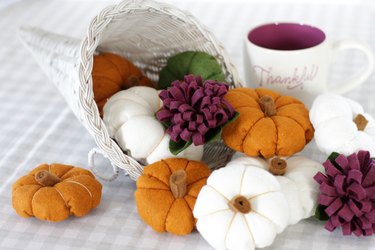
The cornucopia and Thanksgiving go together like turkey and cranberry sauce, like mashed potatoes and gravy, like pumpkin pie and whipped cream. Symbolizing wealth, prosperity and abundance, it's just one of those fall staples we see on tablescapes every autumn. You can modernize your "horn of plenty" centerpiece this season by painting the basket white and creating some delightful felt gourds and flowers in any color you'd like to fill it.
Video of the Day

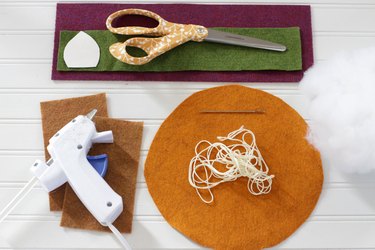
Things You'll Need
Step 1
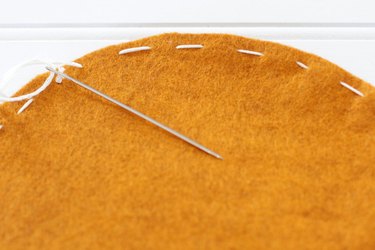
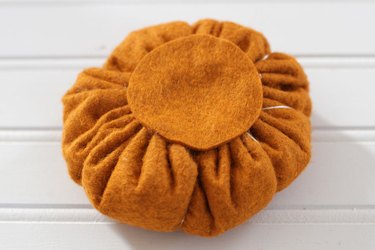
To make the pumpkin, knot the end of the thread onto the embroidery needle and sew a running stitch around the outside of the felt circle.
Step 2
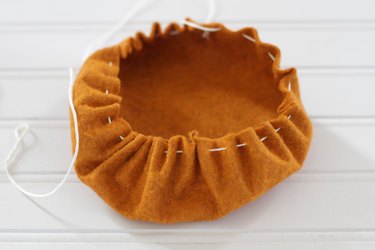
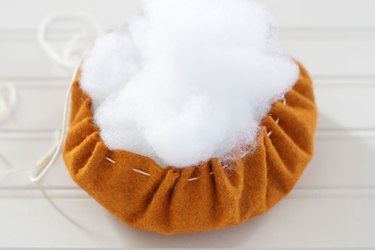
Pull the thread to create a cup shape and fill with fiberfill.
Step 3
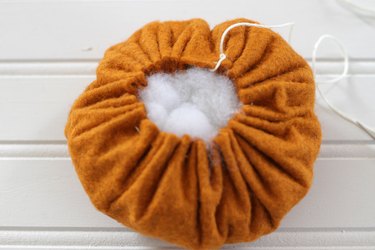
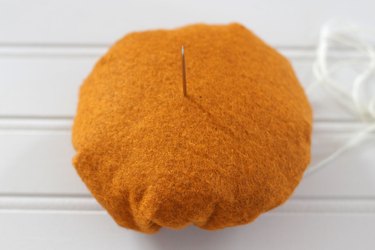
Pull the thread as tight as you can and tie a knot in the end. Do not cut the thread yet.
Step 4
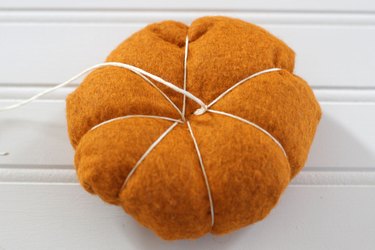
Push the needle through the fiberfill from the bottom and up through the center of the pumpkin top. Wrap the thread back around the pumpkin and up through the center again. Each time pulling the thread tight. Repeat this 5 or 6 times to create sections. Don't worry about having it symmetrical because pumpkins aren't naturally even. When you get to the end, tie a knot in the thread and cut.

Step 5
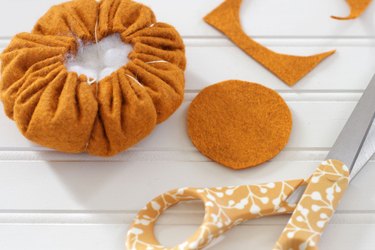
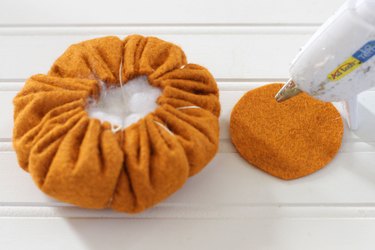
Cut a small felt circle and use hot glue to attach it to the bottom of the pumpkin.
Step 6
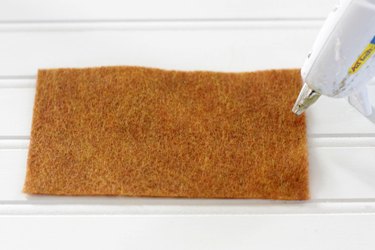
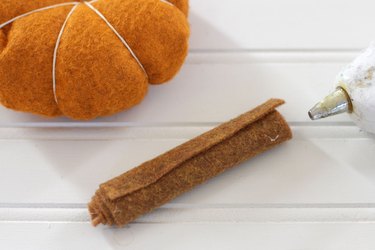
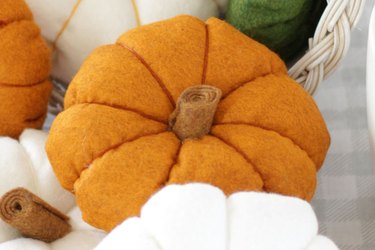
To make the stem, run a small bead of hot glue along the 2-inch edge of the stem felt. Roll the felt and use hot glue to secure the other end. Let it dry for 15 minutes. Cut the stem at an angle to the length you desire and attach it to the top with hot glue.
Step 7
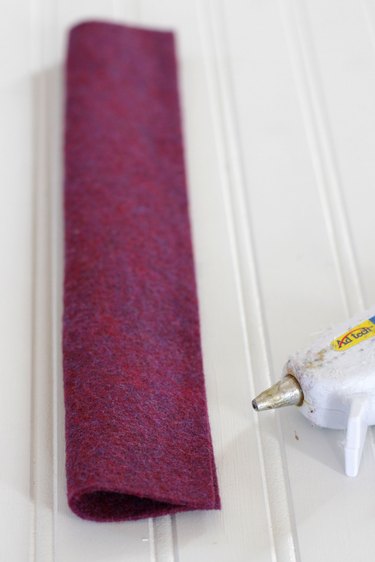
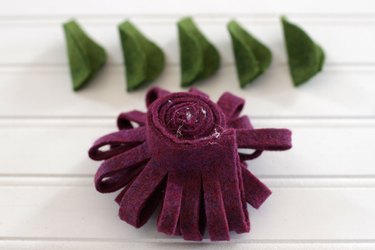
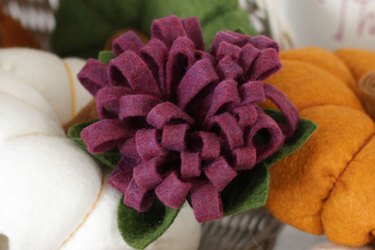
To make the flower, fold a 4-inch x 12-inch piece of felt in half lengthwise and secure the long edge with hot glue.
Step 8
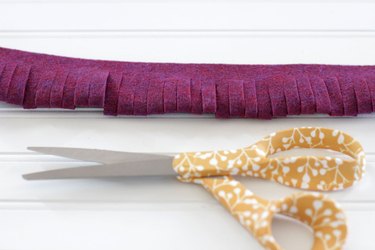
Use a sharp pair of scissors to cut fringe. Start each cut on the folded edge and be careful not to cut all the way through.
Step 9
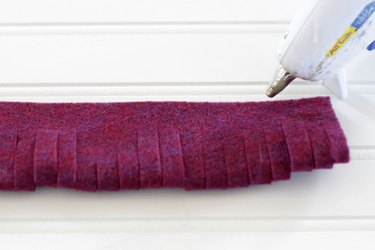
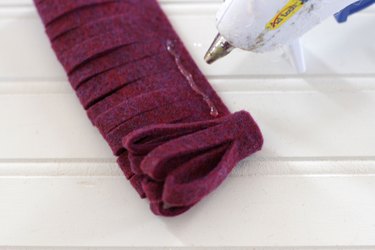
Run a bead of hot glue along the uncut edge and roll the felt until you get to the end.
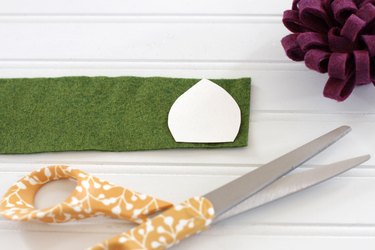
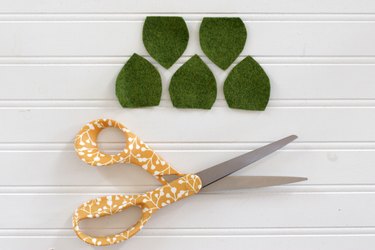
Step 10
To make the leaves, use a paper pattern to cut out five similar felt leaves that are approximately 2-inches tall.
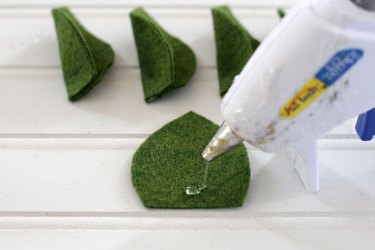
Step 11
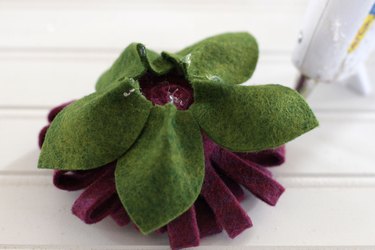
Put a dot of hot glue in the center of the flat, bottom edge of each leaf and fold in half.
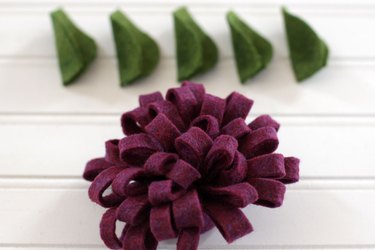
Step 12
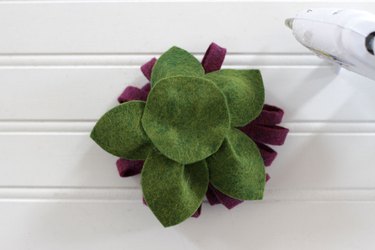
Turn the flower over and attach the leaves with a hot glue gun.
Step 13
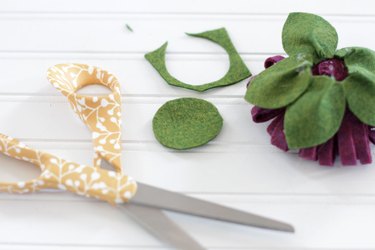
Cut a small circle of felt and attach it to the bottom with a hot glue gun.
Step 14
Paint your horn of plenty basket white and fill it to overflowing with all of your pumpkins and flowers. Such a beautiful way to express gratitude for all of the abundance in life.