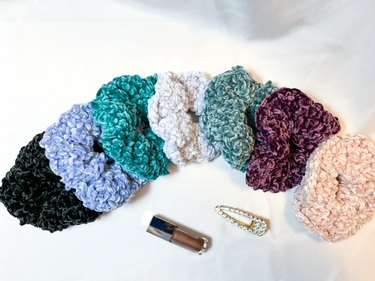
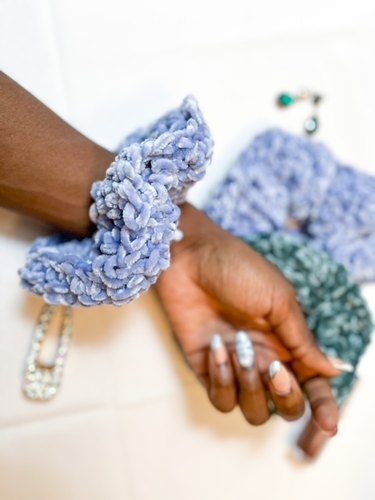
Scrunchies are definitely having more than just a moment. From social media to Etsy to in-person craft fairs and beyond, they seem to be popping up on ponytails (and wrists!) everywhere. It's been a few years since their glorious return, and I think it's safe to say that the lovable hair ties are here to stay. I, for one, couldn't be happier. I wholeheartedly support the trend (and the nostalgia it inspires).
So, I jumped at the chance to create DIY scrunchies of my own, only with an oversized, velvety twist, like the ones I feature in my shop, Yaya's Yarnanigans. Ready to embrace the look? Follow my scrunchie pattern below to create an oversized velvet scrunchie made from Bernat Velvet Yarn. This project is also good practice for working with textured yarn, which opens the door to making soft headbands, beanies or other wearable works in the future.
Video of the Day
Video of the Day
Before working with velvet yarn, here are a few pros and cons to consider. First, this yarn is suitable for beginner to intermediate-level crafters with a slight bend toward intermediate. The texture differences in the yarn require some familiarity with what stitches should look like (front and back as well as top to bottom), so keep that in mind as you tackle this crochet tutorial. There's nothing more frustrating than stopping in the middle of a row to try to figure out if you've accidentally twisted your crochet work!
Another thing to consider: While Bernat Velvet Yarn is certainly one of the softest velvets the yarn industry has to offer (hence its popularity), it can also be slippery. A crochet hook only creates fancy loops, after all, and it's no fun watching loops come undone halfway through your project. With this in mind, I wouldn't recommend using a stitch taller than a half double crochet or a full double crochet if you tend to have tighter tension. This crochet scrunchie tutorial will only require single crochet and half double crochet, so overall, it's beginner-friendly. Just be mindful of each stitch and you'll have your own handmade hair accessories in no time!
Things You'll Need
Bernat Velvet Yarn in Frost Pine and Smokey Blue
Scissors
Yarn needle
Hair ties or hair elastics (without metal pieces)
How to crochet a scrunchie:
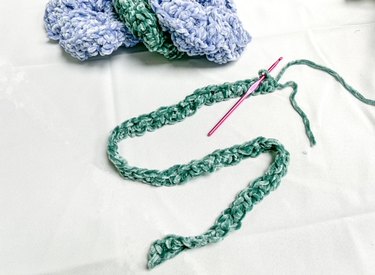
1. Crochet foundation chain
To create a chain, start with a loop and insert the hook through.
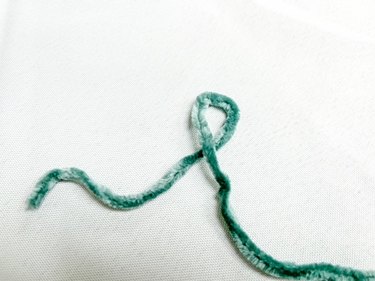
Yarn over and pull yarn through to create a second loop.
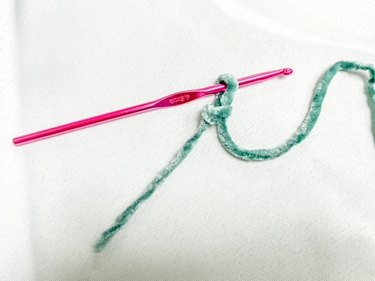
Once you've made a few chains, pull the starting yarn tight enough to create a knot from the beginning loop.
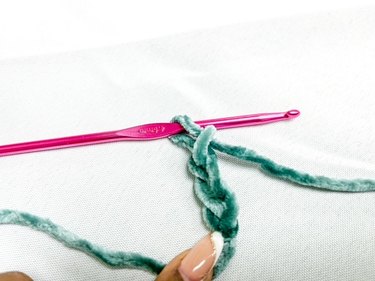
The chain may twist but do your best to keep track of top loops to keep it straight for the upcoming first row.
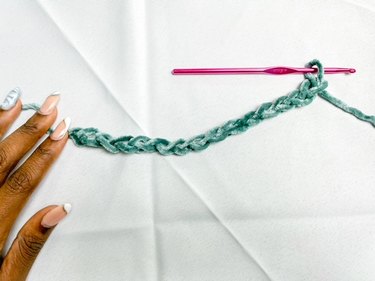
Create a foundation chain of 51 stitches total.
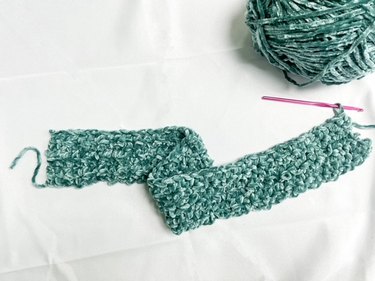
2. Add first row
Skip the first chain on the hook and then single crochet the second chain. Half double crochet the third chain and then alternate between the two across the row. You should have 50 stitches total: 25 single crochet and 25 half double crochet.
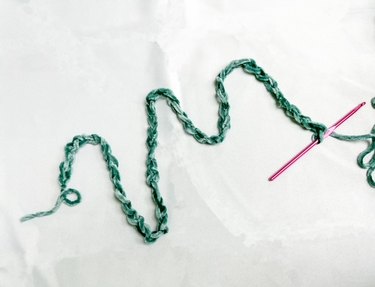
3. Crochet rows 2 through 6
Chain one and then repeat the row one steps for six rows total. If your rows are consistent, each should begin with a single crochet and end with a half double crochet.
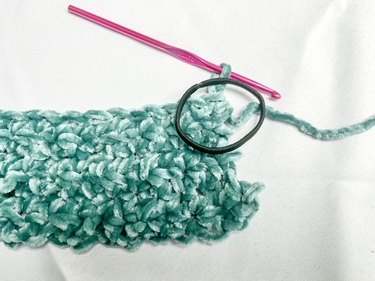
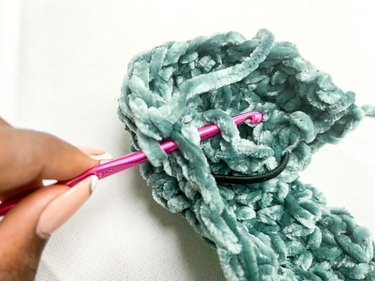
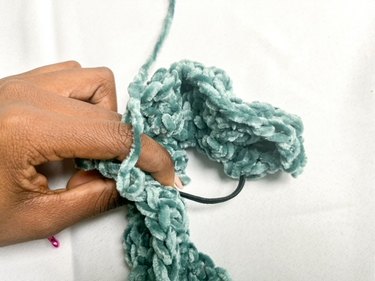
4. Attach elastic hair tie
This part might look tricky, but the mechanics will come together if you take it slow. You'll essentially create a tube around the hair band and then sew two ends of the tube together to hide the elastic.
Place the hair tie on the top corner of the rectangle you created and then fold the bottom corner through the hole of elastic.
Connect the top and bottom of your work with a single crochet to close the tube.
Tip
If you have especially thick or long hair, opt for a strong hair elastic during this stage to ensure the scrunchie has enough hold to accommodate your locks through the chunky yarn.
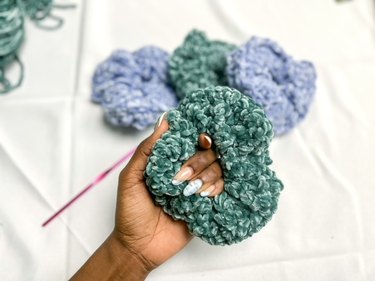
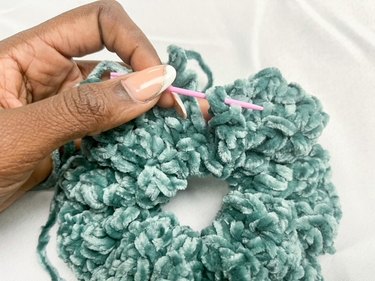
5. "Scrunch" yarn
It is called a scrunchie, after all! As you run out of room to connect more of your work, scrunching together what you've already connected helps create the overall look.
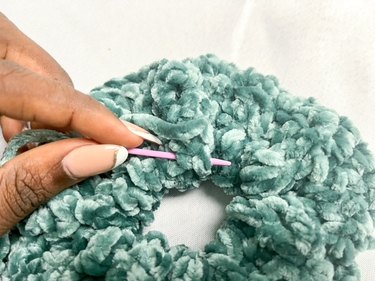
6. Close ends
Once you've used a single crochet to connect the entire scrunchie around a hair elastic, simply grab a yarn needle and sew the two ends closed.
Be sure to sew around the front and back so nothing comes undone later!
There you have it: You now have a chunky, velvety-soft crochet hair scrunchie to show off to friends. Better yet, follow our crochet hair scrunchie pattern to whip up matching accessories for the whole crew! Whether you're wearing your creation to dress up a hair bun with a few ruffles or simply displaying it on your wrist, we hope you're feeling like a bona fide crochet designer after creating this delightful DIY.