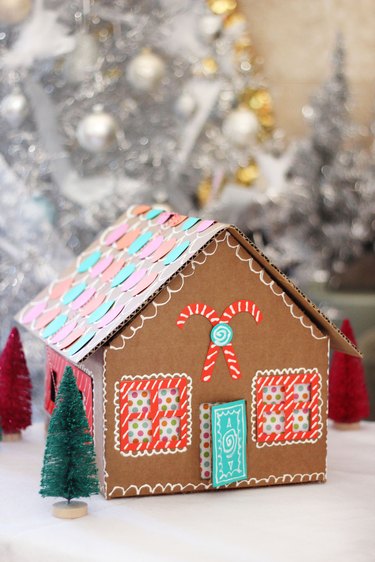
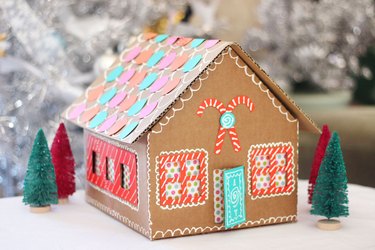
Judging by the reaction of babies and cats, sometimes gift boxes can be more fun than the actual present inside. That could be the case of this delightful gingerbread house gift box. The roof comes off to reveal the holiday present, and afterwards the gift box can be repurposed as a dollhouse or stand-alone decoration. You can even use it as a storage box for holiday decorations. A sweet idea, indeed.
Video of the Day
DIY Gingerbread House Gift Box
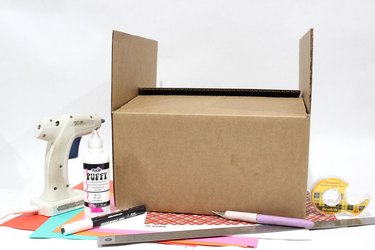
Things You'll Need
Cardboard box
Ruler
Marker
Hobby knife
Extra piece of cardboard
Colored cardstock
White puffy paint
Holiday-themed scrapbook paper
Hot glue gun
Tape
Circle punch
Twine
Step 1: Cut the Box Flaps
Select a rectangular cardboard box that has flaps. The box used in this example is 12x10x6 inches. To create the A-frame roof line of the house, we'll use the shorter flaps. Mark the center point of the top of the flap with a pen, and draw lines from the bottom corners of the flap to this center point.
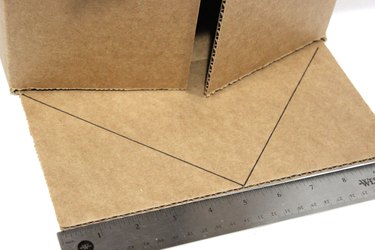
Using a hobby knife, cut off the side triangles of the flap. Repeat with the other short flap.
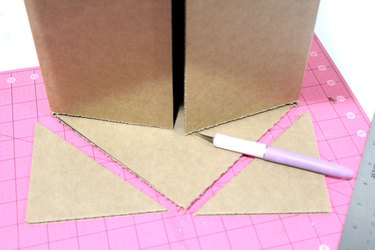
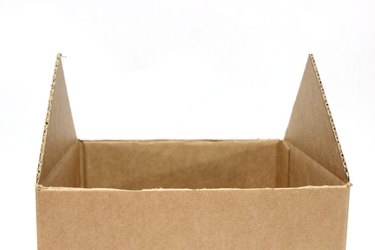
Cut off the two longer flaps entirely so you are left with just the two triangular flaps pointing up.
Tip
If you are repurposing a used cardboard box, you'll want to take it apart and flip it inside out so there is no writing on the outside of it. An added advantage of using a new box is you can keep the triangular flaps unfolded so they stay upright.
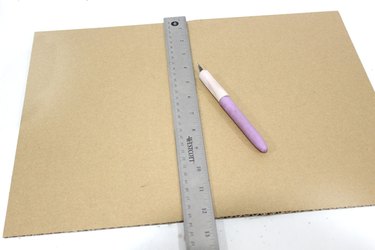
Step 2: Cut the Roof
Measure the length and width of your roof, and cut an extra piece of cardboard so it is about an inch larger on all sides. Run a hobby knife lightly over the center of this piece of cardboard, just enough to score it but not hard enough to actually cut the piece in two.
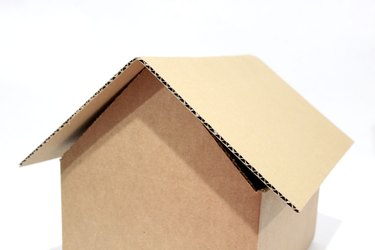
Bend the cardboard at the score line, and you'll have a slanted roof. Place it over the main box to make sure it fits properly.
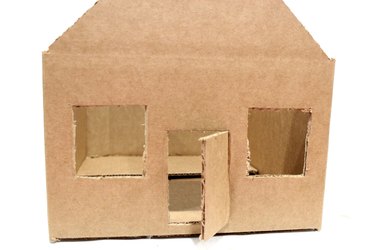
Step 3: Cut Out Door and Windows
Use the hobby knife to cut a door and two windows on the front of the house. You can choose to make windows just for the front, or add them to the sides as well. Don't worry if your cutting is not very straight at this point. Imperfections will be covered by paper cutouts.
Step 4: Cut Paper Door and Window Frames
Cut a door out of colored cardstock, making it slightly larger than the door you cut out from the cardboard. Also, cut window frames out of cardstock that are larger than the window openings. These door and window frames will cover up any uneven edges in the cardboard. Cut out panes in the cardstock— it's much easier to cut four panes in cardstock than cardboard.

Step 5: Decorate Door and Window Frames
Decorate the cardstock door and window frames with white puffy paint. Puffy paint is perfect for this project because it looks like gingerbread house icing. Although it is intended for fabric, it works just fine on paper.
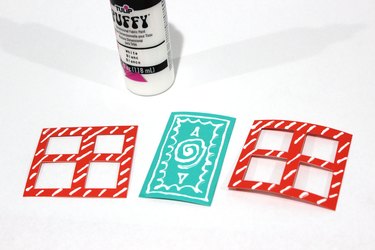
While you're at it, create a decoration that will go above the door. I cut out two candy canes and a swirl candy and decorated them with puffy paint.

Hot glue these decorative elements to the cardboard box.
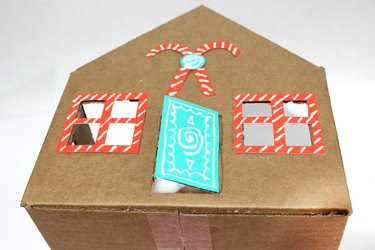
Step 6: Add Scalloped "Icing"
Gingerbread houses are all about the sugar icing drawn in a scalloped pattern. Using the white puffy paint, add a scalloped edge around the window frames as the edges and corners of the box.

Step 7: Cover the Windows and Door
So your gift recipient can't peek inside the box, cover the window and door openings with some colorful scrapbook paper, taping it to the inside of the box. The paper adds a nice pop of color to the gingerbread house.

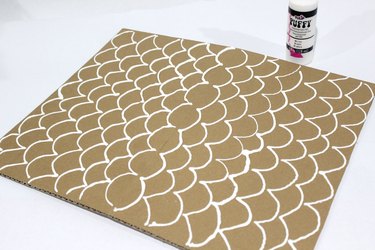
Step 8: Decorate the Roof
Starting at the center line of the roof, draw large scalloped waves with the puffy paint.
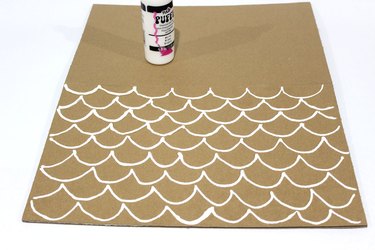
Repeat on the other side of the roof, drawing scalloped waves going in the opposite direction.
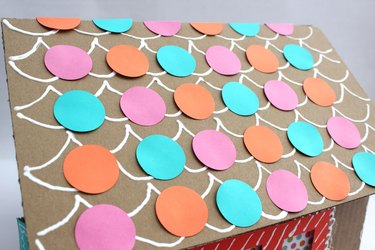
Step 9: Add Candy Drops to Roof
When the puffy paint on the roof is dry, it's time to add circular candy drops for some colorful pizazz. For the candy, cut circles out of different-colored cardstock. I used a one and a half inch circle punch—it's much easier and more precise than cutting them out by hand.

Hot glue the colored circles to the roof, alternating colors as you go.
Step 10: Secure the Roof
After placing your gift inside the box, rest the roof on top of the gingerbread house and secure it with some twine.

I sometimes get the comment that it's futile to wrap a gift in a creative box because it's going to be torn apart anyway. Worry not! The good thing about this gingerbread gift box is that it opens very easily without being destroyed, as the roof just lifts off. And then the gingerbread box house can be saved for future holiday seasons.