eHow may earn compensation through affiliate links in this article.
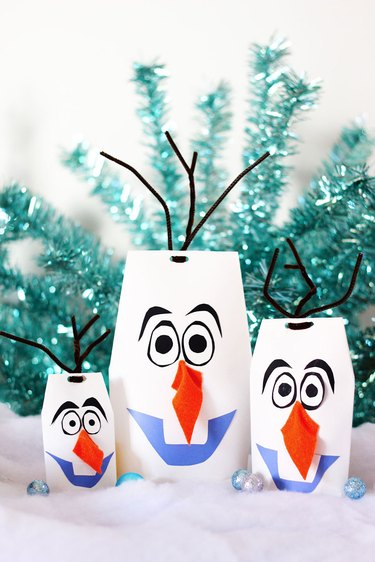
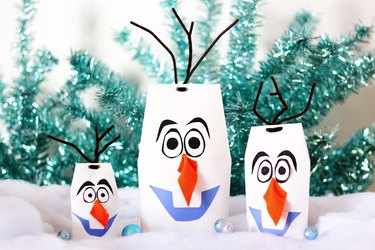
Olaf, the snowman from the Frozen movies, is one of the most beloved characters in the Disney universe. And any holiday present packaged in these easy-to-make Olaf gift bags is also sure to be a favorite. Not only are the bags reusable, they also make great year-round decorations for the Frozen fan in your household. Yes, finally, Olaf can enjoy the summer without melting.
Video of the Day
Video of the Day
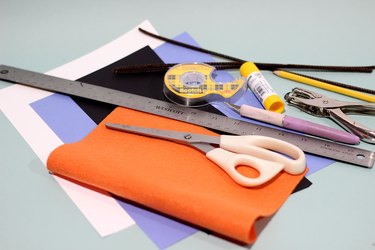
Things You'll Need
White paper
Ruler
Hobby knife or scissors
Black paper
Pencil
Scissors
Glue stick or glue
Blue paper
Hole punch
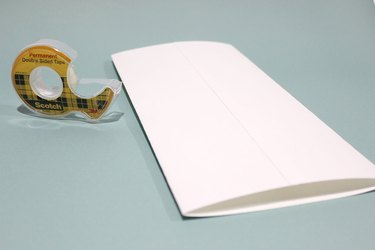
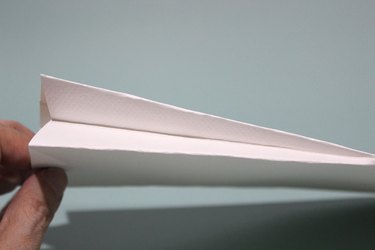
Step 1: Cut Paper to Size
Cut a piece of white paper that is a 12-inch square, using a ruler and hobby knife or scissors to trim it to the right measurements. A 12-inch square piece of paper will create a bag that is about 9 inches tall and 6 inches wide. To create a larger or smaller bag, adjust the size of the square.
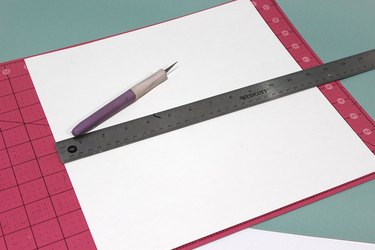
Tip
White wrapping paper or construction paper works best. They are sturdy while being flexible enough for folding.
Step 2: Fold Vertically
Fold the left and right edges inward so they meet in the middle, overlapping the edges by about one half inch.
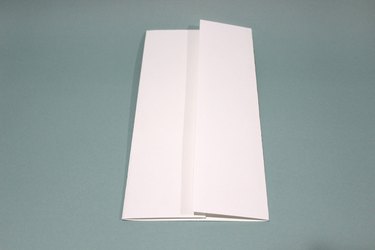
Seal the two overlapping edges with double-sided tape.
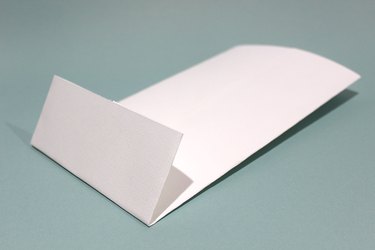
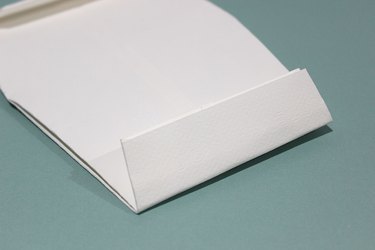
Step 3: Create the Gusset
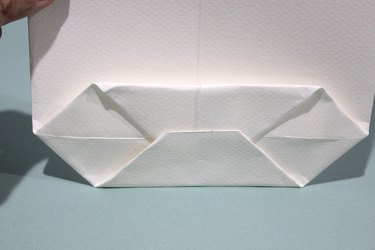
We want a gusset at the bottom of the bag so it can actually hold a gift. Otherwise, it would be just an envelope. Also, a gusset helps the bag sit upright. Start by folding the bottom of the bag about two inches — this will be the depth of the gusset.
Open the fold you've created at the bottom, and flatten the left and right sides into triangles. The bottom of the bag should now look like a hexagon.
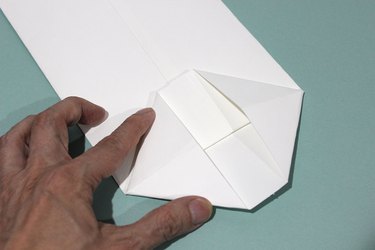
Fold the top of the hexagon down so the edge extends just pass the middle line. Secure this flap with double-sided tape or glue.
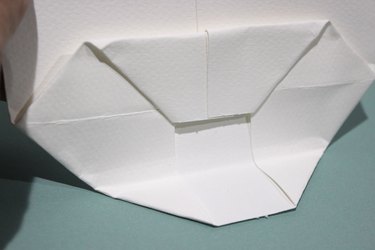
Fold the bottom of the hexagon up so the edge extends just pass the middle line, and secure this flap with tape or glue. For more reinforcement, you can apply a larger piece of tape on top covering both flaps.
Step 4: Create Top Pleats
Olaf is not a blockhead. Olaf's head goes inward at the top, so we'll create pleats on the side of the bag to better approximate the shape of his head. At the top of the bag, mark a point one inch from the left and right edges with a pencil. Also, mark a point six inches down from the top on both sides.
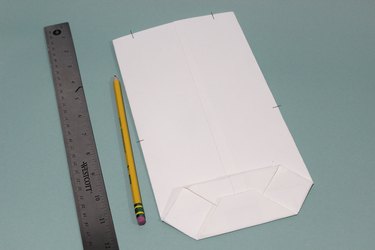
Fold the bag inward using the markings so there are two thin triangles on the left and right sides. Use a ruler to line up the pencil marks, and then fold the paper against the ruler to get a nice, clean edge.
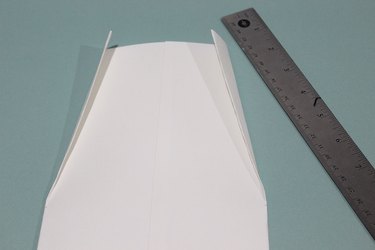
On each side of the bag, you will now have three fold lines. Push the middle fold in, and the other two folds out, to create the pleats.
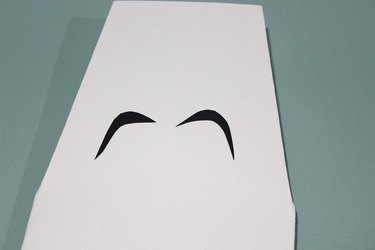
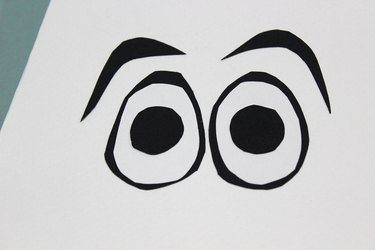
Step 5: Add Olaf's Eyebrows
Now that the bag has been completed with a bottom gusset and side pleats, it's time to decorate it with Olaf's facial features. Let's start with the eyebrows. On a piece of black paper, draw two boomerang-like eyebrows with a pencil, and cut out the shapes with scissors. Then attach them to the bag with a glue stick or glue.
Step 6: Add the Eyes
Cut out two black ovals, and glue them right below the eyebrows. You can sketch the ovals first with a pencil, if you'd like.
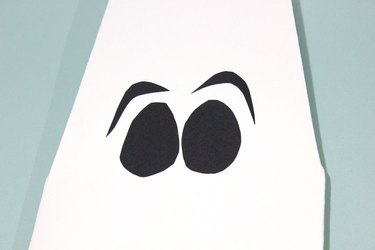
Cut out two white ovals that are a little bit smaller than the black ovals, and glue them on top.
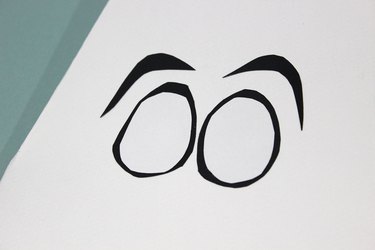
Cut out two small black circles, and glue them to the middle of the white ovals.
Tip
Instead of cutting out shapes for the facial features, you can draw them with colored markers. I prefer the cut shapes because they give Olaf's face more dimension.
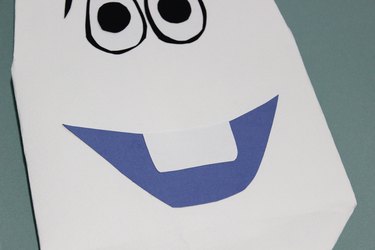
Step 7: Add the Mouth
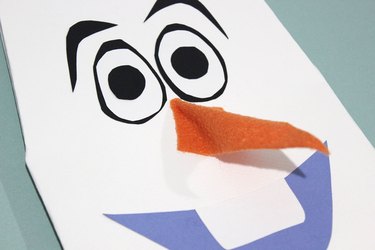
Cut a mouth shape out of a blue piece of paper. Look at pictures of Olaf to give you an idea of his different smiles. Glue the mouth to the bag, leaving room for the nose that will be added later.
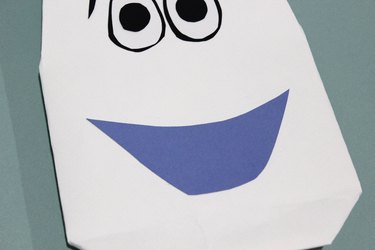
What really gives the face its Olaf-ness is the tooth. Cut a white rectangle and glue it at the top of the mouth.
Step 8: Add the Nose
Cut a piece of orange felt into an elongated diamond that will fit into the space between Olaf's eyes and mouth. The orange felt should look like a little kite.
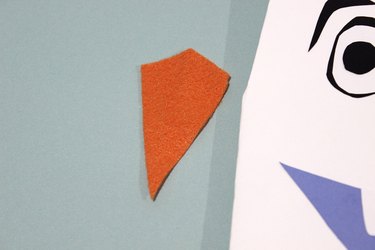
Hot glue the top of the orange felt directly under Olaf's eyes, pinching in the sides to make the nose three-dimensional. Olaf's face is done.
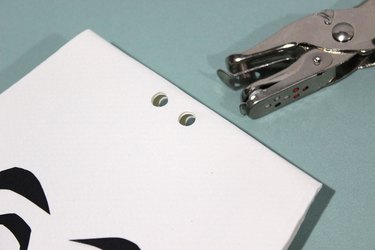
Step 9: Seal the Top
After you've opened up the gusset at the bottom of the bag and placed a gift inside, seal the bag by folding a one-inch flap at the top.
Punch two holes through the flap at the top of the bag.
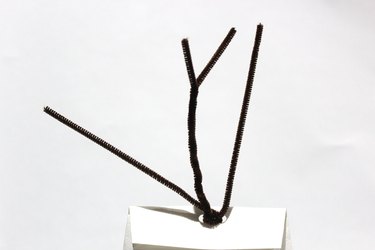
Insert a brown pipe cleaner through the two holes and twist them to lock the flap.
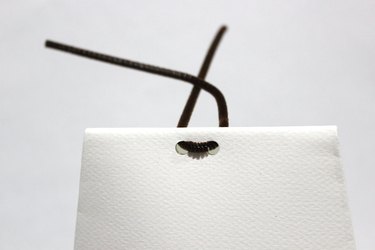
Insert a second pipe cleaner through the two holes and wind one end around the other, allowing the two ends to remain split. Look, just like Olaf's twig hair.
These Olaf bags are so adorable, you may not want to give them away. But in the wise words of Elsa, "Let it go, let it go."