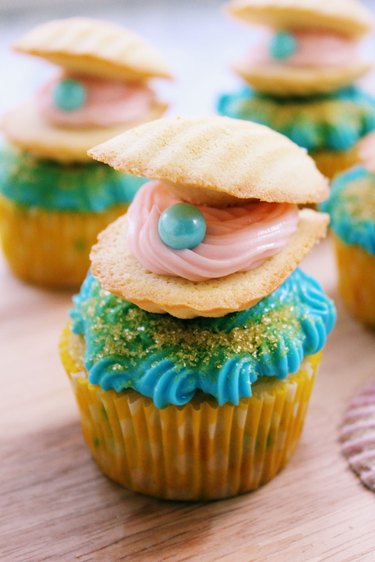
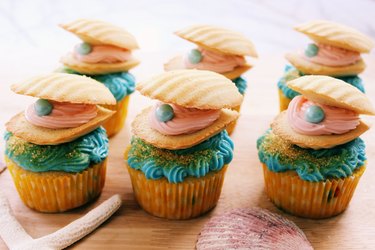
You don't need to dive into the ocean to find precious treasure—just do some baking. These cupcakes decorated as oyster shells displaying pearls will be a hit at your next summer social, beach gathering or even mermaid-themed party. They may look fancy, but they're surprisingly easy to assemble. The shells are made from madeleine cookies, and the pearls are sixlet candies. Of course, the oysters and pearls may not be worth millions of dollars, but the reactions of your family and friends will be priceless.
Video of the Day
Things You'll Need
Cupcakes
Frosting
Blue and red frosting dye
Piping bag
Open star piping tip
Disposable piping bags
Gold sanding sugar
Madeleine cookies
Pearl sixlet candies

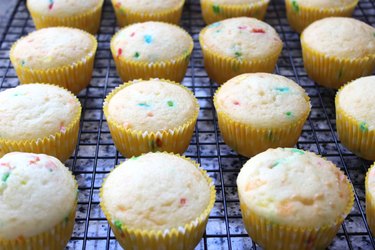
Step 1: Bake the Cupcakes
Using a box mix or your homemade recipe, bake cupcakes in paper liners (I used a confetti cake mix). Fill the liners about two-thirds of the way with batter, and the cake should rise just to the rim.
Video of the Day
Step 2: Prepare the Frosting
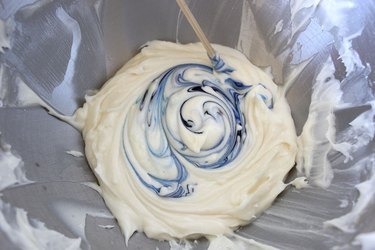
Whip up a batch of frosting with your favorite recipe, or purchase a tub of prepackaged frosting from the supermarket. I find that homemade frosting not only tastes better, but it also spreads more easily and pipes beautifully.
I made a basic buttercream frosting mixing two sticks of butter, three cups of confectioner's sugar, two tablespoons of heavy cream, one teaspoon of vanilla extract and a pinch of salt. Divide the frosting in half, and add one or two drops of blue frosting dye in the first batch. Blend in the dye until you get a bright ocean blue. Add more drops of dye if necessary.
Tip
Frosting dye, available at party or crafts stores, will color your frosting without adding more liquid to it.
Add one or two drops of red dye to the other batch of frosting and stir to create a pleasing pink hue. The blue frosting will be for the ocean waves, while the pink frosting will be for the inside of the oyster.

Step 3: Frost the Top of the Cupcake
While you can just spread the frosting with a spatula, I recommend using a piping tip and bag. It's easier than you would think and gives you professional-looking results. Place an open star piping tip on the end of a disposable piping bag. You don't necessarily need a piping coupler to attach the tip to the bag, but I like how the coupler locks in the piping tip.
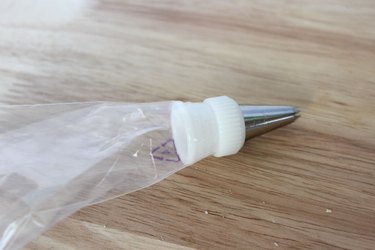
Fill the bag with the blue frosting, not going past the fill line indicated on the bag.
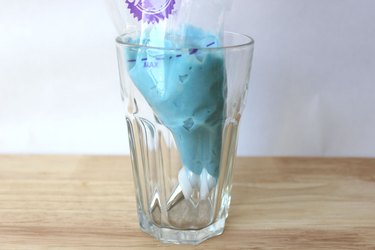
Squeeze the piping bag to release frosting through the tip, making swirls on top of the cupcake to look like cresting waves. It's a good idea to practice on a piece of wax paper first to figure out your design.
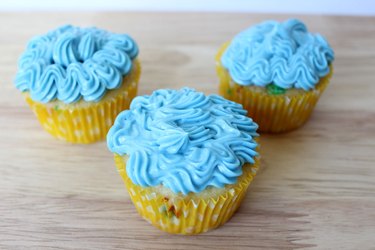
Step 4: Sprinkle Some Sanding Sugar
To give the suggestion of a beach, sprinkle some gold sanding sugar on one side of the cupcake. The gold sugar creates a sparkling sand.

Step 5: Prepare the Madeleines
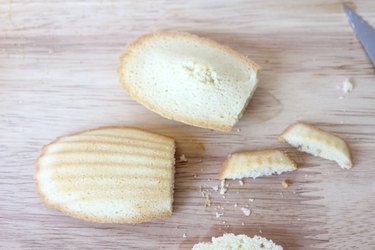
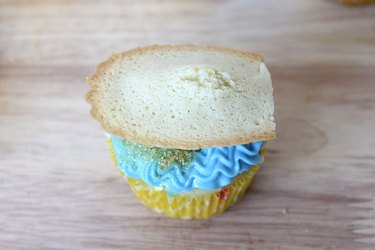
Madeleines make perfect "oysters" because of their shell shape. If your local supermarket or bakery does not have madeleines, any flat, round cookie like a vanilla wafer will work, as well. You will need two madeleines to make each oyster—one for the top and one for the bottom.
Madeleines typically have a hump on the back. Cut off one of the humps with a knife, but leave the hump on the second madeleine intact. The hump will help prop up the cookie so the oyster remains open.

Slice off about half an inch on the narrow end of the madeleines so the shells won't be so long. Now they look perfect.
Step 6: Assemble the Oyster
Place the madeleine that has the hump on the cupcake. The hump should be facing up.
Prepare a new piping bag for the pink frosting, and squeeze the frosting onto the madeleine. You don't need to cover the entire cookie with the frosting–just a small oval in the center is enough.
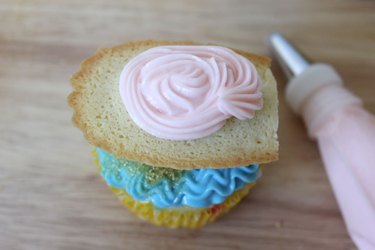
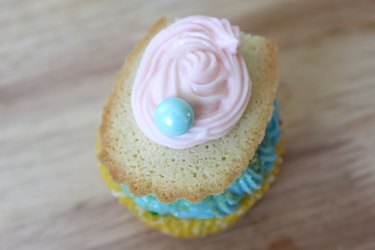
Position a pearl sixlet on the frosting toward the front tip of the madeleine cookie. Sixlets are candies usually used for weddings and showers. They are available in many colors at party stores.
Place the second madeleine on top to finish the oyster. As you can see, the hump from one madeleine props up the other one, and the frosting acts like glue to keep the two cookies together.
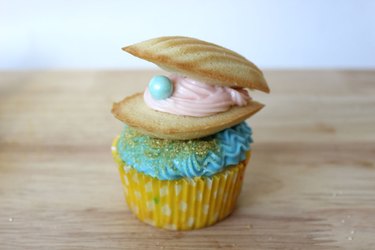
With cupcakes like these, the world is your oyster.