Curly willow branches are easy to work with for DIY projects because their flexibility allows you to twist them into various forms. Wrapped up into a spherical shapes and spray painted a wintery white, these willow twig balls look beautiful displayed on a mantel or tabletop. You can also hang them from a tree and make them sparkle with string lights.
Video of the Day
Things You'll Need
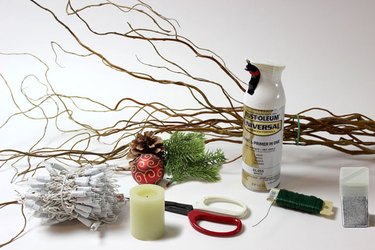
Curly willow branches
24-gauge wire
Floral shears
White spray paint, glossy
Silver glitter
LED battery-operated candle
Pine needles and ornaments
String lights
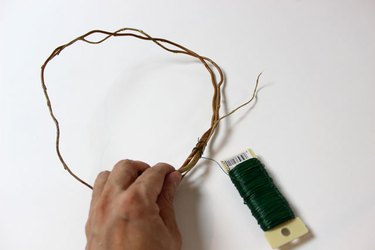
Step 1: Curl Branch Into a Loop
Bend each curly willow branch into a loop that has a diameter of about 8 inches. Willow branches typically have thinner twig offshoots, so wrap those around in the circle as well. Tie the two ends together with some 24-gauge wire, and cut off any excess from the branch with floral shears. If you cannot find curly willow at your local florist, you can also use thin branches from your yard.
Video of the Day
Tip
Willow is flexible when it is fresh, but it becomes more difficult to bend as it dries. To make the branches more pliable, immerse them completely in water for several hours.
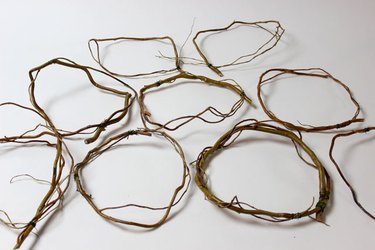
Step 2: Assemble Several Loops
Continue making willow loops until you have 8 or 9 of them. They should all be similar in size.
Step 3: Fasten Two Loops Together
Place one loop inside a second one so that they are perpendicular to each other. Connect them with wire at the two intersection points.
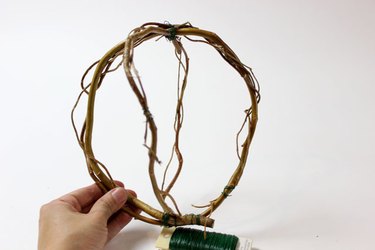
Step 4: Add a Horizontal Loop
Add a third loop around the first two horizontally. Think of it like an equator going around a globe. Fasten the intersection points with wire. Now you have a basic globe structure.
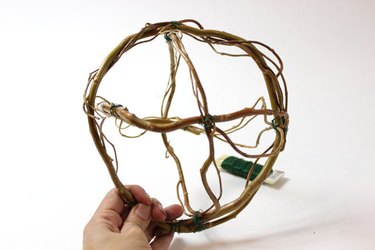
Step 5: Continue With the Other Loops
Add the rest of your willow loops to the globe structure, arranging them at different angles to complete the ball. Use the wire to tie the loops together. As you add more willow, there will be many places where the loops intersect. It is not necessary to wire each of these points. Just choose two spots along each loop, and it will be secure.
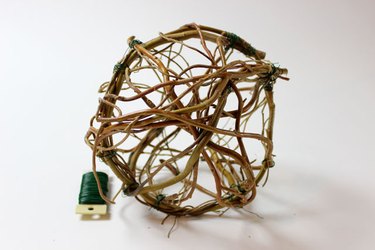
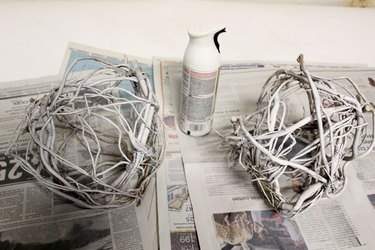
Step 6: Spray Paint the Ball
In a well-ventilated area, spray paint the willow balls you've created with several coats of glossy white. The paint not only makes them more festive, it hides the wires.
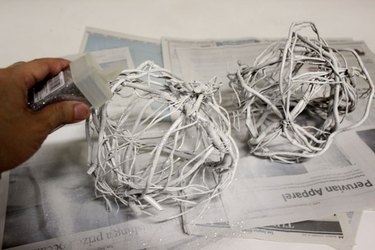
Step 7: Sprinkle Glitter
Silver glitter adds a beautiful iridescence to the white paint. On your final coat of spray paint, sprinkle the glitter onto the branches while the paint is still wet. The glitter will stick to the wet paint so you do not need glue. Let the willow balls dry completely before handling.
Step 8: Display Them Two Ways
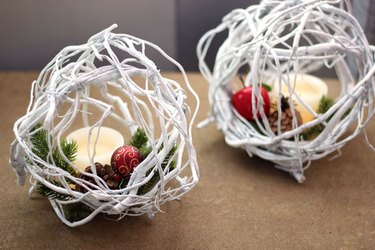
Slide battery-operated LED candles, pine needles and ornaments between the branches of the balls for a festive tabletop display.
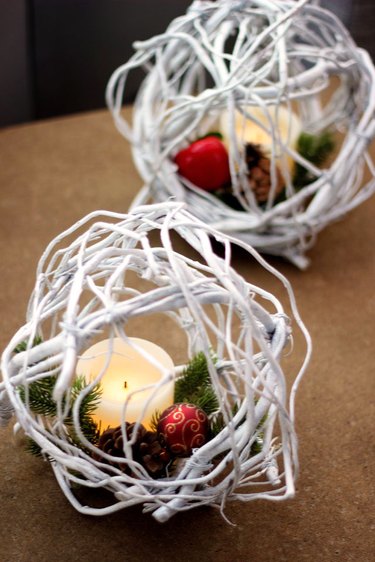
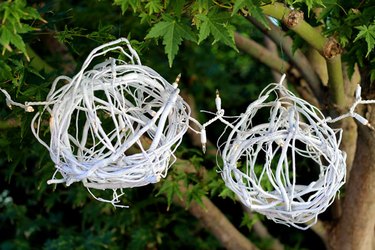
The willow balls also look beautiful when hung from a tree with wire. String some holiday lights across the balls for a magical effect.