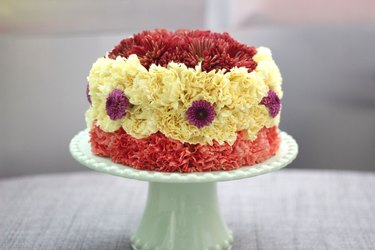
For your next party, here's a cake that is calorie-free, fat-free and gluten-free. It's a non-edible floral cake — a floral arrangement in the shape of everyone's favorite party dessert. This floral cake is perfect for not only birthdays, but also for anniversaries, holidays, baby and bridal showers, housewarmings, office parties and practically any occasion. It also makes a delightful gift that is guaranteed to elicit oohs and aahs. And making it is, well, a piece of cake.
Video of the Day
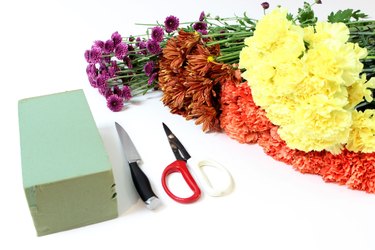
Things You'll Need
Floral foam
Knife
Water
Plate or cake platter
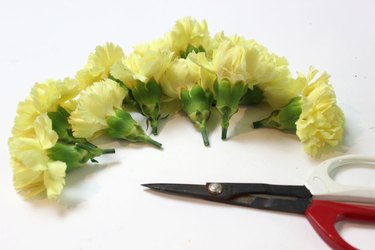
Carnations (12 to 14 of one color, 24 to 28 of another)
Floral shears
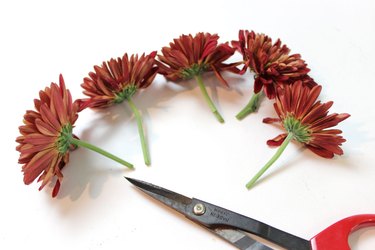
Chrysanthemums (12 to 15)
Button pompoms (8)
Step 1: Cut the Floral Foam
The foundation for the floral cake that holds all the flowers is floral foam. You can purchase floral foam in the floral supply department at the crafts store. Floral foam comes in standard-sized bricks that are 3 inches high by 4 inches wide by 9 inches long. Be sure to buy the floral foam that is designated for fresh flowers rather than artificial flowers. Using a knife, make two cuts in the floral foam to create two pieces that are 4-inch by 4-inch squares. You will have an extra one-inch piece at the end, which you can discard.
Video of the Day

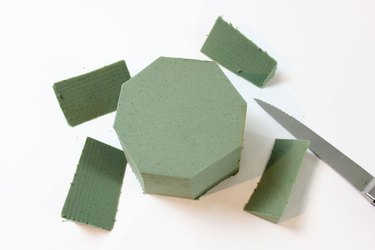
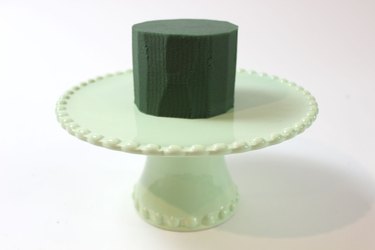
The floral cake requires just one of the 4 by 4-inch pieces of foam. Save the other piece for future use. We now need to turn this square cube of foam into a rounded cylinder. Start by cutting straight up and down at the corners of the cube so that the shape is now an octagon.
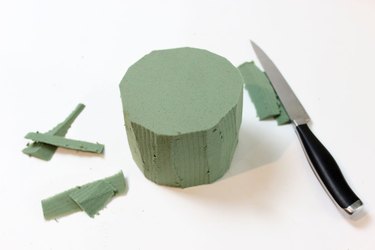
Keep shaving off the sharp corners of the foam until it is rounded, resembling a cylinder. You will notice that the floral foam is much smaller than you'd expect a cake to be. Don't worry, the cake will become bigger when the flowers are inserted on all sides.
Step 2: Soak the Floral Foam
Drop the floral foam in a container of water and let it soak up the water naturally. It will take less than a minute — you will know it's completely absorbed with water when the color of the foam turns dark green.
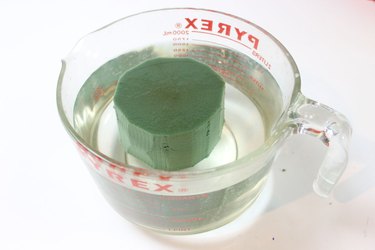
Remove the floral foam from the water and place it on a plate or cake platter.
Step 3: Insert Bottom Row of Flowers
Carnations are the ideal flower for the floral cake because the petals are fluffy and look like frosting. There will be three rows of carnations making up the perimeter of the floral cake. I like to make the bottom row of flowers a different color from the top two because it then looks like a frosting trim. Cut the stems to about one-half inch with floral shears or scissors.

Starting at the bottom of the floral foam cylinder, insert the stem of the first carnation at a perpendicular angle to the foam. Push the carnation into the foam until it stops naturally at the base of the flower.
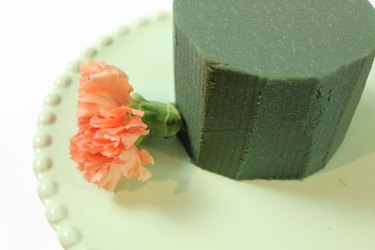
Continue inserting carnations around the floral foam until you've completed the bottom row. Depending on the size of your carnations, it will take between 12 to 14 carnations.
Step 4: Insert the Middle Row
Choosing a different color of carnations, cut the stems to about one-half inch.
For this middle row, insert the first carnation directly above the bottom row, again at a perpendicular angle to the floral foam.

Continue inserting the carnations of the middle row until you've gone completely around the circumference of the foam.

Step 5: Insert the Top Row
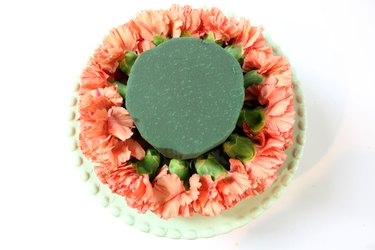
Although the sides of the cake may look full, one more row of carnations at the top is necessary to give the cake some height. Using the same color as the middle row, insert carnations at the top of the floral foam, again at a perpendicular angle.

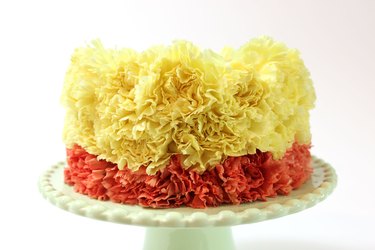
The arrangement now has three rows of carnations and looks like a multi-layered cake.
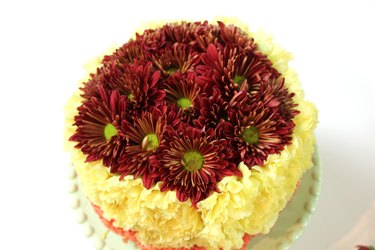
Step 6: Decorate the Top of the Cake
To decorate the top of the arrangement, select flat flowers like daisies and chrysanthemums, which will mimic the flat top of a typical cake. I've used chrysanthemums in this example. Cut the stems of the chrysanthemums to about two inches.
Insert the chrysanthemums into the floral foam, keeping them at the same level as the top row of carnations.
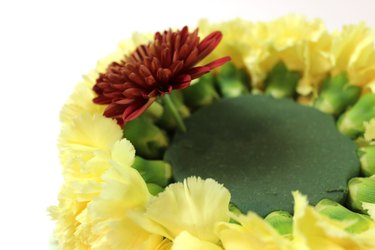
Continue inserting flowers at the top until the floral foam is completely covered. Depending on the size of your chrysanthemums, you will need between 12 to 15. If you're using daisies, which are larger, you will need fewer.
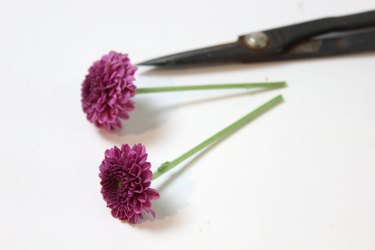
Step 7: Add Polka Dots
For a finishing touch, add a row of polka dots along the middle of the floral cake. Select a small, round flower like button pompoms, and cut the stems to about four inches.
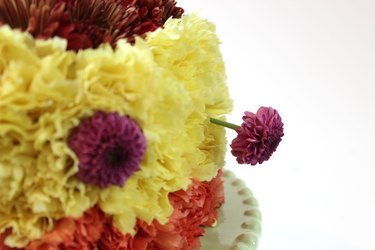
These polka dots will be inserted between the top and middle row of carnations. Slide your finger in between the carnations to find a clear path to the floral foam, and insert the button pompoms, spacing them evenly about three to four inches apart.
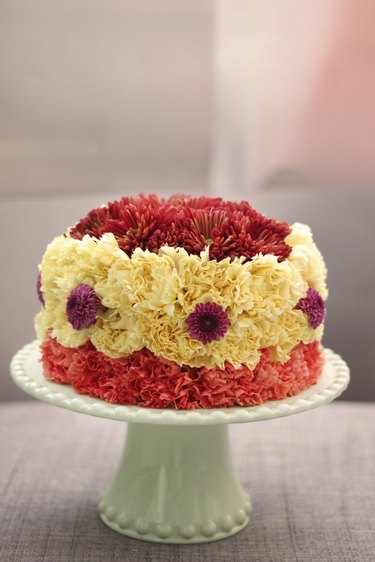
The floral cake is done! And because carnations and chrysanthemums stay fresh for so long, this arrangement will last at least a week.
Warning
This floral cake is a flower arrangement and is not edible. Make sure that children — and hungry spouses — know that they can't eat it.