Things You'll Need
Wooden box
Sandpaper
Paper
Decoupage paste
Paint
Paint stir stick
Lacquer
Paintbrush
Paint thinner
0000 grade steel wool

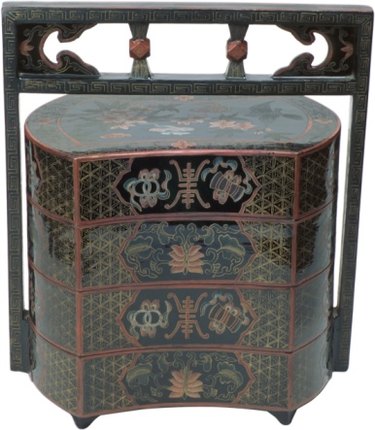
Lacquer is a type of organic varnish that is typically applied to wood or metal. It is noted for being beautiful and comes in different shades and colors. Making a lacquered box is not particularly difficult, but does require skill to make an even finish. Lacquer and lacquer thinner are also somewhat toxic, so making a lacquered box is not a suitable project for children. This project is simplest if you use a pre-made unfinished wooden box, though it is possible to make your own box, and lacquer will adhere to other materials.
Step 1
Take apart the box if you are using a pre-made box, removing all hardware so that you have only a lid and a bottom. Put any hinges, screws or fasteners into a secure container so that you do not lose them.
Video of the Day
Step 2
Sand the box thoroughly and clean it. The box must be as smooth, clean and dust-free as possible. Lacquer typically shows the wood grain, so choosing a clear, beautiful grain is important when using lacquer on a box.
Step 3
Decorate the box, if desired. This step must be done before you add lacquer. The lacquer itself may be sufficient for your tastes, but lacquer also lends itself well to decoupage, and this technique was very popular in the past. Cut out decorative images from paper, or use photographs or postcards, and adhere them firmly to the box with decoupage paste. You can also use other, more unusual items, such as beads, ribbons or feathers, or add gold leaf to the box. These items will all be protected by the lacquer coating. In addition, lacquer will adhere to some paints, enabling you to paint an image on the box. Use trial and error to find out if lacquer will stick to a paint that you want to use.
Step 4
Open the can of lacquer and stir thoroughly using a paint stir stick for about five minutes. If you are using plain, clear lacquer, it will require less or no stirring because you do not need to mix any pigments. If you can clearly see the bottom of the container through clear lacquer, it does not require stirring.
Step 5
Dip a clean paintbrush into the lacquer and spread a thin, even coat on your box. Wait for it to dry, and then repeat until you are satisfied with the appearance of the box. Using lacquer can be difficult because each new layer dissolves the layer underneath, making it easier to make a mistake or create an uneven finish. However, more layers make the finish more beautiful in appearance.
Step 6
Wait for the box to dry completely, letting it sit undisturbed for a day. Clean your paintbrush with paint thinner.
Step 7
Rub over the lacquer coating gently using steel wool. You may wish to apply a wax, as well.
Step 8
Replace all of the hardware, reassembling the box.
Tip
Protect your work surface with cloth or newspaper. If you make a mistake, it is easy to remove a lacquer finish with lacquer thinner. However, lacquer thinner is very dangerous, so be careful and wear a mask. Lacquer does not normally need sanding between coats, but if you see dust or small imperfections, sand gently using 400-grit sandpaper before adding a new coat. Only use clear or light-colored lacquer with decoupage or other decorations.
Warning
Lacquer fumes can be dangerous. Wear a mask and work in an area with good ventilation.
Video of the Day