Things You'll Need
1/2-inch thick sheet foam insulation
Hobby knife with #11 blades
Ruler
Marker
Newspaper
Masking tape
Plaster cloth
Acrylic paints and brushes
1-inch nails with flat heads
White glue
Cardboard box approximately 2 inches deep
Shallow plastic or metal pan
Water
Dry ice
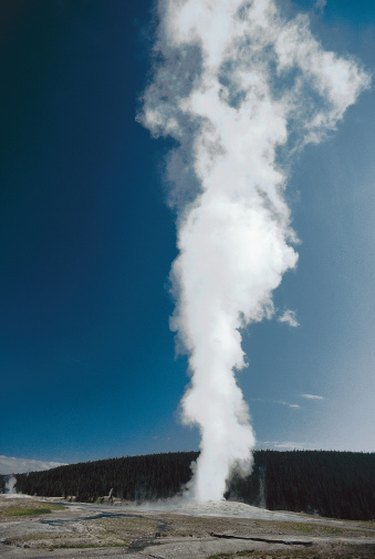
Geysers are dramatic and fascinating geological features that offer great potential for a model. Geysers can emit lots of steam and occasionally erupt into spouts of extremely hot water similar to a volcano. This subject might be an interesting and eye-catching school project, or something unique for your model railroad or diorama. The method discussed here requires a little effort, but it will give you a great steam effect and is a cool little project that will turn heads.
Creating the Top
Step 1
Measure the length, depth and width of the interior of the box that will ultimately become your base.
Video of the Day
Step 2
Mark your foam insulation sheet using a ruler and a marker to the same specification as the box dimensions minus 1/8 inch. The idea is that this will ultimately form the top or lid of the box and fit snugly inside it.
Step 3
Cut three strips of foam insulation corresponding to the shallow walls of the box minus 1/2 inch to accommodate the foam lid using a hobby knife and a ruler. For example, if your box is 2 inches deep, cut three strips of foam at 1.5 inches wide so that the foam top can rest on them and be flush with the top of the box.
Step 4
Cut a hole representing the geyser hole in the center of the foam lid using a hobby knife.
Step 5
Align the strips of foam to the edges of the sheet with the geyser hole to form walls on three sides under the lid.
Step 6
Secure the foam walls to the lid by applying a line of white glue between the sheets and pushing flat headed nails into the foam and allow to dry.
Step 7
Crumple small bits of newspaper to form a slight mound around the geyser hole and tape down with masking tape.
Step 8
Dip sheets of plaster cloth into water and apply to the top of the newspaper and the rest of the base, crinkling and smoothing the cloth as desired to create the landscape surrounding the geyser, and allow to dry.
Step 9
Paint the surface of the model with acrylic paints.
Creating the Base
Step 1
Cut away the top of the cardboard box and the rear panel wall.
Step 2
Paint the outer edges of the box to suit your needs.
Step 3
Set the geyser model into the base so that the open end below the model and the open end of the box align.
Step 4
Slide a shallow pan of water into the box from the open end.
Step 5
Drop a couple of pieces of dry ice through the geyser hole into the pan of water below to allow the fog to come through the hole to simulate steam.
Tip
The area around a geyser is constantly assaulted with hot and often sulfuric water, so little grows there. These holes are typically white or light tan around the edges.
If you put too much dry ice in the water, the fog will go everywhere. You may want to cut a fourth wall from foam so that you can close off the box when displaying the steam effect to keep the steam funneled through the hole.
You can also create a cotton plume to simulate steam by taking pillow stuffing and teasing it out by hand into shape.
Video of the Day