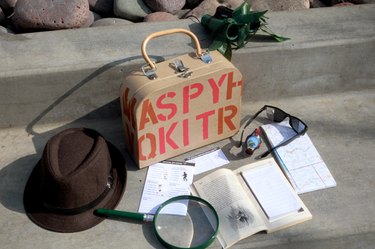
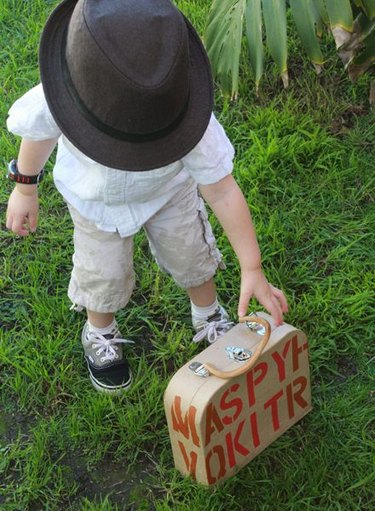
Creating a spy kit with your kids is a fun way to encourage pretend play while exposing them to a variety of iconic spy characters and their helpful tools. Each item in this spy kit is simple to make, but will bring hours of imaginative fun for all!
The Spy Case: Things You Will Need
Video of the Day
- Paper maché briefcase
- Stencil letters
- Red and brown acrylic paint
- Foam paintbrush
- Paper plate
Video of the Day
Step 1: Arrange the Stencils
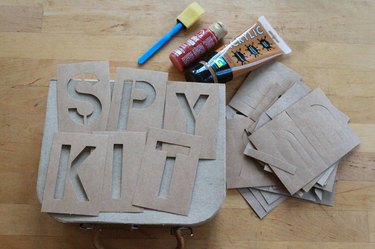
Find all of the letters you will need to spell "SPY KIT" and set them aside. If your stencil letters are small enough, you could also spell out "TOP SECRET" or "CONFIDENTIAL."
The paper case in this sample measures 10 inches by 8 inches by 3 inches and the letter stencils measure 3 inches by 4.5 inches.
Step 2: Paint the Words
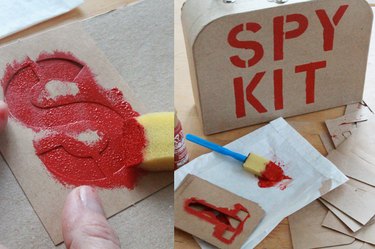
Pour a small amount of red paint onto your paper plate or other paint-mixing surface. Place the paper maché case in front of you, with the bottom side nearest you, and arrange the stencil letters on the lid of the case. You can secure them with tape if you'd like. Gently dab each stencil with red paint. If you don't tape the stencils down, hold them flat and steady against the case as you work.
Let the red letters dry completely.
Step 3: Conceal the Name
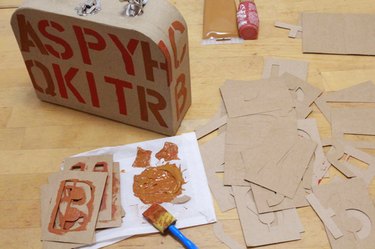
You could leave your case as-is with the words SPY KIT boldly stenciled in red letters, but that's not very covert or spy-like.
To conceal the words SPY KIT in plain sight, place additional stencil letters around the red letters and paint them with brown paint. Continue painting letters around the edges of the kit, and even on the back if you'd like.
Reverse-View Sunglasses: Things You'll Need
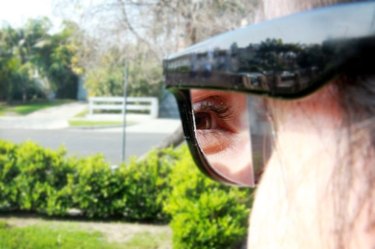
With the mirrors in place, a true spy will be able to see in front of her as well as behind her.
- Mirrored sheets
- Child's sunglasses
Hey parents, why not make a pair for yourself? You might enjoy having "eyes on the back of your heads" to keep your spies in line!
Step 1: Cut Mirror Strips
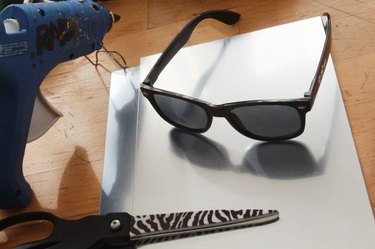
Cut two small strips from your mirrored sheet. Make them just slightly longer than the height of the lenses, and about a third of the total width of the lenses.
Step 2: Adhere Mirror Strips to Glasses
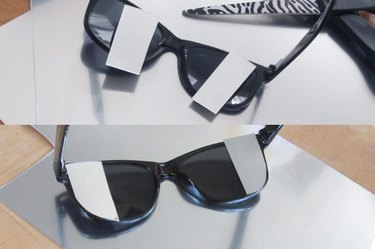
Hold the mirrored sheets firmly against the outer portion of the lens. With the scissors, trim the mirrored sheets so that they fit perfectly against the glasses.
Hold the glasses up on your child to make sure there is not too much mirror blocking their forward-facing vision. Trim away excess as needed. Peel back the adhesive strip on the back and stick them in place, or, if using non-tacky mirrored sheets, glue the mirrored paper to the glasses frame.
Peek-a-Boo Map: Things You'll Need
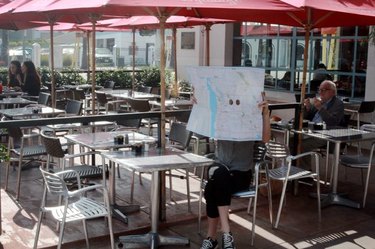
A spy map is an essential tool (and so easy to make).
- Scissors
- Folded paper map
Step 1: Cut Out Eye Holes
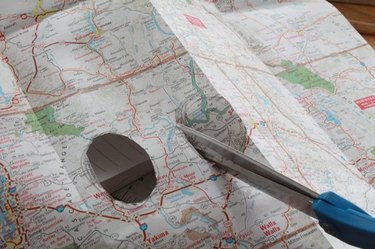
Open the map and cut two ovals in the middle of the map, close enough together that you can peer through them.
How simple is that?
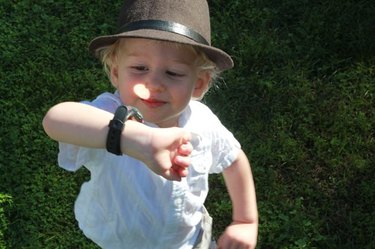
Signal Watch: Things You'll Need
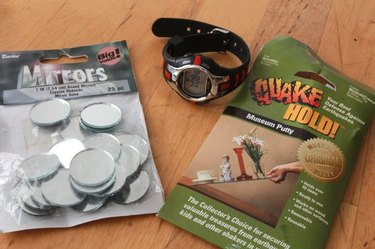
When a spy is in trouble, he or she needs a discreet way to signal for help.
- Child's watch
- Small round mirrors
- Museum putty
Step 1: Press-On Putty, Press-On Mirror
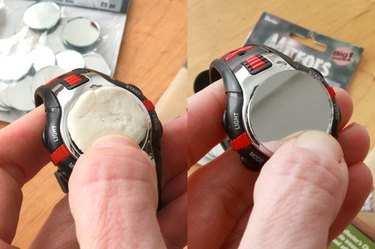
Take a nickel-sized piece of putty and press it into the glass face of the watch. Push the mirror directly onto the putty and hold it there for a moment.
Museum putty isn't permanent, so you can always pull the mirror back off and put it in your pocket when you need to check the time.
Step 2: Signal for Help!
Use the sun's light to signal back to HQ when you are in need of an escape plan! Or use the signal watch to check your teeth after lunch. Spies should never be caught with broccoli in their teeth.
Camouflage Binoculars: Things You'll Need
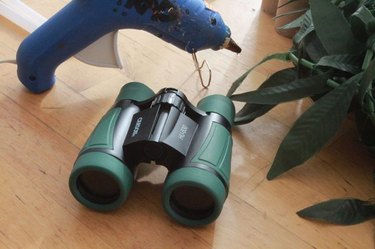
A disguised pair of binoculars will help your little spy stay undercover!
- Child's binoculars (or 2 toilet paper tubes and tape to make a set of binoculars)
- Hot glue gun and glue sticks
- Silk leaves
Step 1: Apply Hot Glue
When the hot glue gun is warmed up, gently squirt a string of glue along the top of one side of the binoculars.
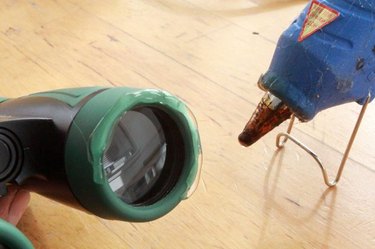
Step 2: Layer the Leaves

Begin layering the leaves on the top of the hot glue. This is a task for parents only, as the glue can be too hot for tiny fingers. Work quickly and carefully. When you have layered leaves along one top side of the binoculars, repeat the steps on the second side.
Step 3: Go Undercover
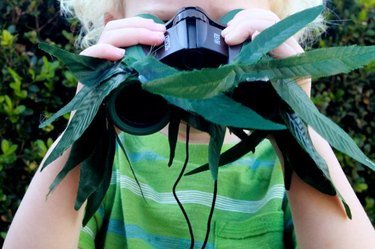
Not only will you be able to spy long distance, you will almost vanish into the foliage with this must-have spy aid.
Secret Compartment Book: Things You'll Need
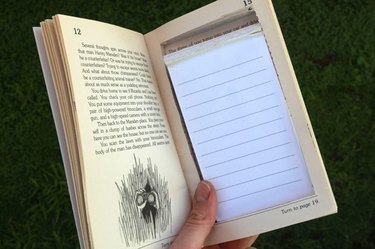
Every spy needs a secret compartment book – and they are a snap to make!
- Old paperback book
- Metal ruler
- Cutting blade
- Small notebook
Step 1: Cut Pages and Hide Notebook
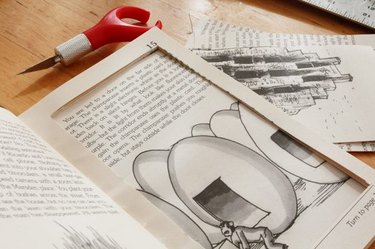
Open the book (a few pages in), and press the spine open. Lay the metal ruler on the left side of the book and carefully cut a rectangle out of the center of the page.
Make sure the rectangle is bigger than your small notebook. Try to leave at least a 1/2 inch paper border in your pages as you cut.
Hide the notebook in the newly formed compartment and what do you have? The perfect place for housing the most important spy notes!
Extra: Download Spy Notes Worksheet and ID Card
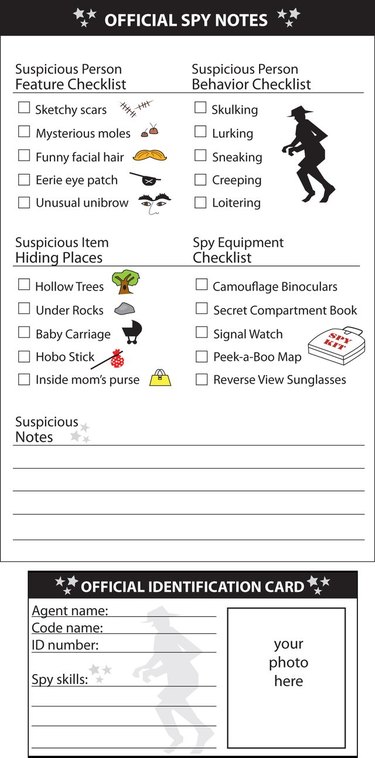
To further assist your kids in their spy play, we've created a downloadable spy notebook page. Print out the 4 inch by 6 inch notebook sheet and let your kids have fun creating profiles of suspicious characters and objects. Complete the spy kit with an official printable ID card! Have fun making up a code name and brainstorming fun spy skills for your kids. Laminate the ID card or encase it in packing tape for the ultimate spy experience.
All of the spy tools listed here (plus a large magnifying glass) will fit perfectly in your homemade spy kit!