Things You'll Need
Scissors
Posterboard
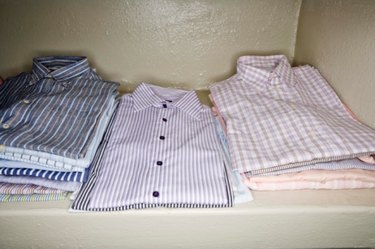
Various old dress shirts
Iron
Washing machine
Dryer
Laundry soap
Pencil
Quilt backing
Quilt batting
Safety pins
Creating a quilt from old mens' dress shirts is a perfect way to recycle otherwise unusable household items. Rather than throwing the shirts in the garbage and taking up landfill space, a quilt will turn the shirts into a useful item for the home. The quilt can also honor a loved one. For example, it could be made from a father's, grandfather's or husband's old dress shirts.
Instructions
Step 1
Consider the colors and patterns in the shirts you have available. Try to collect shirts in certain color families. For example, several shades of purple and colors that would complement a purple color scheme.
Video of the Day
Step 2
Check the items carefully. Do not use any items that are worn, too thin, fraying, ripped or pulled. Try to cut around stains.
Step 3
Cut away all seams. Remove all darts, pleats and hems. Cut off the buttons and save them for a future project.
Step 4
Wash and dry the items before using them. Iron the fabric to make it as flat as possible.
Step 5
Choose your quilt pattern. Beginners should consider a simple nine-patch block pattern.
Step 6
Make a template for the quilt squares to ensure each square is the same size. Measure a piece of posterboard to the correct pattern size and cut it out. Trace this pattern on the "wrong" side of the fabric -- or the side that will not face up on the final quilt. You should cut out five darker squares and four lighter squares.
Step 7
Lay the squares on the work area. Place the darker squares as the four corners and the center. Place the light squares in the center of the top, bottom, left and right sides to create a block.
Step 8
Sew the squares together with a quarter-inch seam allowance. Start with the top row. Place the first square on top of the second square and sew the left sides together. Place the third square on top of the second square and sew the right sides together. Repeat for the remaining two rows.
Step 9
Press the seams. Flip the first row toward you so it is face down on top of the second row. Sew these two rows together by sewing the along the top side of the fabric. Open the newly created row and set it on the work space. Flip the third row so it is face down on top of the second row and sew the rows together in the same manner.
Step 10
Create additional blocks until the proper quilt size has been created.
Step 11
Wash your quilt backing to pre-shrink it.
Step 12
Piece quilt backing together horizontally in two. Divide the width of the quilt by two and cut out the backing. Make sure to leave a quarter-inch of extra fabric to allow for seams. Sew the quarter-inch seams.
Step 13
Piece quilt back together vertically in two. Divide the length of the quilt by two and cut the backing, once again allowing for quarter-inch seams. Sew the quarter-inch seams.
Step 14
Layer the pieces together on your work space. Place the quilt back flat with the "wrong" side facing up. Place the quilt batting on top of the backing. Lay the quilt over the two layers and safety pin it together. Sew the final project together, quilt or tie the quilt and bind it.
Tip
Consider placing additional fabric in your color scheme in the quilt to help the old dress shirts go farther.
Warning
Always supervise children when the sewing machine is in use.
Video of the Day