The Singer Stitch Sew Handheld Portable Sewing Machine is a useful device that makes it easy to get sewing, regardless of your project. It's small and ideal for making quick fixes like sewing on buttons and making repairs and doesn't take up much room. Plus, you don't have to be a skilled seamstress to make use of it.
Step 1
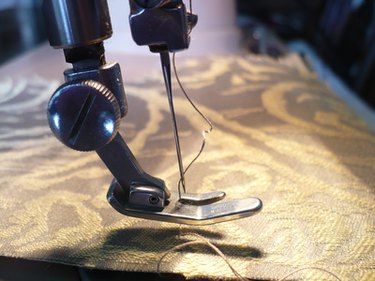
Attach the bobbin or spool onto the bobbin arm on the sewing machine. Pull the thread up and loop onto the needle arm. Attach the thread to the tension control at the end of the needle arm. Thread about 2 inches through the eye of the needle. Insert the batteries into their compartment. Make sure the machine's power switch is not pressed down.
Video of the Day
Step 2
Place the sewing machine in your right hand. Put your right thumb by the power switch. With your left hand, turn the hand wheel for the needle arm to raise it to its highest position.
Step 3
Slip your fabric under the presser plate on the machine. You may need to lift it a little for the fabric to clear. Press down the power switch with your right thumb. The machine will start to sew. Use your left hand to guide the fabric, not the sewing machine.
Step 4
Raise the needle arm once more when you're finished sewing. Pull 3 inches of thread from the machine and cut. Thread the string through a sewing needle and finish the last stitch. Tie a knot to secure.
Video of the Day