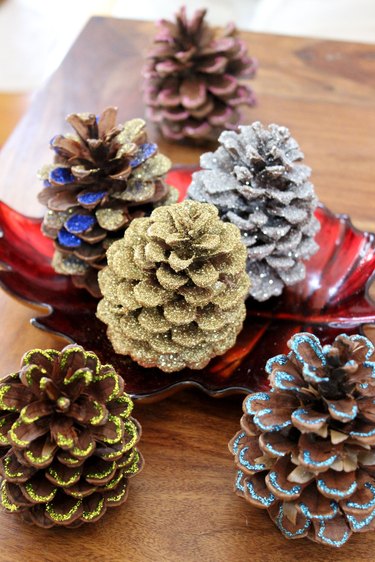
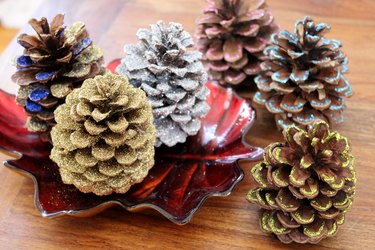
Everything's better with glitter. Like sparkling fairy dust, it transforms even the plainest objects into festive decorations. Case in point: look how glitter transforms pinecones, which are already a popular item for fall and winter decor. And as you'll see, there are several ways to add glitter to them depending on the look you want. So welcome to the glitterati!
Video of the Day
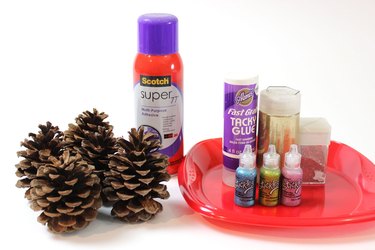
Things You'll Need
Pinecones
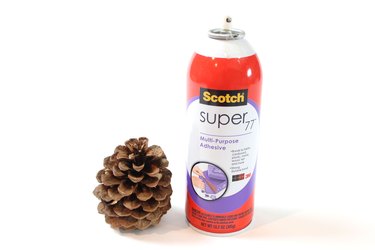
Permanent spray adhesive
Glitter
Plastic or paper plates
Craft glue
Paint brush
Glitter glue
Spray Adhesive Method
Step 1: Spray the Pine Cones with Adhesive
To cover the entire pine cone with an even coating of glitter, use the spray adhesive method. Start by spraying the pine cone with a permanent adhesive, turning the pine cone several times to get the adhesive in all the nooks and crannies.
Video of the Day
Tip
Spray adhesives come in many formulations. Be sure to select one labeled "permanent" rather than "repositionable," as you want to give the glitter a permanent hold.
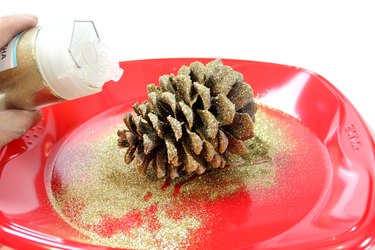
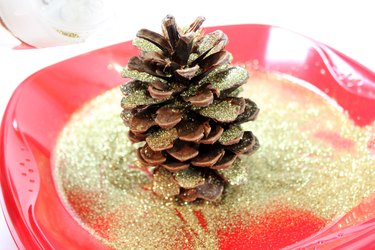
Step 2: Sprinkle Glitter on Pine Cone
Sprinkle glitter on the pine cone using a paper or plastic plate to catch the extra glitter. (You can put the extra glitter back in the container later for re-use.) Turn the pine cone several times to make sure the glitter covers the entire surface.
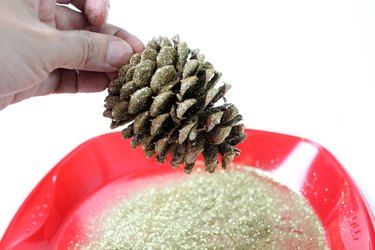
Step 3: Shake Off Excess Glitter
Knocking the pine cone against the paper plate several times, shake off the excess glitter.
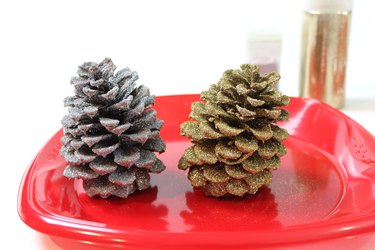
Then allow the adhesive to dry overnight.
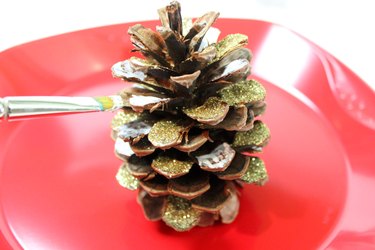
Paint Brush Method
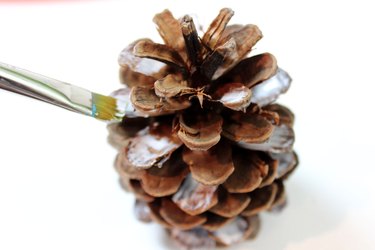
Step 1: Apply Glue to Scales
To control exactly where you want the glitter on the pine cone, use the paint brush method. This comes in handy when you want different colors of glitter on different parts of the pine cone. With a paint brush, apply craft glue to the scales where you want glitter.
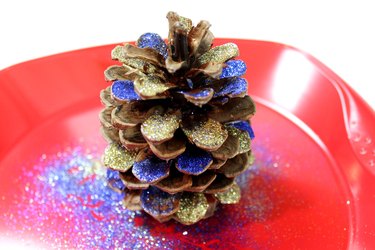
Step 2: Sprinkle Glitter
Sprinkle glitter on the scales where you applied glue, and shake the excess glitter from the pine cone.
Step 3: Apply Glue to Other Scales
With the paint brush, apply glue to other scales in which you wish to add a different color of glitter.
Step 4: Sprinkle the Other Color
Sprinkle the other color of glitter on the scales where you've applied glue, and shake off the excess glue. Then allow the glue to dry overnight.

You can add as many colors as you want with this method. It's also a fun way to decorate pine cones with the colors of your favorite sports or school teams.
Glitter Glue Method
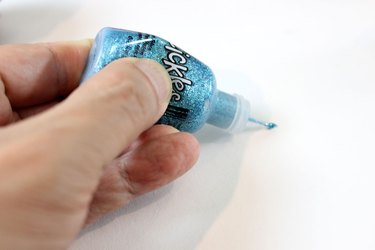
Step 1: Prep the Glitter Glue Bottle
To create details with the glitter, use glitter glue. Available in crafts stores next to the regular glitter, glitter glue is a mixture of glitter and glue in a squeeze bottle. Because of its fine tip, you can draw thin lines of glitter, or even write with it.
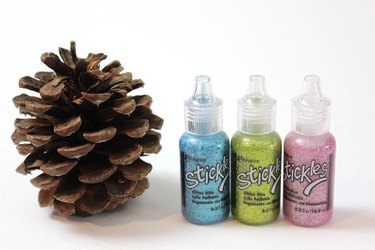
Before using it on the pine cone, squeeze the glitter glue bottle onto a piece of paper until you have an even flow of glitter.
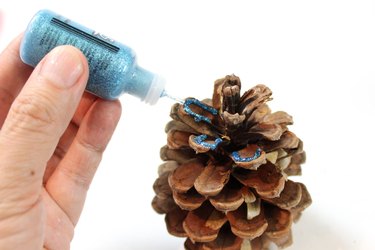
Step 2: Squeeze Glitter Onto the Scales
Decide what design you'd like to apply to the pine cone, and draw the design on the individual scales by squeezing the glitter glue bottle. On the pine cone in this example, I outlined the perimeter of each scale with glitter.
Use different colors for a rainbow of glittery pine cones. And let the glitter glue dry overnight.
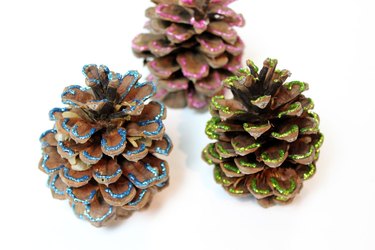
With pine cones this glittering — and easy to decorate — you may never want a plain pine cone in your home ever again.