Things You'll Need
Remodel ceiling junction box
Phillips or slotted screwdriver
Two-prong electrical tester
Piece of wood
Hammer
Double-gang remodel switch box
12-2 non-metallic, NM electrical cable
Dual NM wire cutter/stripper
Orange wire connectors
12-gauge solid THHN electrical wire
Red wire connectors
Single-pole light switch
Double-gang switch cover plate
If a room lacks light, adding additional lighting is not out of the question, as long as you have a way to appropriately route the electricity. Through a switch already in operation, it is indeed possible to tie into an existing circuit. Some prior wiring knowledge is helpful, but not necessary to brighten your room.
Step 1
Turn off the breaker to the existing circuit to disconnect the electricity.
Video of the Day
Step 2
Trace around the template provided with the remodel ceiling junction box. Carefully cut along the trace line with a drywall saw to remove the wallboard from the ceiling.
Step 3
Remove the screws holding the wall plate to the switch on the circuit. Touch a prong from a two-prong electrical tester to a terminal screw holding a black wire to the switch. Touch the remaining prong from the tester to any metal on the electrical box or switch. The tester won't light if the correct breaker is turned off. Repeat the test on the remaining terminal screw, holding a black wire on the side of the current switch.
Step 4
Remove the screws holding the switch in the switch box on the circuit. Loosen the screws on the switch and remove the wires from beneath.
Step 5
Untwist the wire connectors holding the two white wires together inside the switch box on the circuit. Disconnect the two bare copper wires inside the box the same way.
Step 6
Pull the switch box from the wall. Remove the screws holding the box and take it out of the wall. If the box is nailed in, loosen it by inserting a piece of wood inside the box and striking it with a hammer.
Step 7
Increase the size of the existing switch location to accommodate an additional switch onto the circuit. Trace the template from the double-gang remodel switch box over the switch location. Cut along the trace line to enlarge the switch location.
Step 8
Pull a length of 12-2 non-metallic, NM electrical cable from the new light location to the existing switch location.
Step 9
Insert the end of the 12-2 NM electrical cable through a knockout in the back of the remodel ceiling junction box. Push the junction box into the ceiling and twist the screws on the box clockwise to clamp the box to the ceiling.
Step 10
Insert the circuit wires at the switch location and the 12-2 NM electrical cable you pulled from the new light location through a knockout in the back on the double-gang remodel box. Push the box in the wall and turn the screws on the box clockwise to clamp it to the drywall.
Step 11
Strip the 12-2 NM electrical cable at both the new ceiling light location and the switch location. Remove the exterior sheath from the 12-2 NM electrical cable using a dual NM wire cutter/stripper. Strip 3/4-inch of insulation from the exposed black and white wires at both locations.
Step 12
Assemble your new light fixture following the manufacturer's directions. Connect the white wire from the light fixture to the white wire from the new ceiling junction box by twisting an orange wire connector to both wires. Repeat the connection for the black wire from the junction box and the black wire from the fixture. Finish the connection to the circuit by connecting the bare copper wire from the junction box to the green wire from the fixture with another orange wire connector.
Step 13
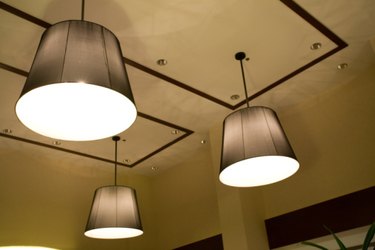
Attach the light fixture to the ceiling junction box, using the screws provided with the light fixture's mounting hardware. Install the light bulbs and the light shade onto the new fixture.
Step 14
Cut two six-inch pieces of 12-gauge solid THHN black wire. Strip 3/4-inch of insulation from both ends of each wire to create two pigtail wires.
Step 15
Twist a red wire connector onto the three white wires inside the newly-enlarged switch box, connecting them together. Connect the three bare copper wires with another wire connector. Push the white and bare copper wire sets to the back of the switch box.
Step 16
Twist a red wire connector onto the black line wire and the two pigtail wires to connect together. The line wire connects directly back to the breaker box and provides power to the existing circuit.
Step 17
Wrap the black wire from the existing light fixture around one screw on the right side of the original switch. Wrap one black pigtail around the other screw and tighten both screws. Wrap the black wire from your new light fixture around a screw on the right side of the new switch. Wrap the remaining pigtail around the remaining screw on the new switch and tighten both screws.
Step 18
Attach both switches to the double-gang remodel box at the top and bottom of the switch, using the screws provided with the switches. Cover the two switches and double-gang box with a double-gang switch cover plate.
Step 19
Turn on the breaker to the existing circuit inside the breaker box to connect the electricity.
Video of the Day
- Do-it-Yourself-Help.com: Wiring Diagrams for Household Switches
- Aubuchon Hardware: How to Install an Electric Switch
- Aubuchon Hardware: How to Install a Light Fixture
- Hammer Zone.com: Installing an Incandescent Ceiling Light Fixture
- HammerZone.com: Installing An "Old Work" Ceiling J-Box
- HammerZone.com: Installing An "Old Work" Switch or Outlet Box
- Don Vandervort's Home Tips.com: Cutting and Stripping Electrical Wires