Things You'll Need
Wire stripper
Splice kit(s)
Screwdrivers
Hex wrench
Heat source (heat gun, hair dryer, torch)
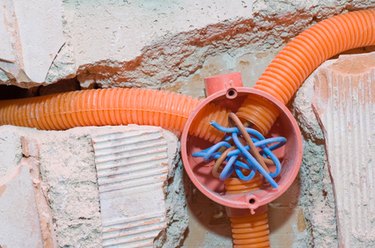
Splices are required in underground cable for a variety of reasons. They are required if digging equipment accidently hits a wire, or if the wire connection fails during the original installation. Regardless of why a splice is needed, the repair process is the same, and uses something called a splice kit. Some kits use a heat-shrink tube that covers the splice when finished, while other block-style kits have a silicone sealer that seals after the splice connections are complete. Both methods protect the splice to ensure that it is waterproof. Splices are available in a wide range of sizes, so be sure to purchase the correct one.
Step 1
Turn the power off. Use a voltmeter to verify.
Video of the Day
Step 2
Locate the spot that needs the splice, and cut out the bad part of the wire. Check to make sure the wire is long enough to make the splice. You will need both ends of the wire to touch. You might need to install a short piece of wire between the cut wires to make up for what was lost from the damage. If this is the case, you will need two splice kits.
Step 3
Strip the wire about ½-inch. Do this on both sides of the splice. The length can vary depending on what type of splice you are using. Read the splice kit's instructions carefully.
Step 4
Slide the heat-shrink tubing over the wire. Move it far enough down the wire to be out of your way. This is important because it needs to be on the wire before the connection is tightened. This step is not necessary with the block-style splice kit.
Step 5
Insert one end of the wire into the splice and tighten down the screw until it is snug against the wire. It should not pull out of the splice. Some of the kits use a standard screw and some use hex screws.
Step 6
Slide the heat-shrink tubing over the splice. Use a heat source to shrink the tubing down to the proper size. Do not overheat the tubing. Verify that the sealer is coming out around the wire. You should see this all the way around the wire on both sides of the splice. If you used a block-style splice, make sure the silicone is covering the ends of the wire, past where the insulation starts.
Tip
There are several types of splices. For most applications you do not need to spend a lot of money. Lower-priced kits still do an excellent job.
Warning
If you are not comfortable working with electricity, have the work done by an electrician.
Electricity can cause serious injury or death. Always double check to make sure the power is off before you start working with electrical wires.
Video of the Day